Create a notice
Quick answer
- Open Notices and click Create notice +.
- Fill in the Information, then set the Audience type and Visibility.
- Review and click Publish.
Notices help you share updates and announcements with staff, parents, and/or students. Creating requires completing three sections: Information → Audience type → Review & publish.
Open the notice form
Go to Notices and click Create notice +.
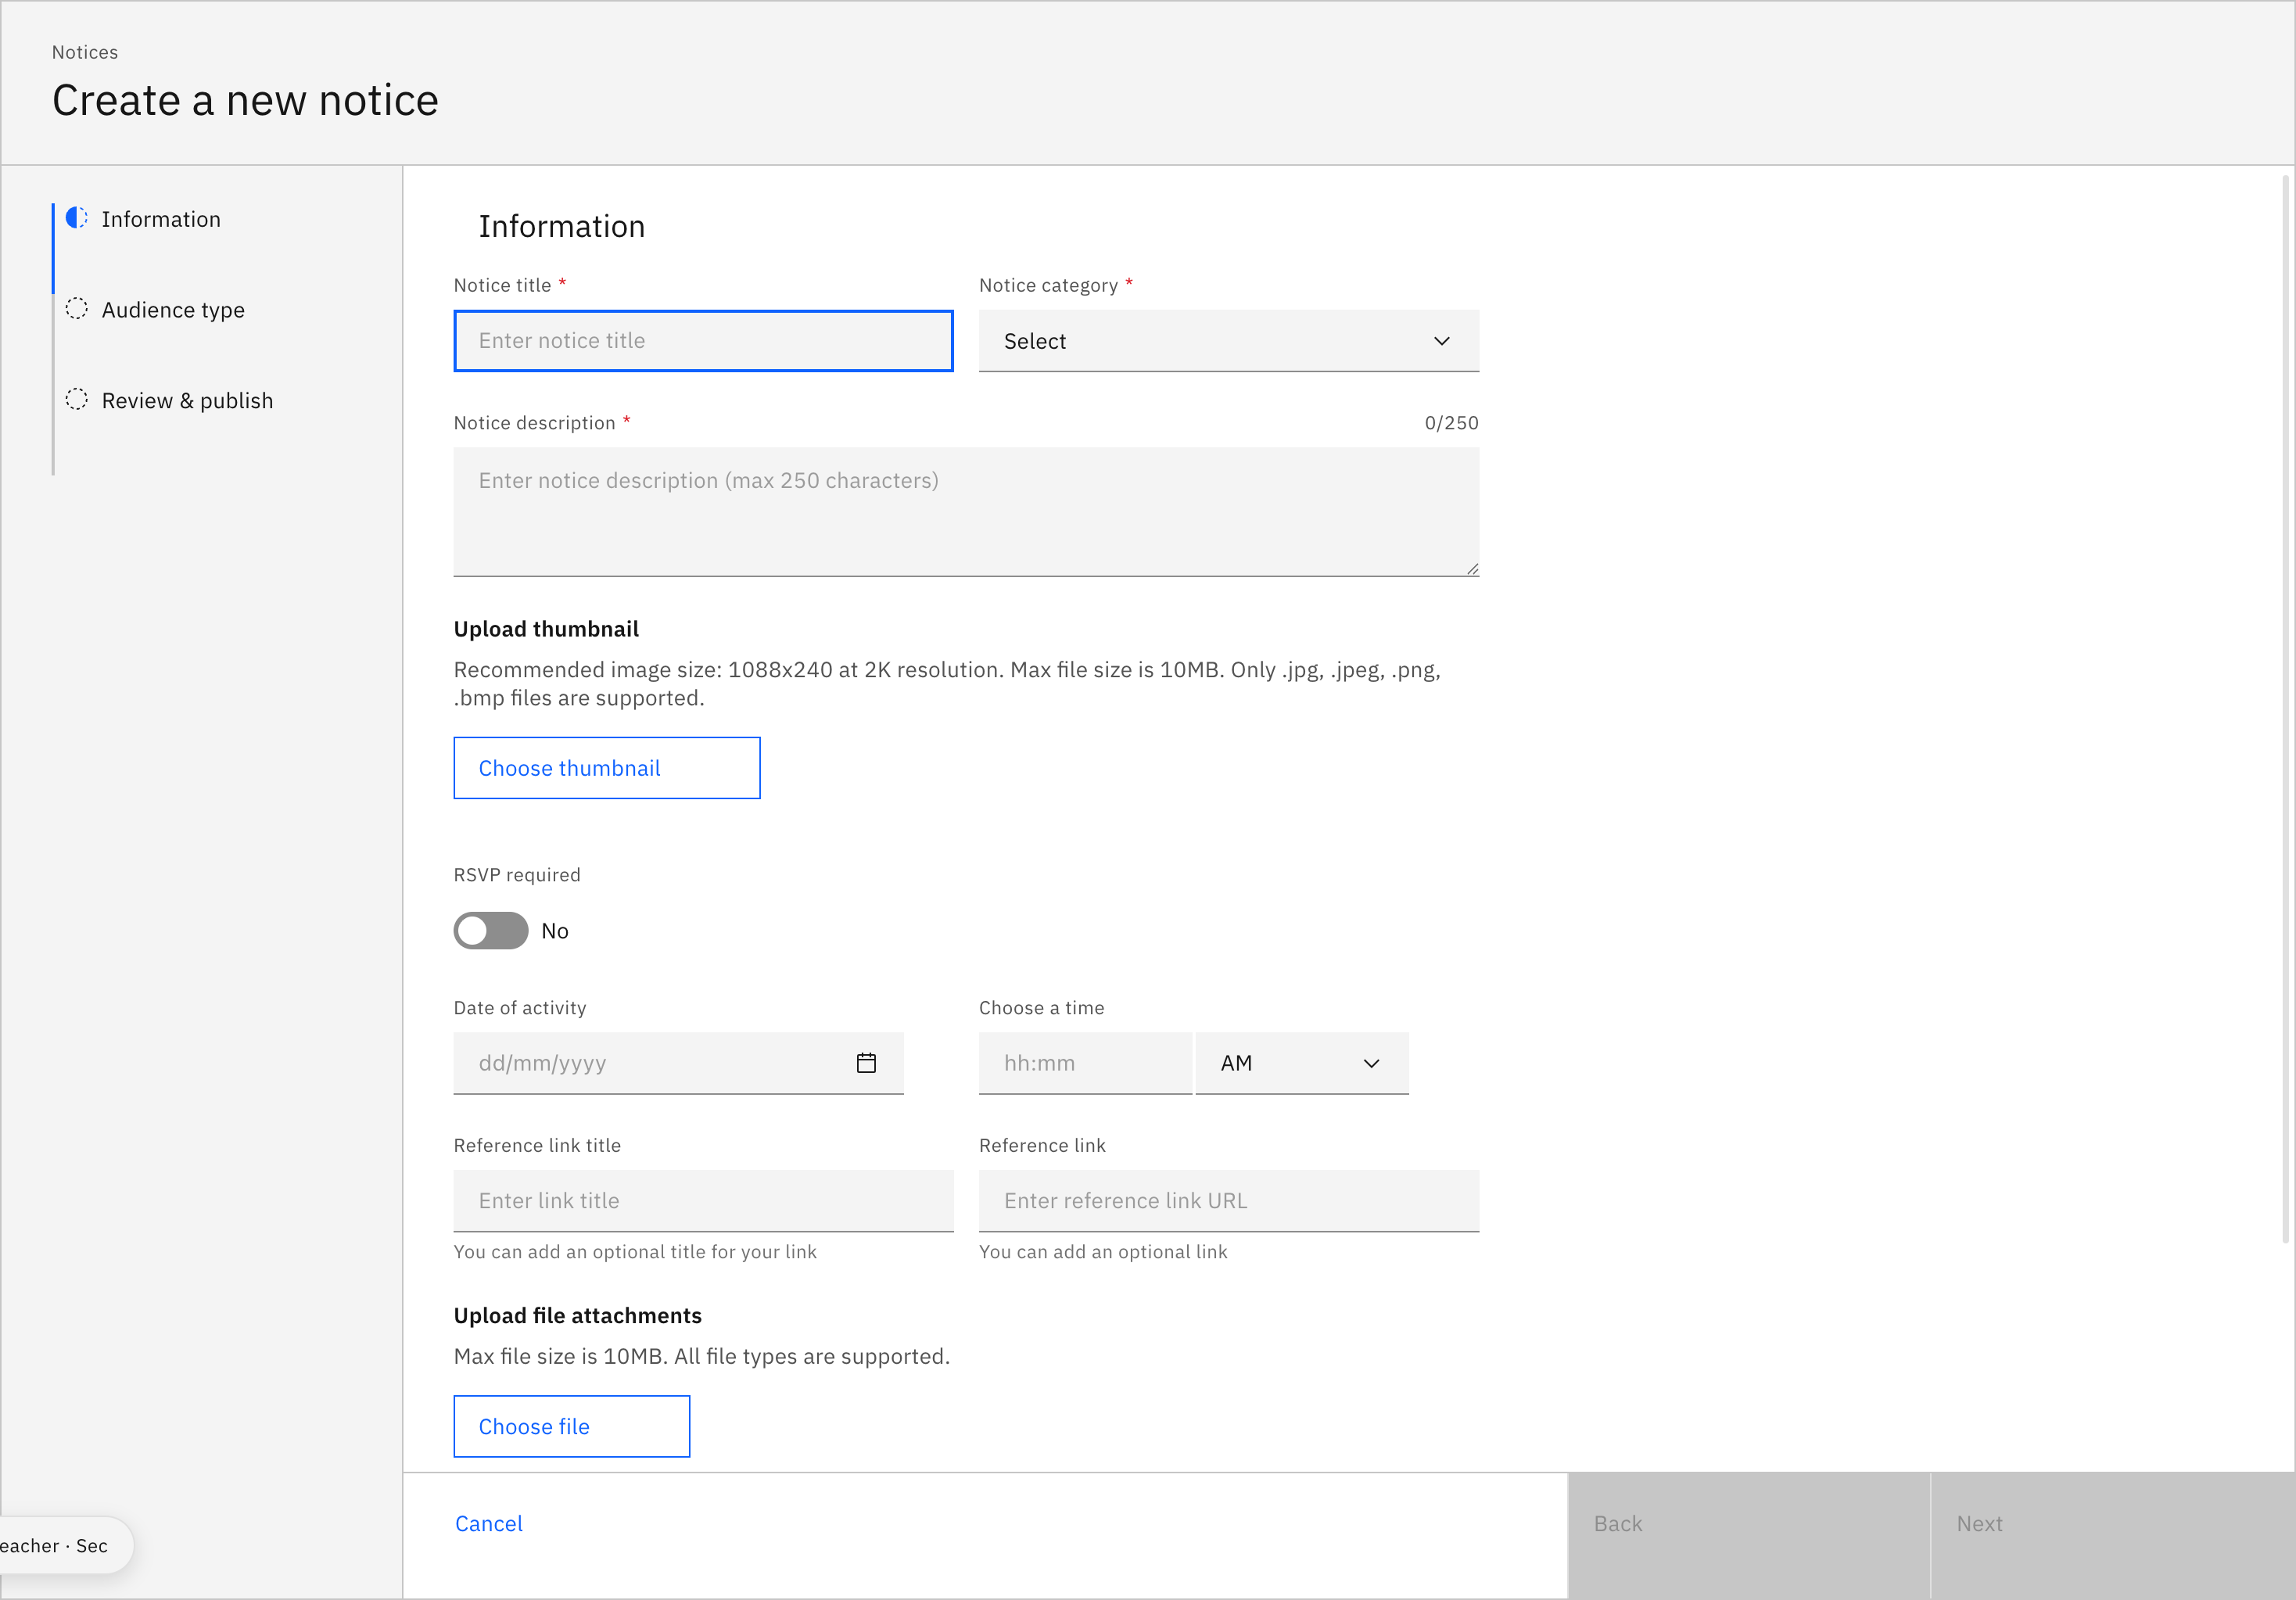
Fill in the information
Add a Notice title, choose a Notice category, and write a Notice description. Optionally add a thumbnail, a date and time, reference links, or attachments — then click Next.
Note: Turn on RSVP required to let recipients confirm attendance; you will not get a notification of their attendance. Confirming adds the event to their calendar automatically.
Set the audience, visibility, and publish
Set the Visibility dates. In the next step, choose the Audience type (who can see it), then review everything and click Publish.