Manage the waitlist
Quick answer
- On the activity's details page, find the Waitlist table.
- Tick one or more students to bring up the batch bar.
- Use Approve to enrol them, or Remove to take them off.
When an activity has a waitlist turned on, students beyond the maximum join it instead of being turned away. From the activity's details page you bring those students into the activity or take them off the list.
Open the Waitlist table
On the approved activity's details page, find the Waitlist table. It only appears when the activity has a waitlist. The heading shows the Maximum number of students, and the columns are Name, Year group/s, and Gender.
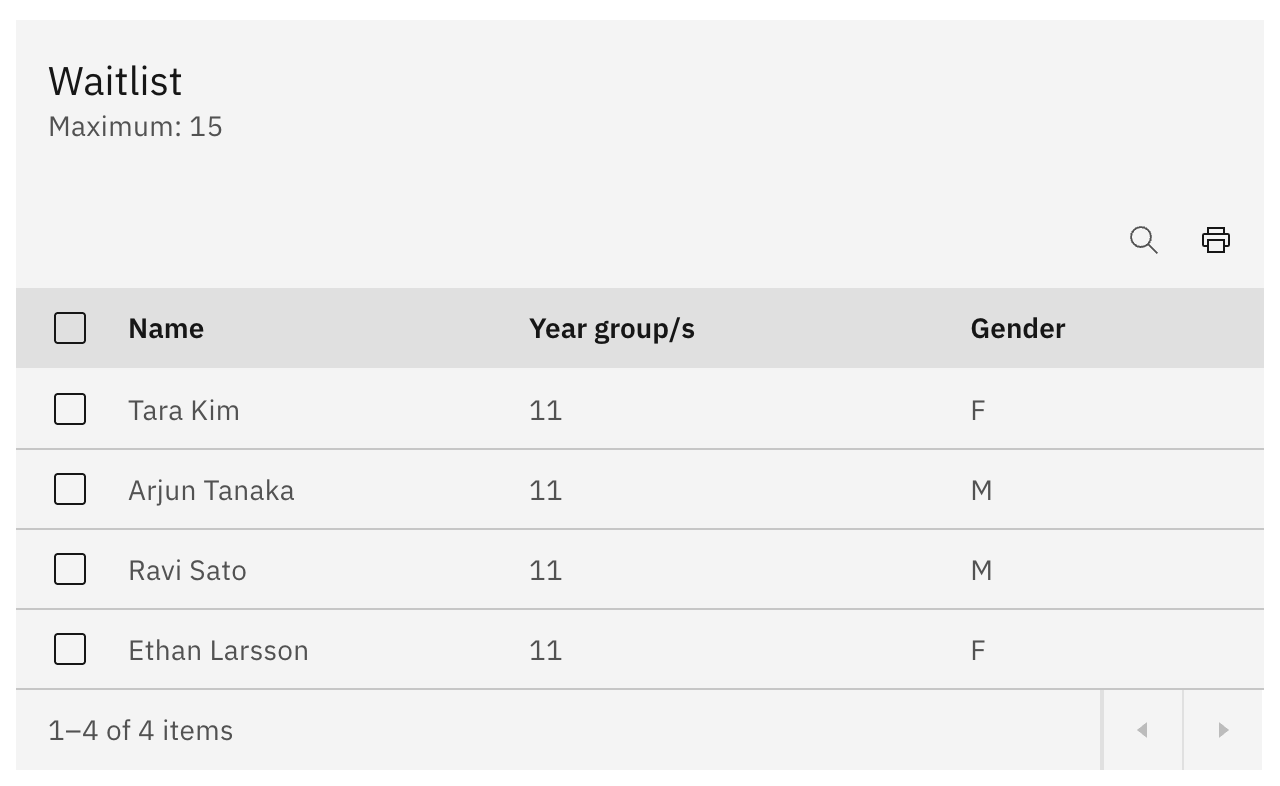
Select the students you want to act on
Tick one or more rows. As soon as a row is selected, a batch action bar appears with Approve and Remove. There are no per-row buttons — selecting rows is how you choose who to act on.
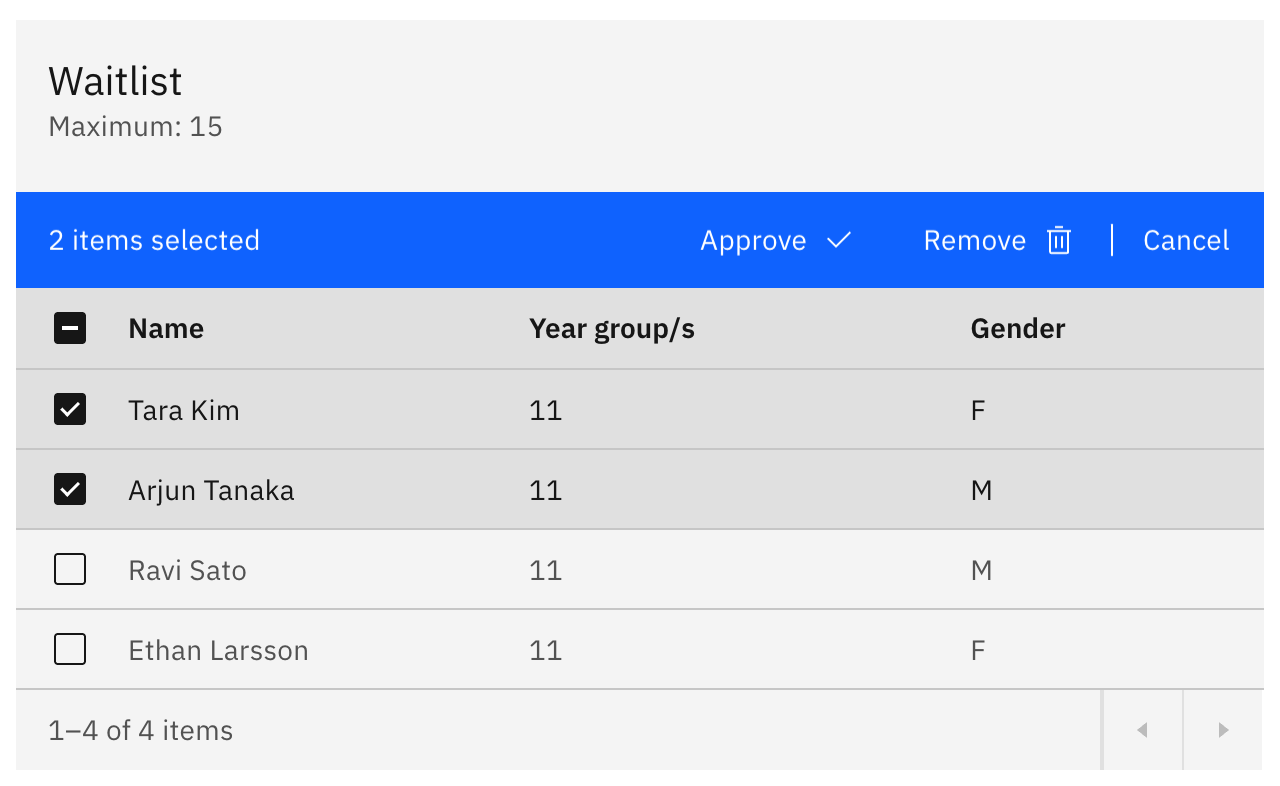
Approve or remove them
Click Approve to move the selected students off the waitlist and into the activity, or Remove to take them off the list entirely. Remove asks you to confirm and can clear several students at once. A success message confirms each action.