Set Up Fee and Charge Interval
Quick answer
- Open Academic Management ▸ Setup ▸ Fee and Charge Interval, click New, enter the interval ID, start/end dates, and number of intervals, then click Generate.
- For each period, set the description, start/end dates, due date, and click Update unit quantity. Then generate weeks and months for pro-rata support.
- The fee and charge interval is the link between students, fee schedule templates, and the fee generation batch — students without a matching interval are excluded from billing runs.
The fee and charge interval defines the academic billing cycle and the individual periods within it. It links students, fee schedule templates, and the fee generation batch — any student whose academic enrolment record does not contain a matching interval will be excluded from billing runs.
Create the interval
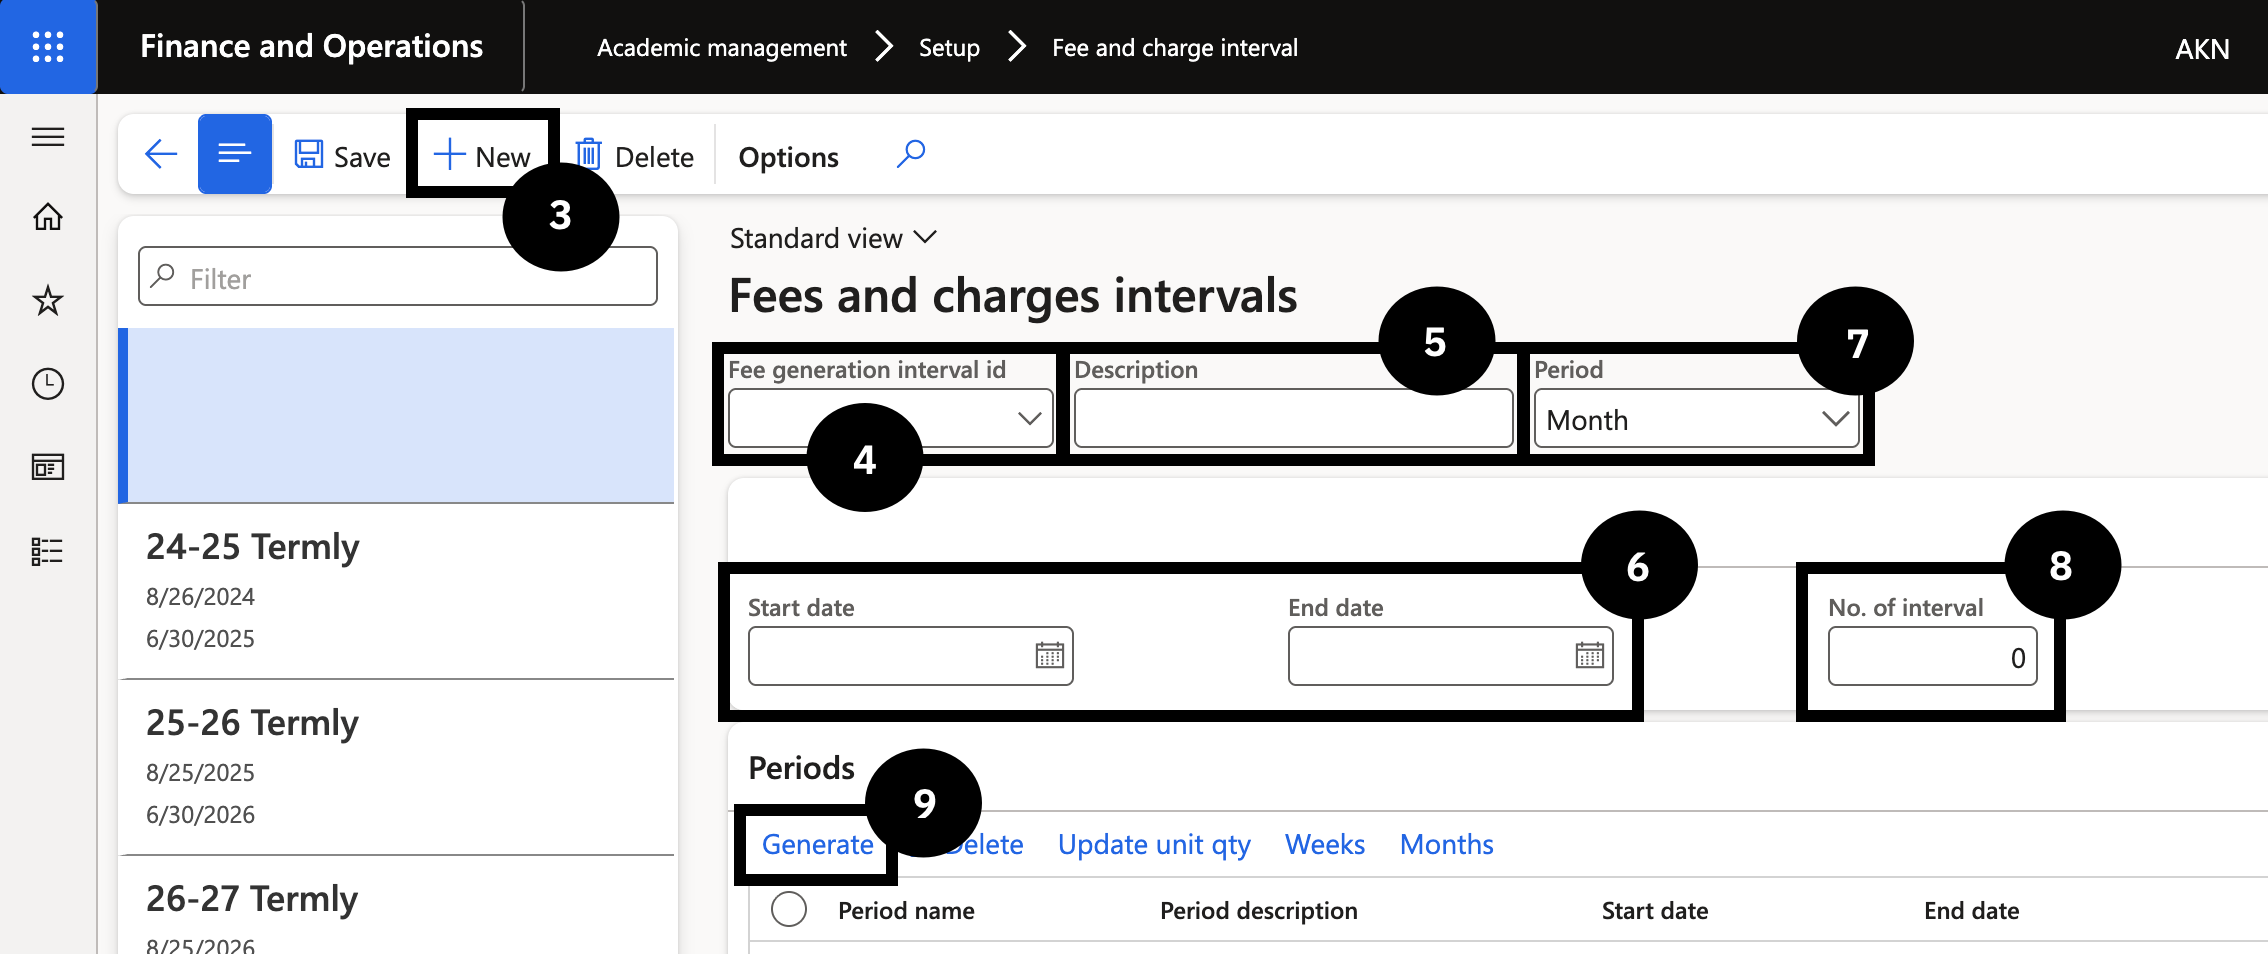
From the FNO dashboard, open Modules ▸ Academic management, expand Setup, and click Fee and Charge Interval. Click New in the toolbar (③) and complete the following:
- Fee generation interval ID (④) — enter a code (e.g., 2025-2026).
- Description (⑤) — enter a description.
- Start date and End date (⑥) — enter the start and end of the school's academic year.
- Period option (⑦) — select Month or Week based on the school's pricing method.
- Number of intervals (⑧) — enter the number of invoices to be generated in the year (e.g., 3 for termly, 10 for monthly).
Click Generate in the toolbar (⑨) to create the periods.
Complete each period
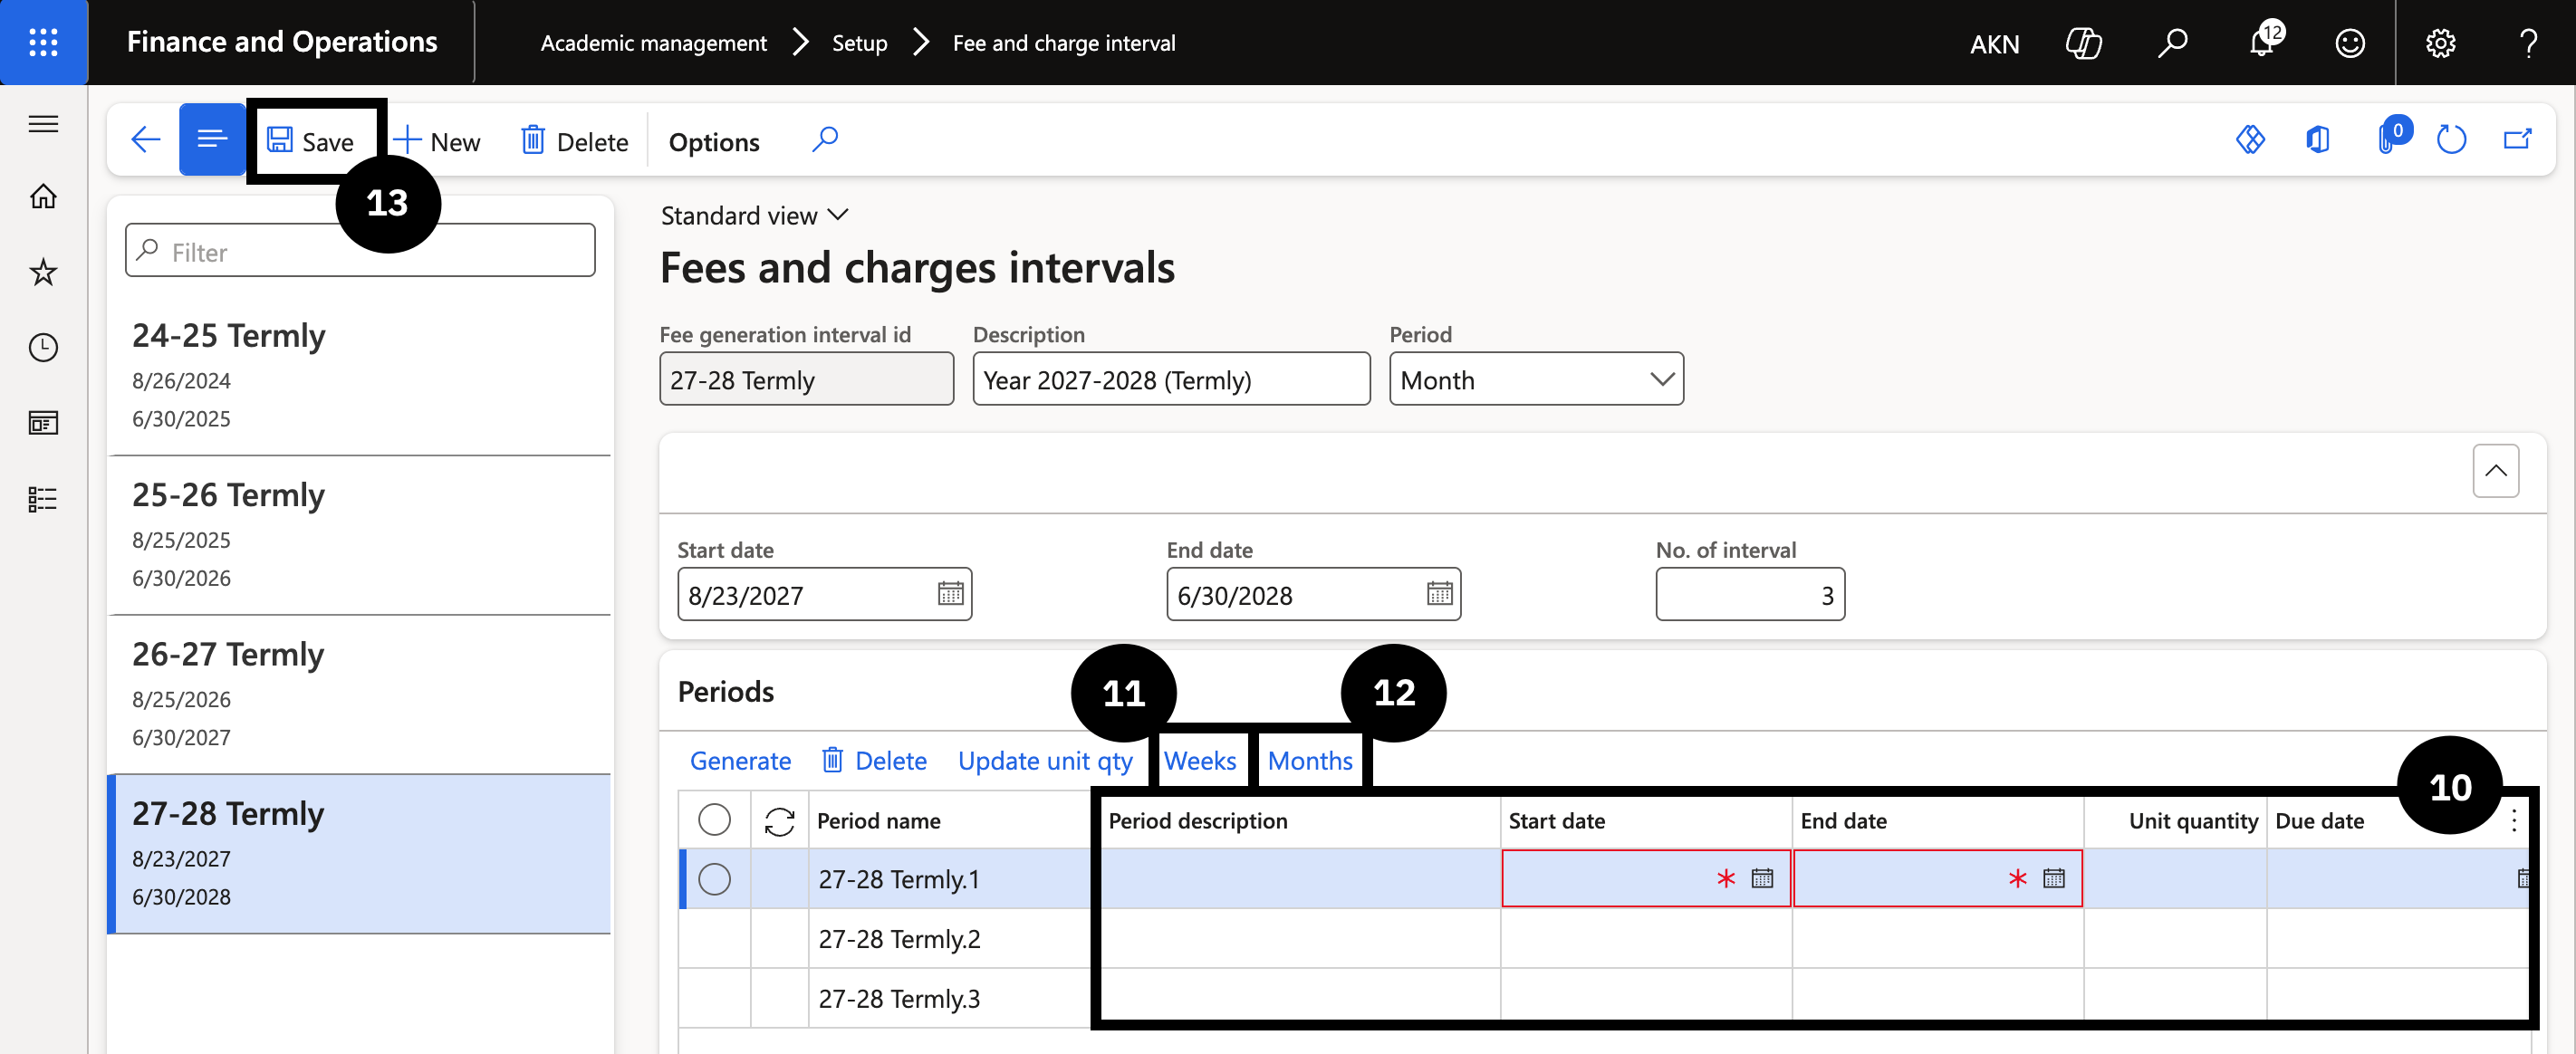
For each period generated (⑩):
- Period description — enter a description.
- Start date and End date — enter the period dates.
- Due date — enter when payment is expected.
- Revenue recognition date — enter if deferral is required.
Click Update unit quantity so the system calculates the number of months or weeks within the period.
Generate weeks and months
Click Weeks (⑪) in the Periods toolbar and then Generate to populate the week dates for each period. This is required only for pro-rata joining and leaving policies. Then click Months (⑫) and Generate to populate the month dates.
Save
Validate all entered data for accuracy, then click Save (⑬).