Set Up Advance Discount Policy
Quick answer
- Open Academic Management ▸ Setup ▸ Advance discount policy, click New, set the policy code, fee and charges interval, charges code, discount value, and date range, then save.
Advance discount policies reward families who pay fees ahead of schedule by applying a discount when payment is received within a specified date window. Each policy is tied to a billing cycle and defines the time period, charge code, and discount percentage that applies.
Create the policy and set the interval
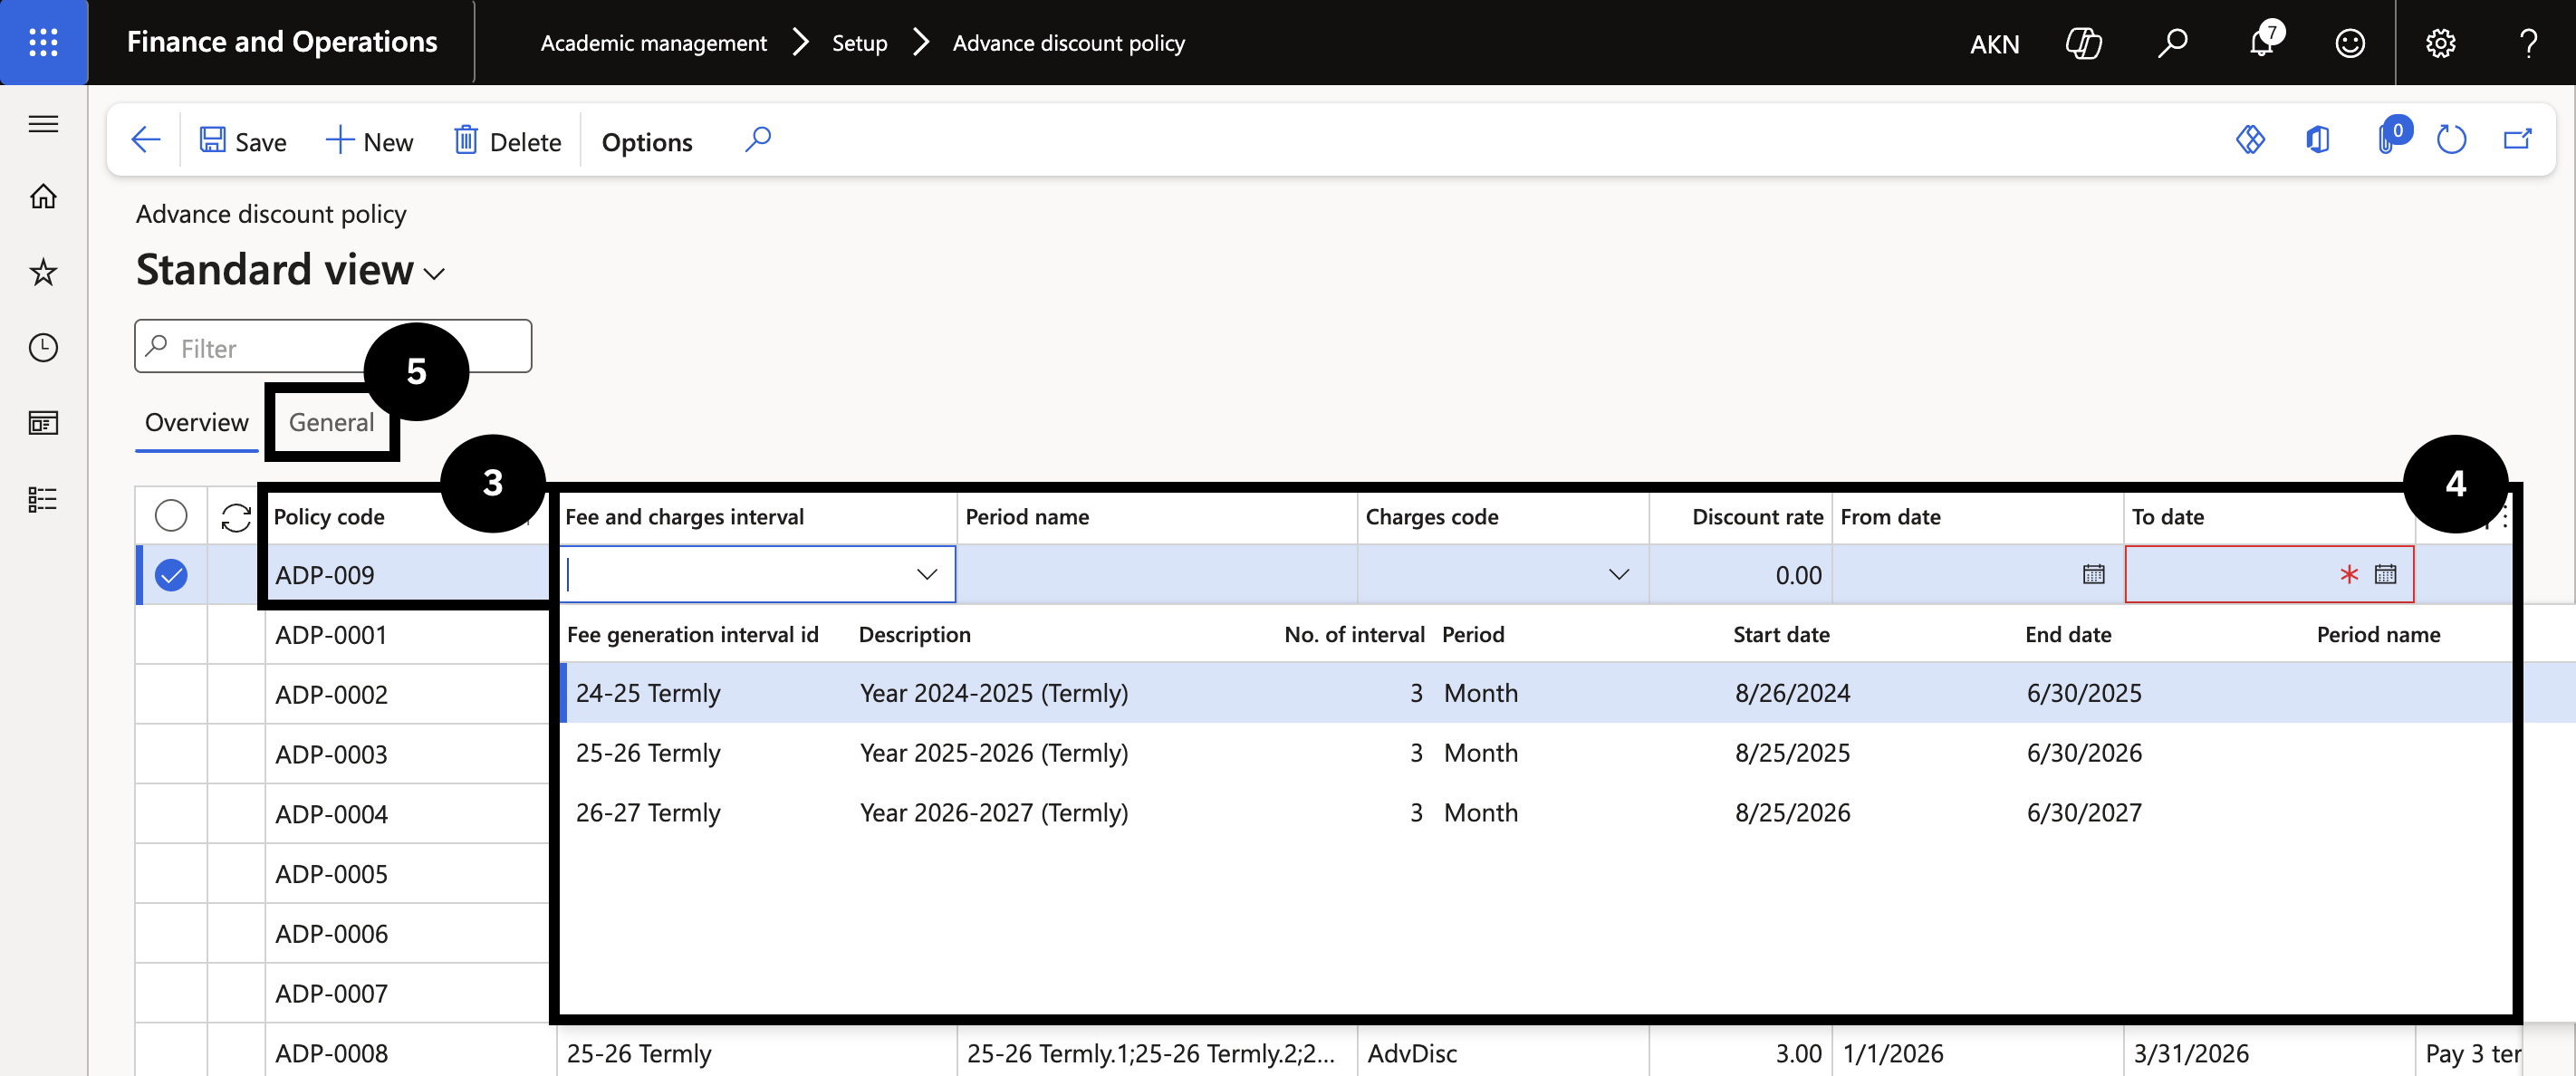
From the FNO dashboard, open Modules ▸ Academic management, expand Setup, and click Advance discount policy. Click New and complete the following on the Overview tab:
- Policy code (③) — enter a value.
- Fee and charges interval (④) — select the billing cycle that applies to this policy.
Configure the General tab
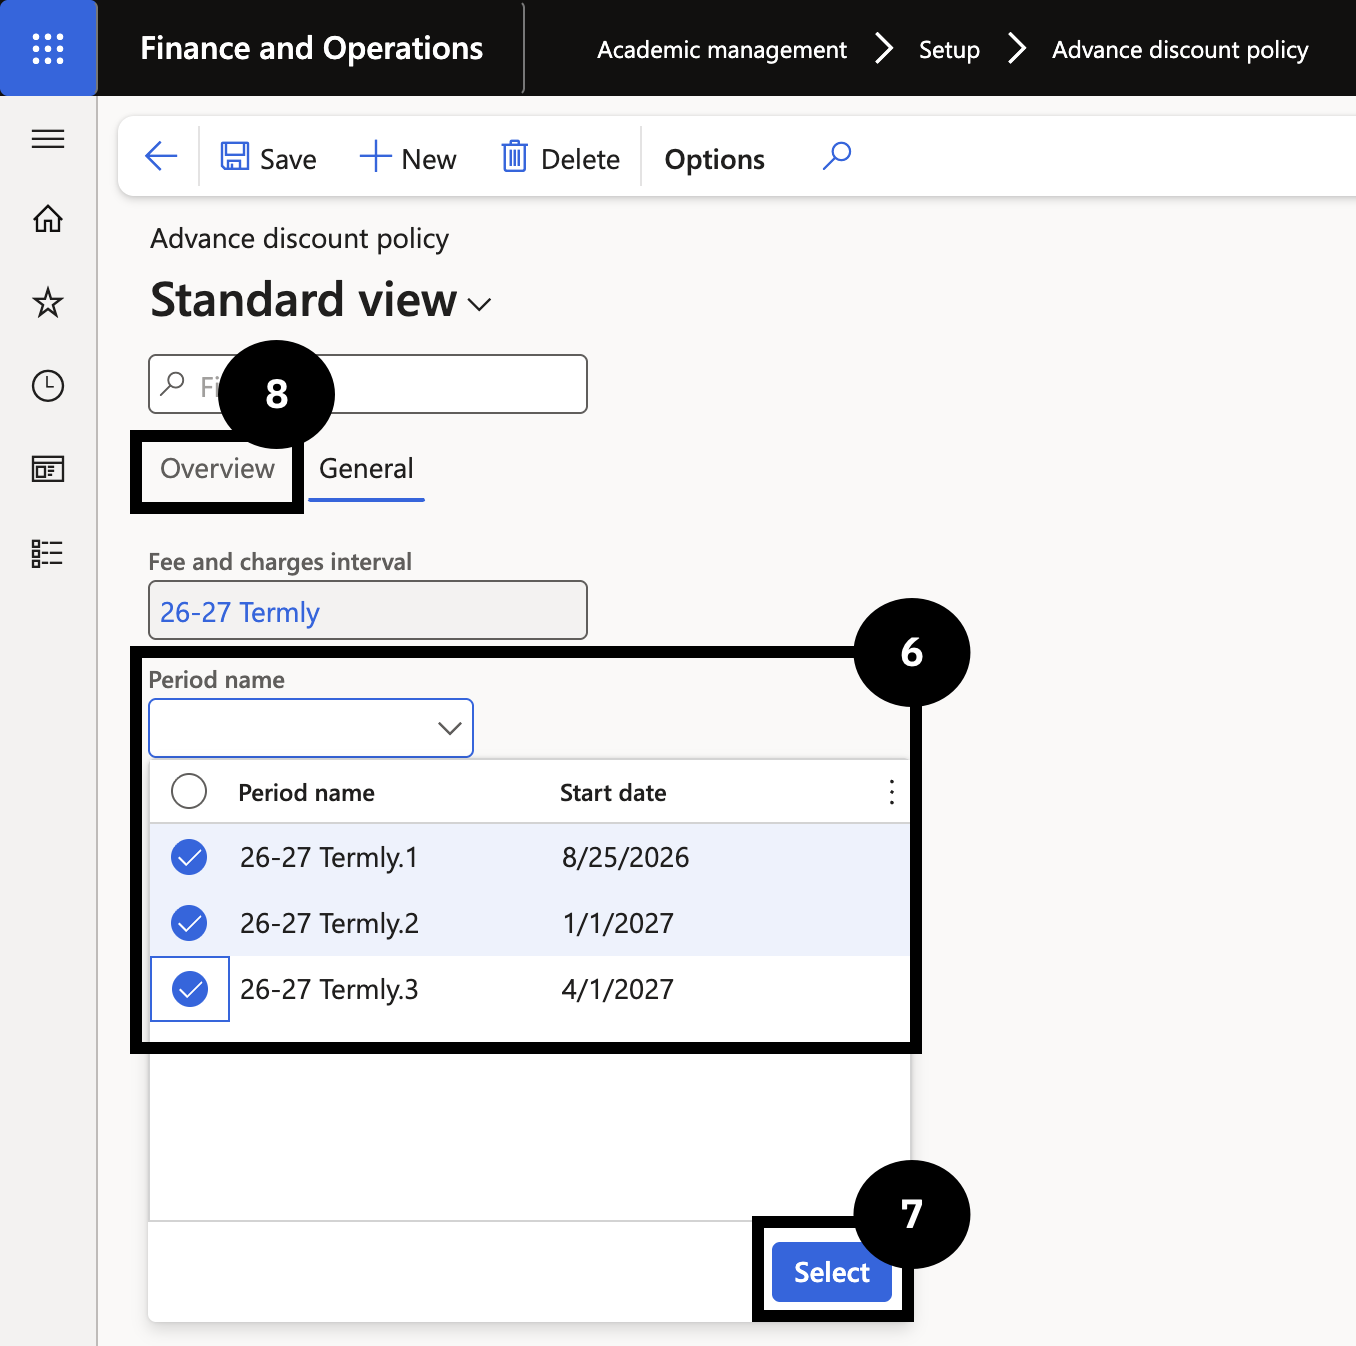
Click the General tab (⑤). In the Period name field (⑥), select the relevant time period (more than one may be selected). Click Select (⑦). Return to the Overview tab (⑧).
Complete the discount details and save
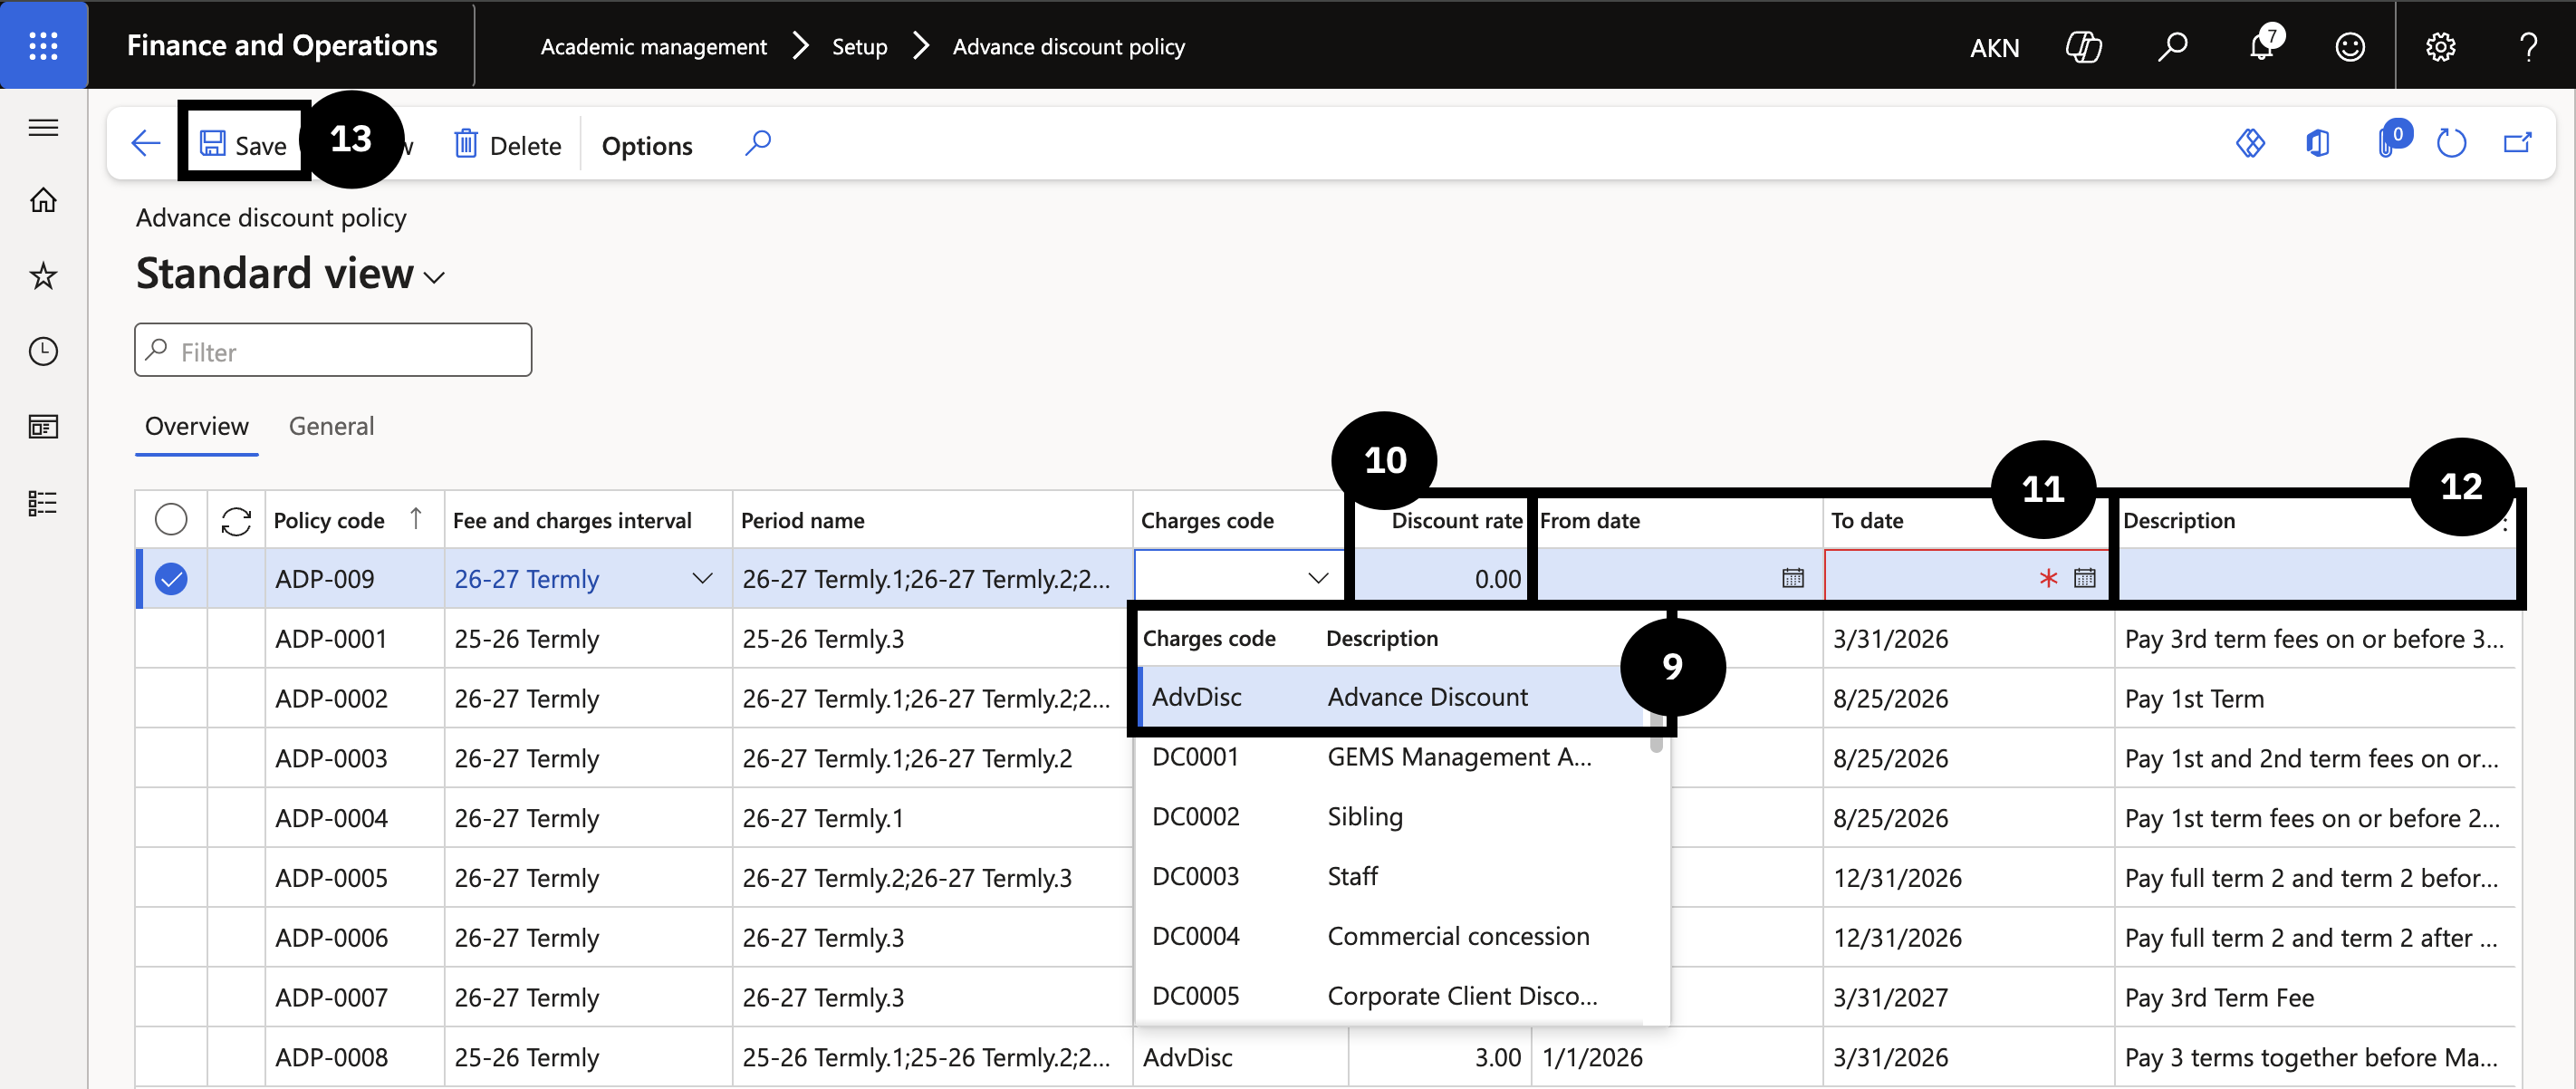
On the Overview tab, complete the remaining fields:
- Charges code (⑨) — select Advance Discount.
- Discount rate (⑩) — enter the discount value.
- From date and To date (⑪) — enter the period during which the discount applies.
- Description (⑫) — enter a description for reporting reference.
Click Save (⑬).