Configure Receipt Intercompany Mapping
Quick answer
- Open Academic Management ▸ Setup ▸ Cashier Receipt ▸ Receipt intercompany mapping, click New, and select the method of payment, destination school, account type/account, and intercompany journal.
- Primarily used for GEMS Rewards (GRL), where financial liability from reward points is recorded at the receiving school and transferred daily to the GEMS Rewards legal entity.
This setup is primarily used to support scenarios such as GEMS Rewards (GRL), where financial liability arising from reward points is initially recorded at the receiving school and requires daily transfer to the GEMS Rewards legal entity.
Open Receipt intercompany mapping and create a new entry
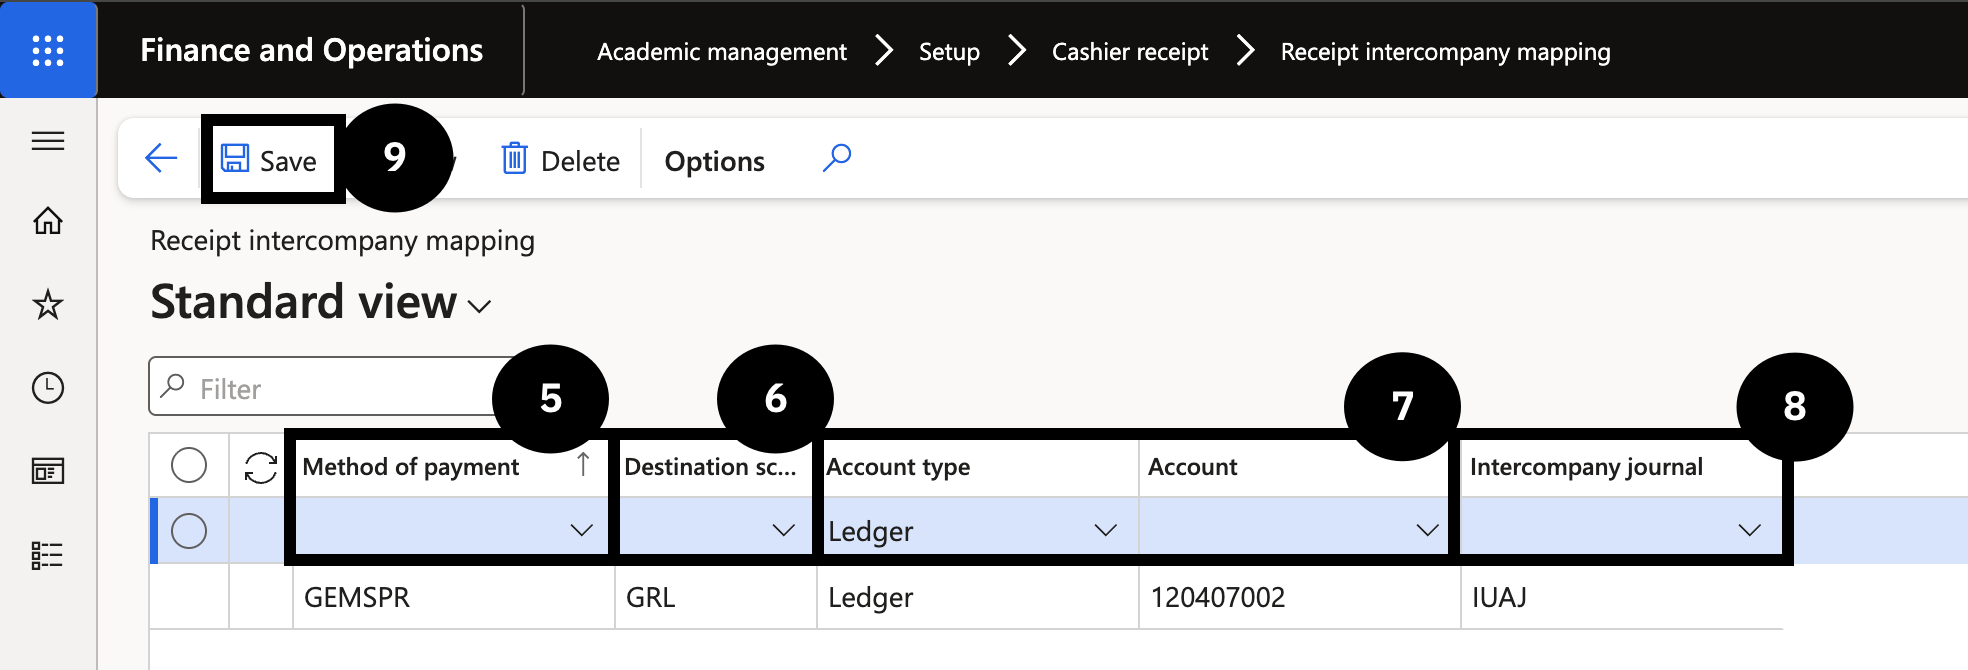
From the FNO dashboard, open Modules ▸ Academic management, expand Setup ▸ Cashier Receipt, and click Receipt intercompany mapping. Click New and complete the following:
- Method of payment (⑤)— select the payment method configured for intercompany processing with another school.
- Destination school (⑥)— select the school that will receive the intercompany posting.
- Account type and Account (⑦)— set based on the entry posting in the original cashier receipt: if Account type is Ledger, select the Main Account; if Bank, select the Bank Account.
- Intercompany journal (⑧)— select the journal.
Save
Click Save (⑨).