Configure Receipt Intercompany Mapping
Quick answer
- Open Academic Management ▸ Setup ▸ Cashier receipt ▸ Receipt intercompany mapping, click New, and select the method of payment, destination school, account type/account, and intercompany journal.
- When the cashier journal is posted, the destination school will have the intercompany journal created according to the configured settings.
When the cashier journal is posted, the selected destination school will have the intercompany journal created according to the configured method of payment, account type/account, and intercompany journal selection.
Open Receipt intercompany mapping and create a new entry
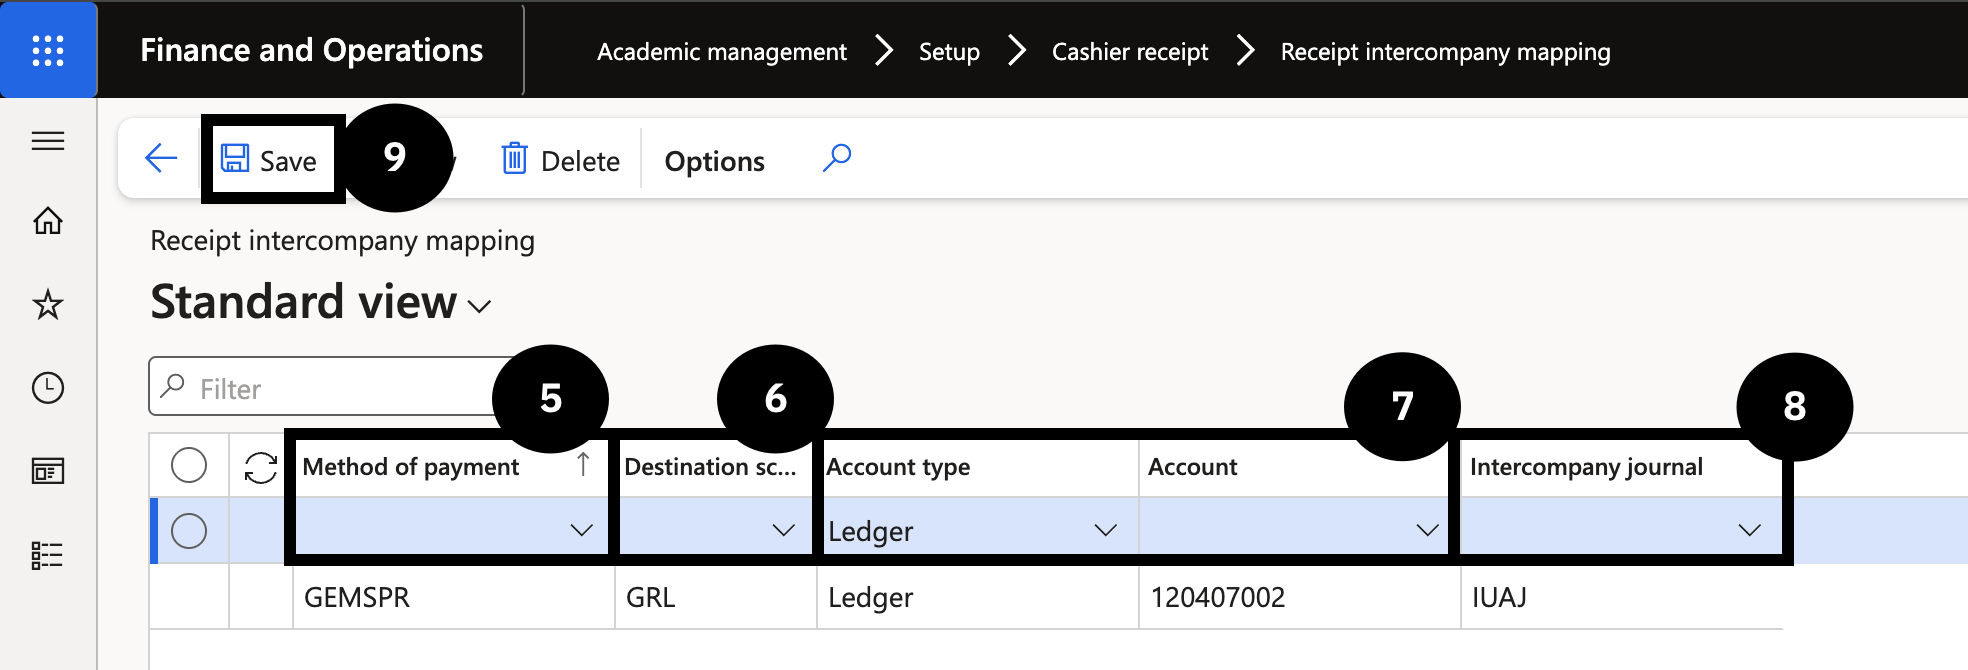
From the FNO dashboard, open Modules ▸ Academic management, expand Setup, then expand Cashier receipt, and click Receipt intercompany mapping. Click New in the toolbar and complete the following:
- Method of payment (⑤) — select the payment method that has an intercompany journal with the destination school (e.g., CobOn).
- Destination school (⑥) — select the school that will receive the intercompany posting.
- Account type and Account (⑦) — set based on the entry posting in the original cashier receipt: if Account type is Ledger, the Account is Main Account; if Bank, the Account is Bank account.
- Intercompany journal (⑧) — select the journal.
Save
Click Save (⑨).