Configure Fee Schedule Parameters
Quick answer
- Open Academic Management ▸ Setup ▸ Fee schedule parameters and complete the General tab — journals for deposits, payments, and user group permissions.
- Set Financial activities to Student, then configure Integrations (relationship types), Pro rata adjustment, and Number sequences tabs.
Fee schedule parameters are where the billing module's core settings live — journals for deposits and payments, user group access, integration of relationship types, and pro rata joining and leaving logic. Complete this once during implementation and revisit only when new functionality is enabled, or organisational settings change. All journals referenced here must already exist in the system.
Open Fee schedule parameters
From the FNO dashboard, open Modules ▸ Academic management, expand Setup, and click Fee schedule parameters.
Complete the General tab
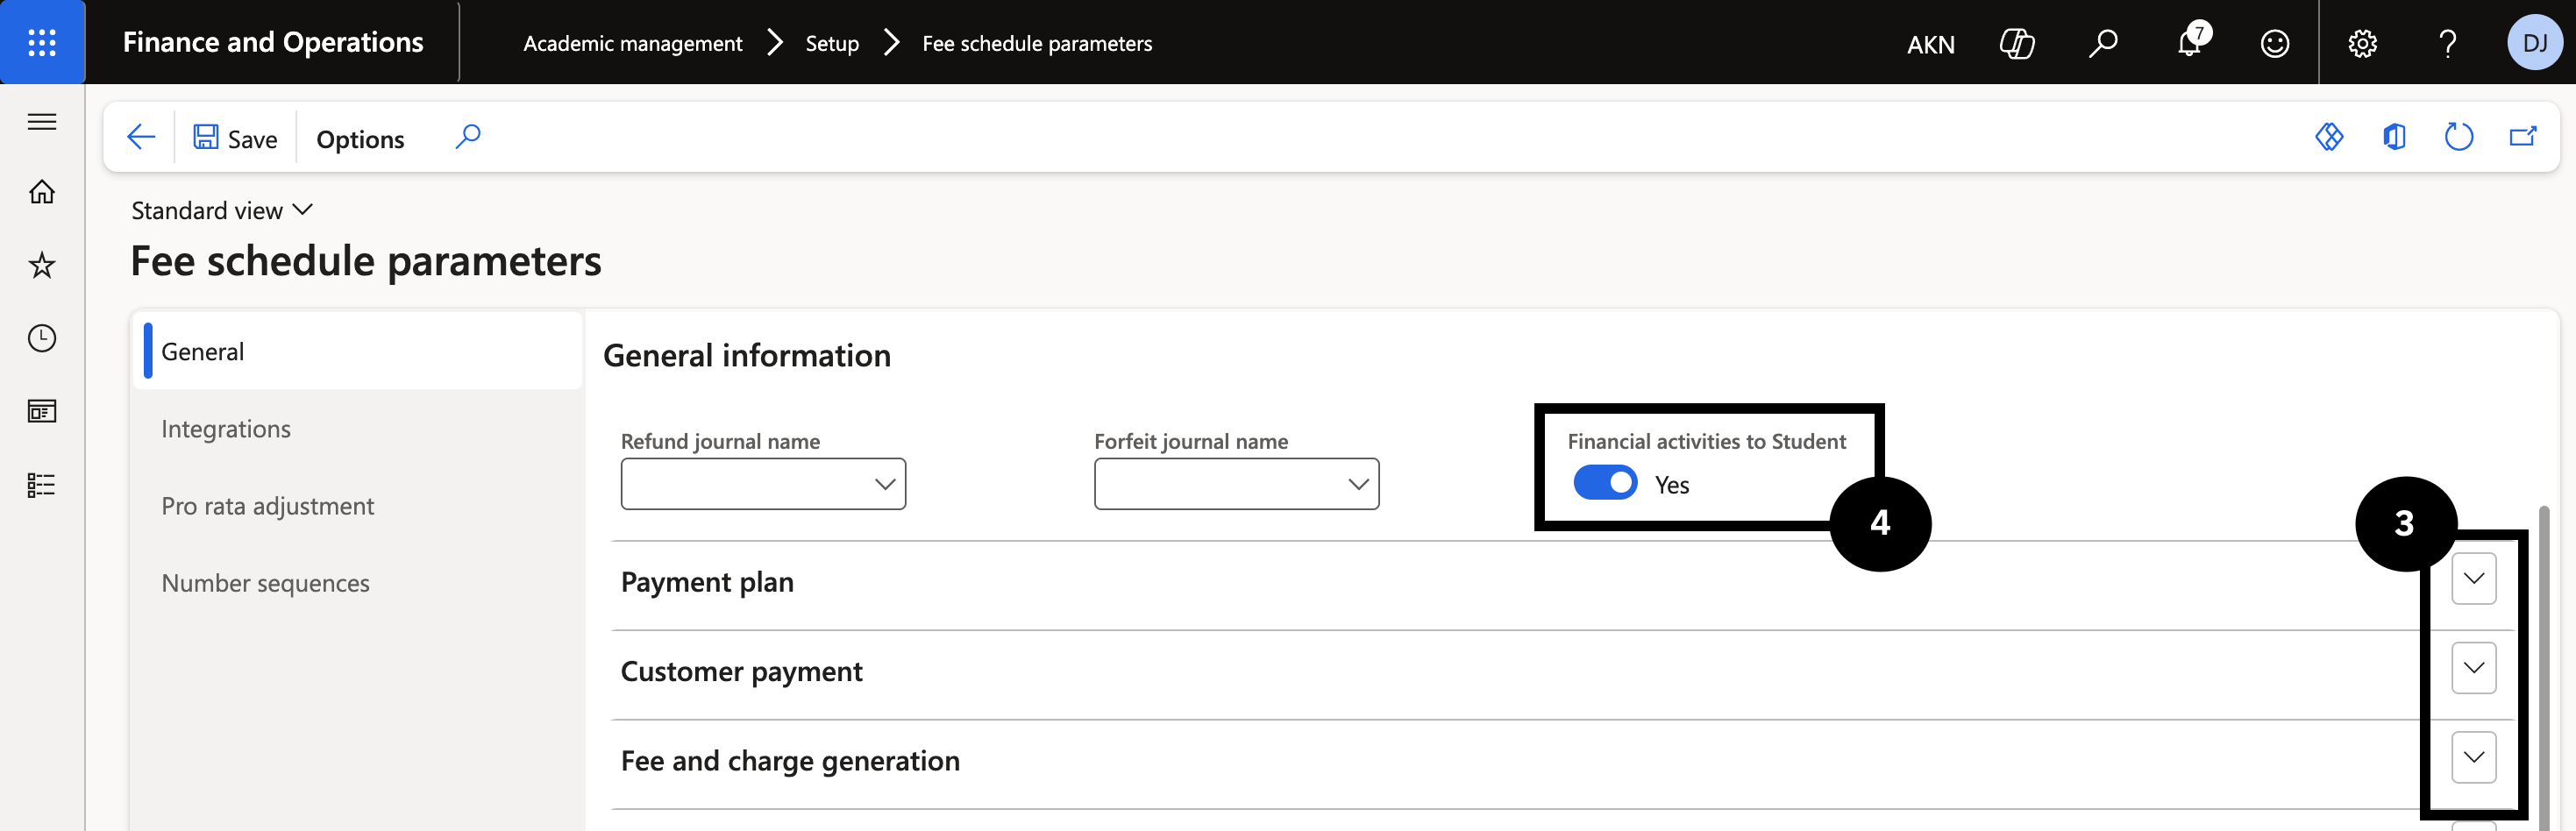
On the General tab, expand each section and complete the fields based on your school's requirements (③):
- Deposit handling journals for refund and forfeit.
- Payment journals for online, over-the-counter, and miscellaneous receipts.
- User group permissions for generated sales orders.
- Staff concession cancellation and adjustment setup (applies when a staff contract ends).
In Financial activities to Student (④), select:
- No — when posting financial transactions to the fee payer account.
- Yes — when posting financial transactions directly to the student account.
Configure the Integrations tab
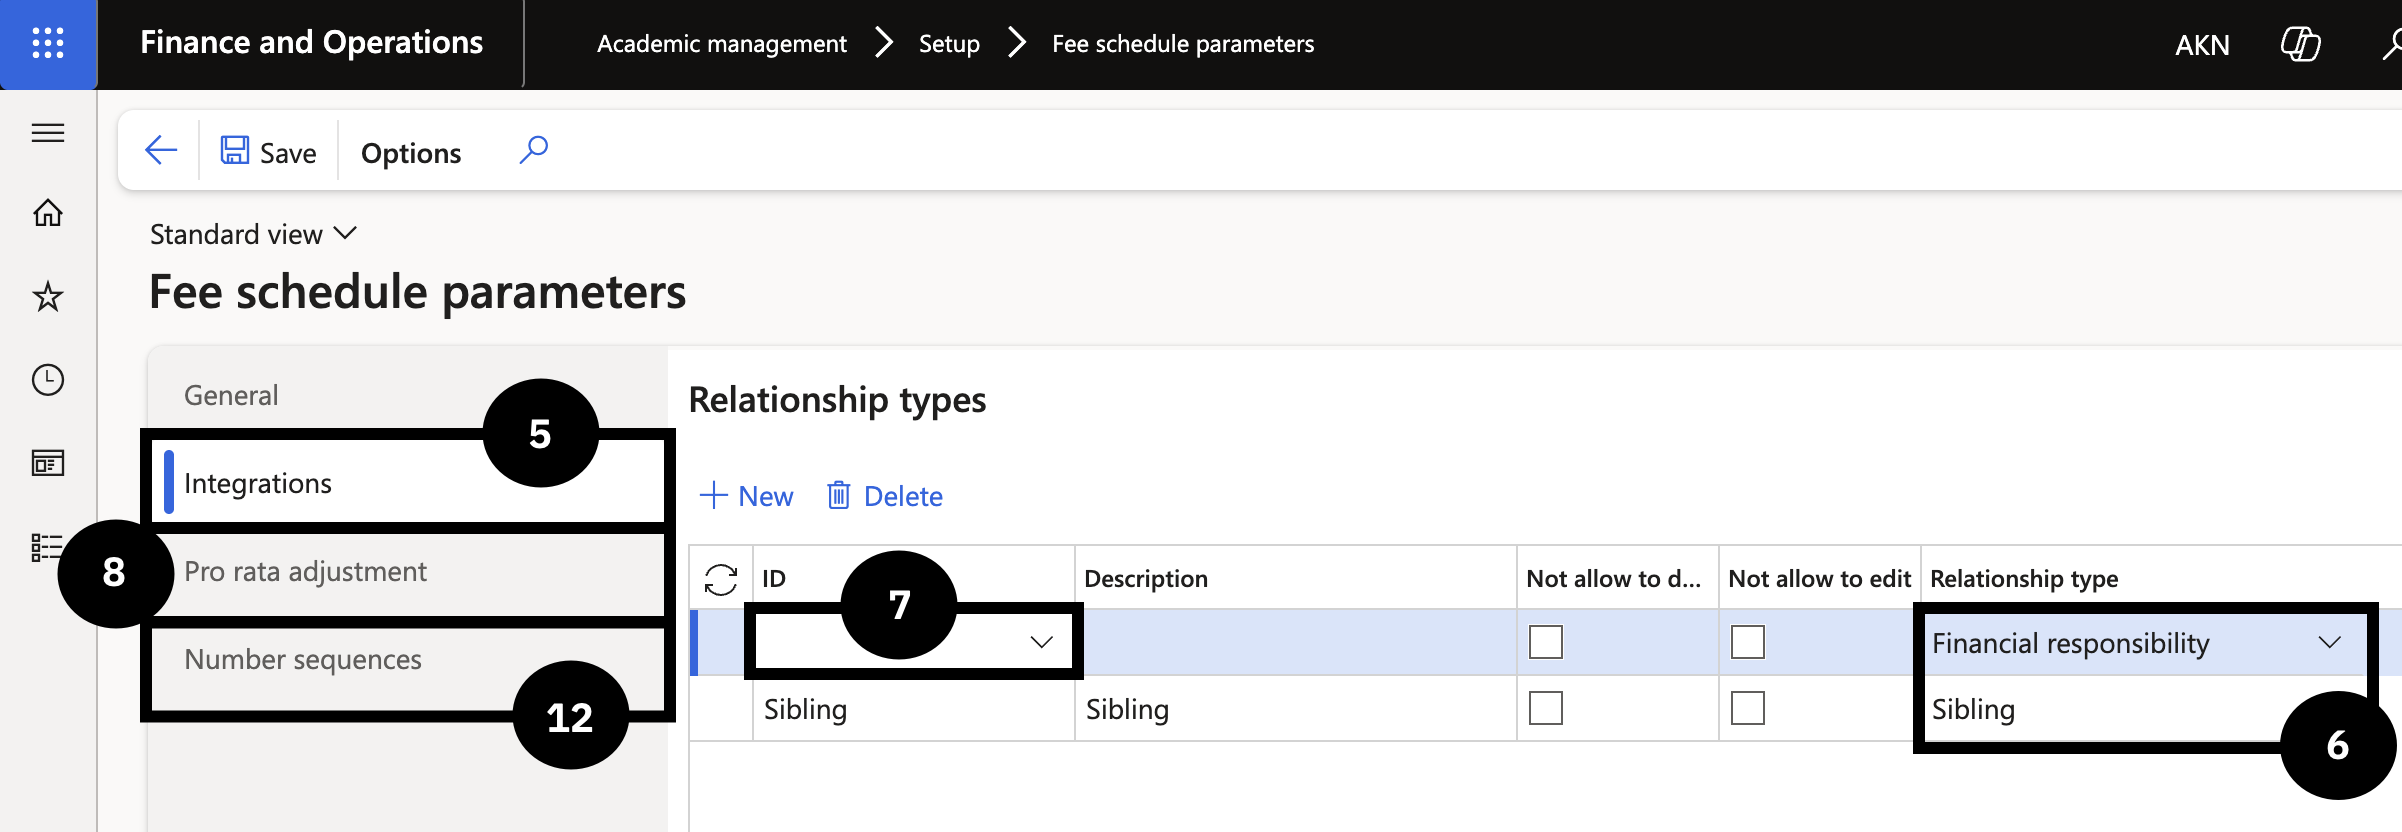
Click the Integrations tab (⑤). Select the Relationship type (⑥)— choose Financial responsibility for parents or guardians who pay fee invoices, and Sibling for brother/sister relationships used in sibling order calculations. Select the ID value that matches the configured relationship type (⑦).
Set Pro rata and Number sequences
Click the Pro rata adjustment tab (⑧) and select the Pro rata adjustment joining and Pro rata adjustment leaving options. For Leaving date, choose:
- Last day attended — when the school tracks the leaving date as the last day attended.
- Expiration date — when the leaving date is the expiration date in the Academic enrolment table.
Click the Number sequences tab (⑫) and confirm all number sequences are set for all references.
Save
Click Save.