Configure Customer Integration Mapping
Quick answer
- Create a Report type in Academic Management ▸ Setup ▸ Integration ▸ Report type, then configure the mapping in Customer integration mapping by selecting the record type, customer type, and customer group.
- The Record type description fills in automatically once the record type is selected.
This process defines how customer data is mapped and synchronised between the source system and Dynamics 365 Finance and Operations, classifying records into the correct customer type — Student or Fee payer — based on configuration.
Create a Report type
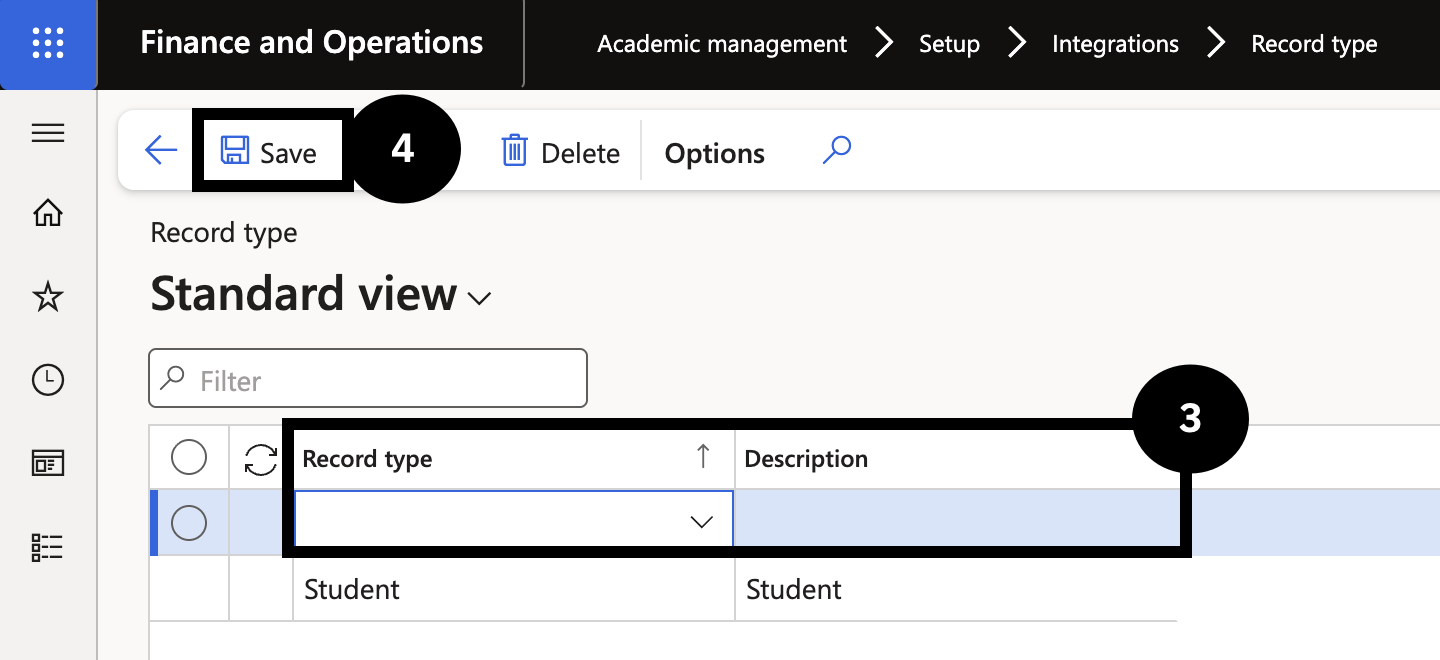
From the FNO dashboard, navigate to Modules ▸ Academic management ▸ Setup ▸ Integration ▸ Report type. Click New, fill in the Record type and Description fields (③), then click Save and close the page (④).
Configure Customer integration mapping
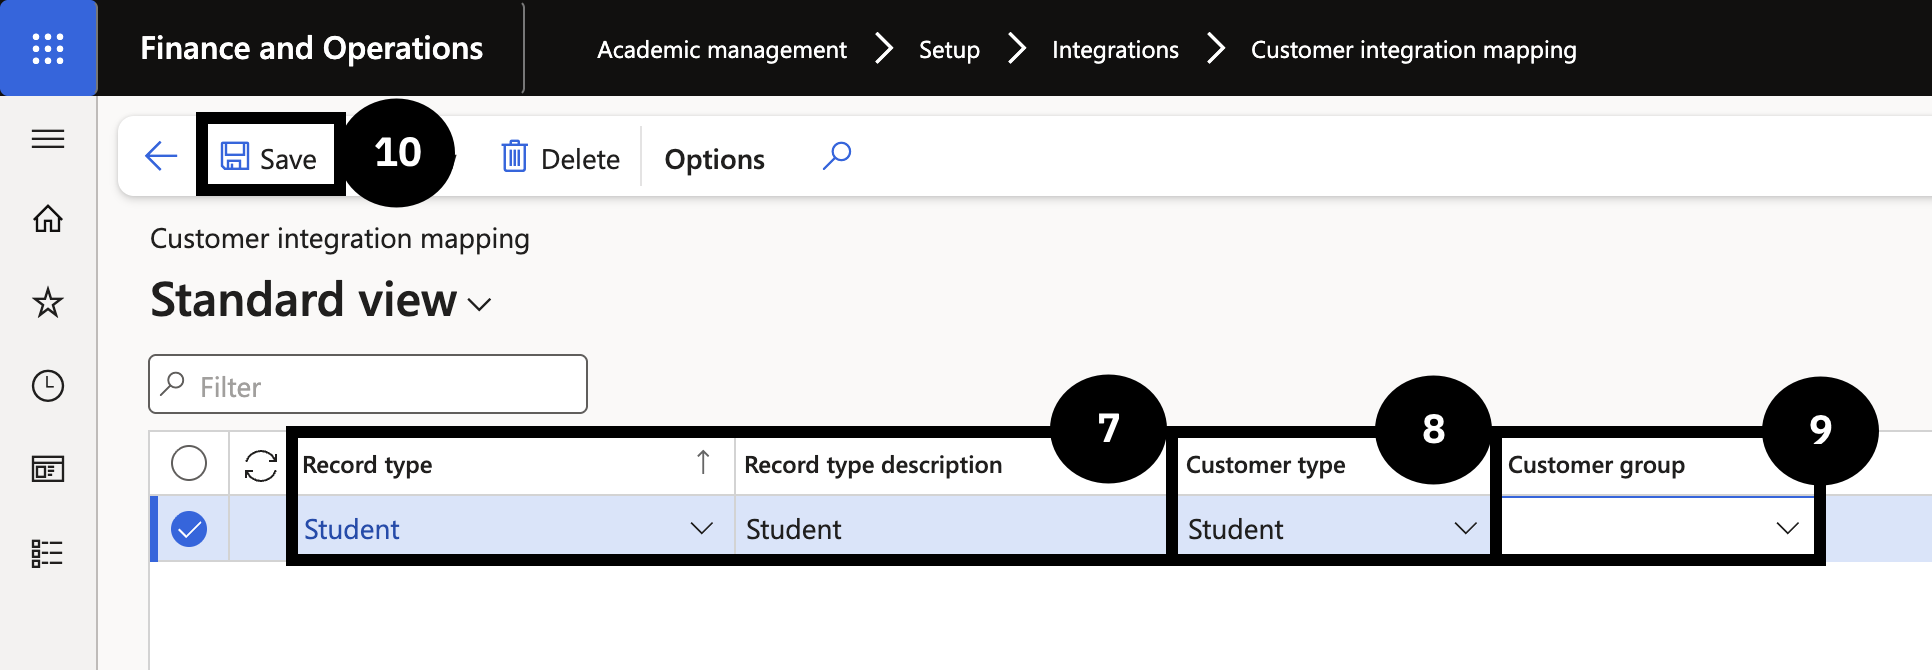
Navigate to Modules ▸ Academic management ▸ Setup ▸ Integration ▸ Customer integration mapping. Click New and complete the following (⑦-⑨):
- Record type — select from the dropdown. The Record type description fills in automatically.
- Customer type — select Student or Fee payer.
- Customer group — select the appropriate group from the dropdown.
Save
Click Save (⑩).