Application / Registration Fee Process via Cashier
Quick answer
- Find the student in All admission fees, filter by Application fee, select the record, and click Post with Preview enabled.
- Then create a new cashier receipt in Accounts receivable ▸ Payments ▸ Cashier receipt, select the student, mark the registration fee, select the payment method, enter the amount, and click Post.
Registration fees can be receipted over the counter when a fee payer makes payment in person at the school. The pre-admission fee record must already be posted (see Manually Post a Pre-Admission Fee) before proceeding with cashier receipting.
Note: The enrolment officer must manually push the student record to Registered status in the student management system before receipting over the counter. This step is automated when payment is made online.
Filter and post the fee record
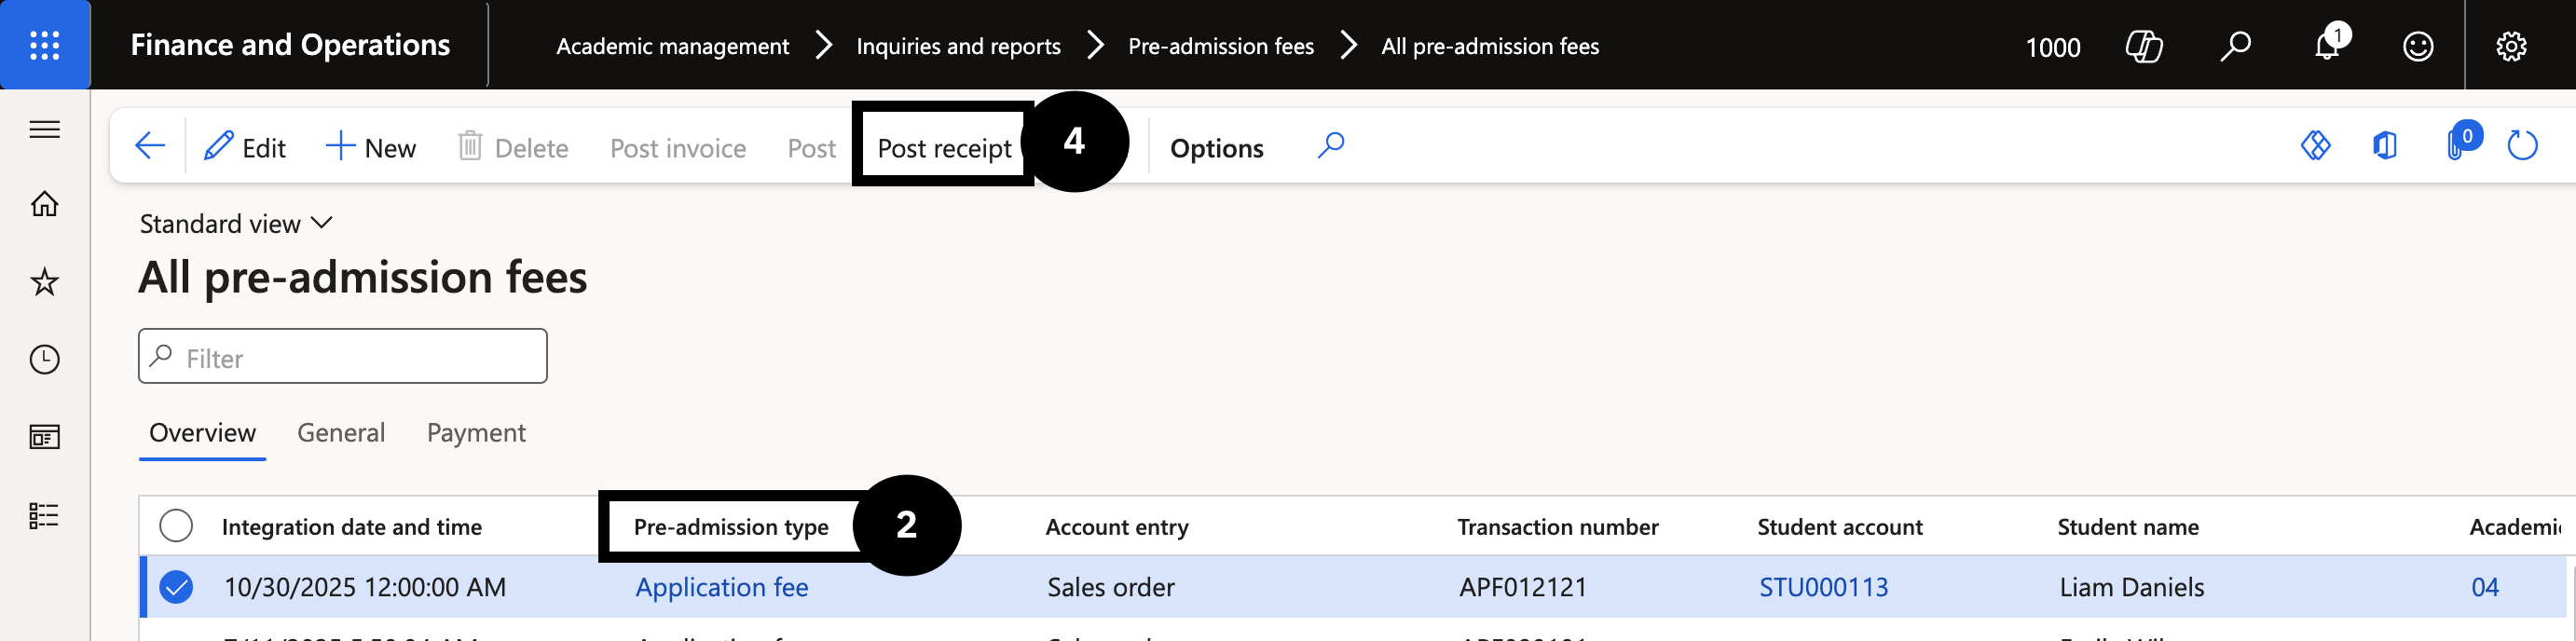
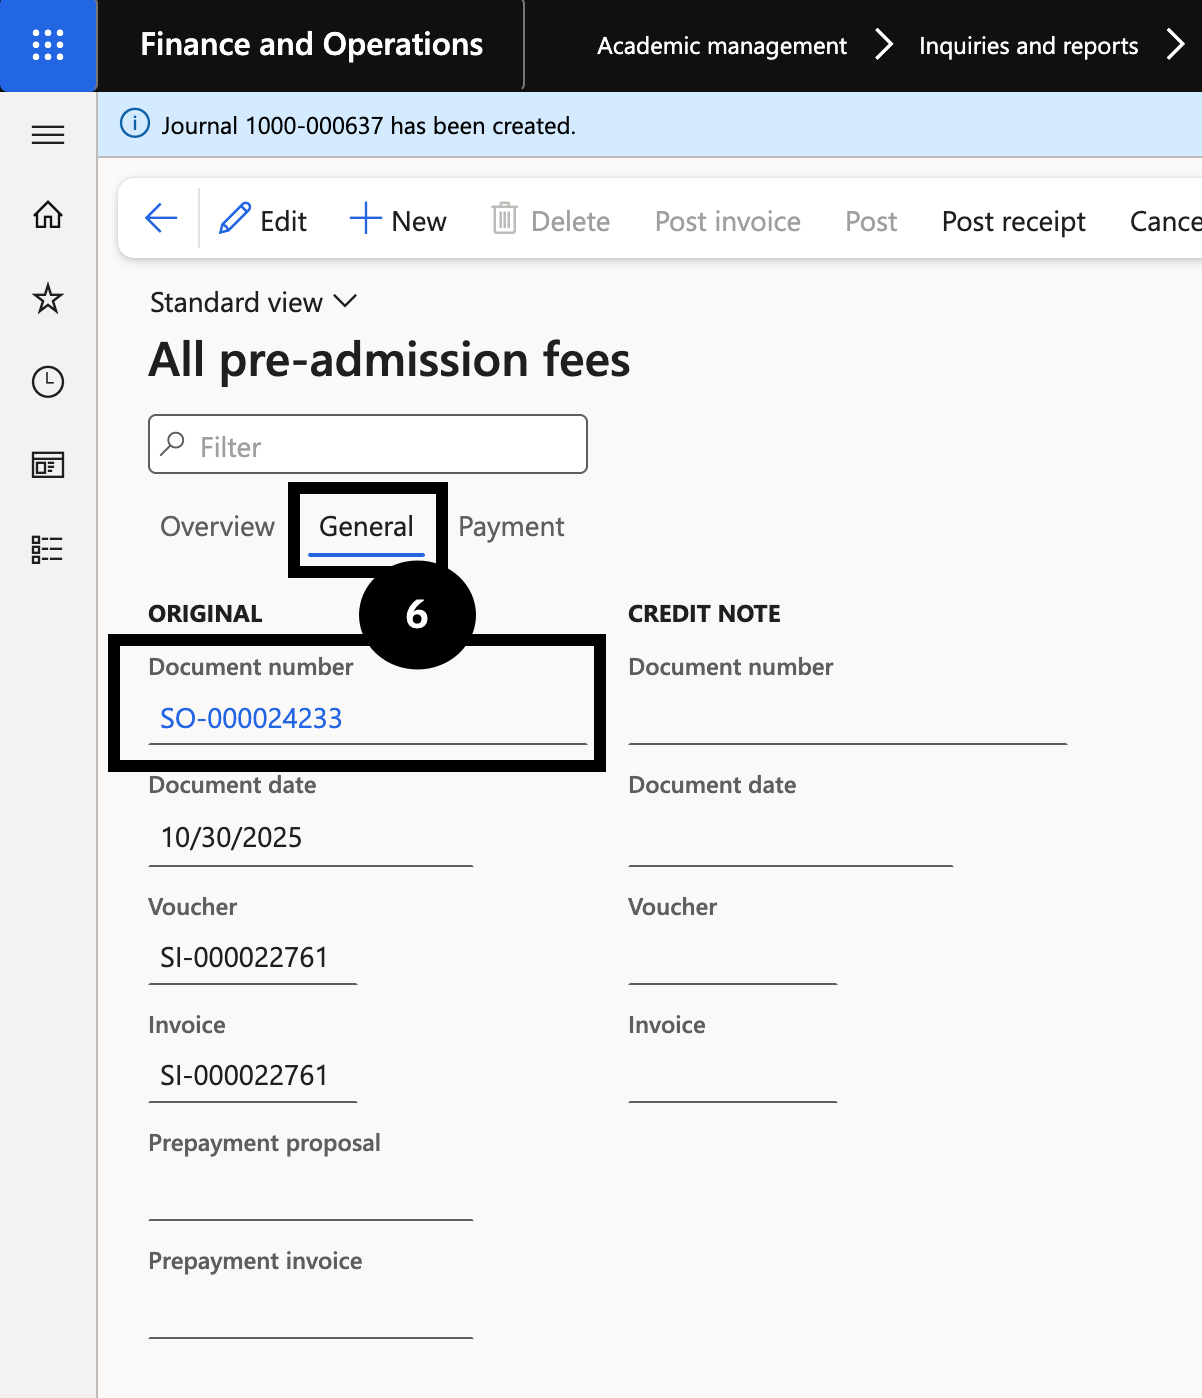
From the FNO dashboard, open Modules ▸ Academic Management, expand Inquiries and reports ▸ Pre-admission fees, and click All admission fees. Filter Pre-admission type by Application fee (②), locate and select the correct student record. Click Post (④) with Preview toggled on. Click the General (⑥) tab to view the created sales order — it will now be available in Cashier receipt for payment.
Create a cashier receipt
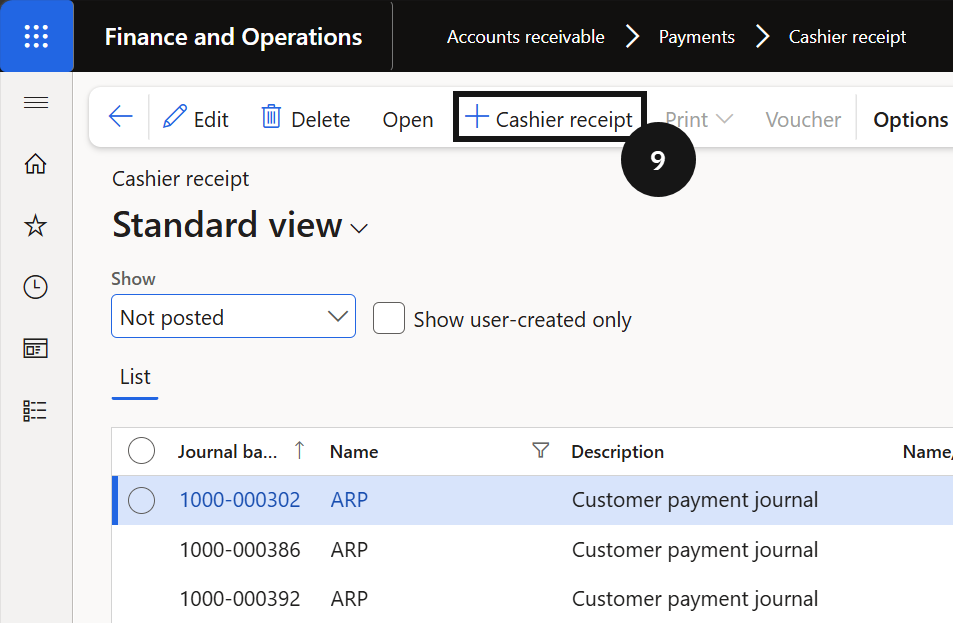
From the FNO dashboard, open Modules ▸ Accounts receivable, expand Payments, and click Cashier receipt. Click + Cashier receipt in the Action Pane (⑨).
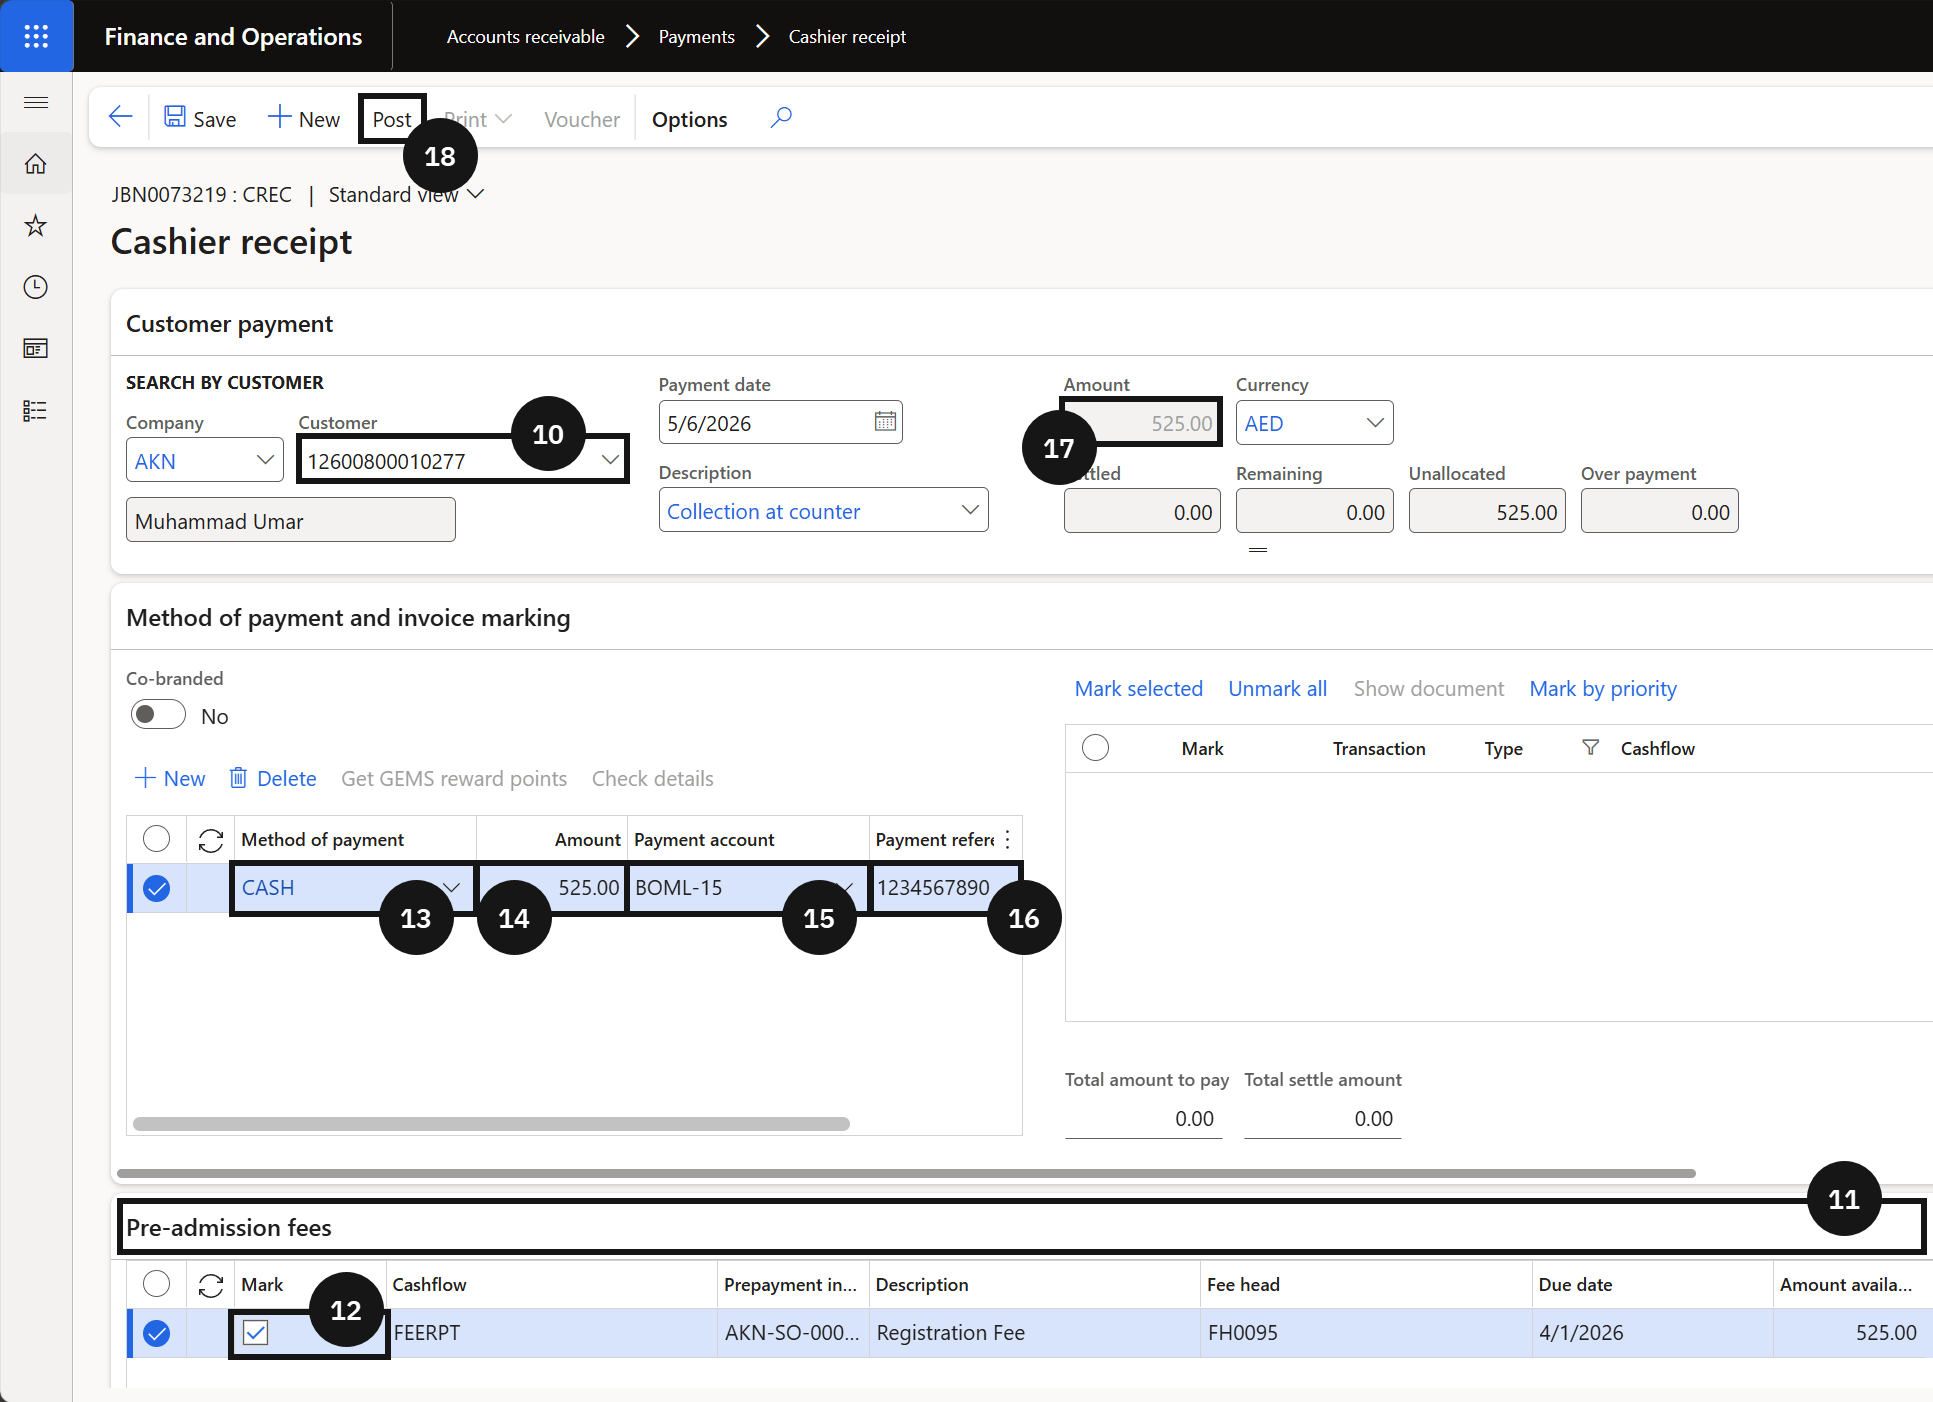
Select the student name from the fee payer list. Open the Pre-admission fees tab (⑪) and tick the Mark checkbox (⑫) next to the registration fee. Complete the payment details in the Method of payment and invoice marking tab:
- Method of payment (⑬) — select the payment method from the dropdown.
- Amount (⑭) — enter the fee amount.
- Payment account (⑮) — select the deposit account.
- Payment reference (⑯) — enter a payment reference.
Verify the fee is fully allocated in the allocations summary.
Post and deliver the receipt
Click Post in the Action Pane (⑱). Select the receipt delivery option — Print receipt to print a physical copy or Email receipt to send to the fee payer. Click OK.
Once posted, the receipt journal flows back to the student management system, allowing the enrolment record to proceed to the next stage.