Manually Post a Pre-Admission Fee to Create a Sales Order for Cashier Receipt
Quick answer
- Filter All pre-admission fees by Application Fee, select the student record, click Post with Preview = Yes, and confirm the sales order number on the General tab.
- This step is only required for counter payments — online payments create the sales order automatically.
Note: This step is only required when a parent wishes to pay the registration fee over the counter. For online payments, the sales order invoice is generated and posted automatically. For counter payments, the student management system must first be manually progressed to Registered before following the steps below.
Filter and select the fee record
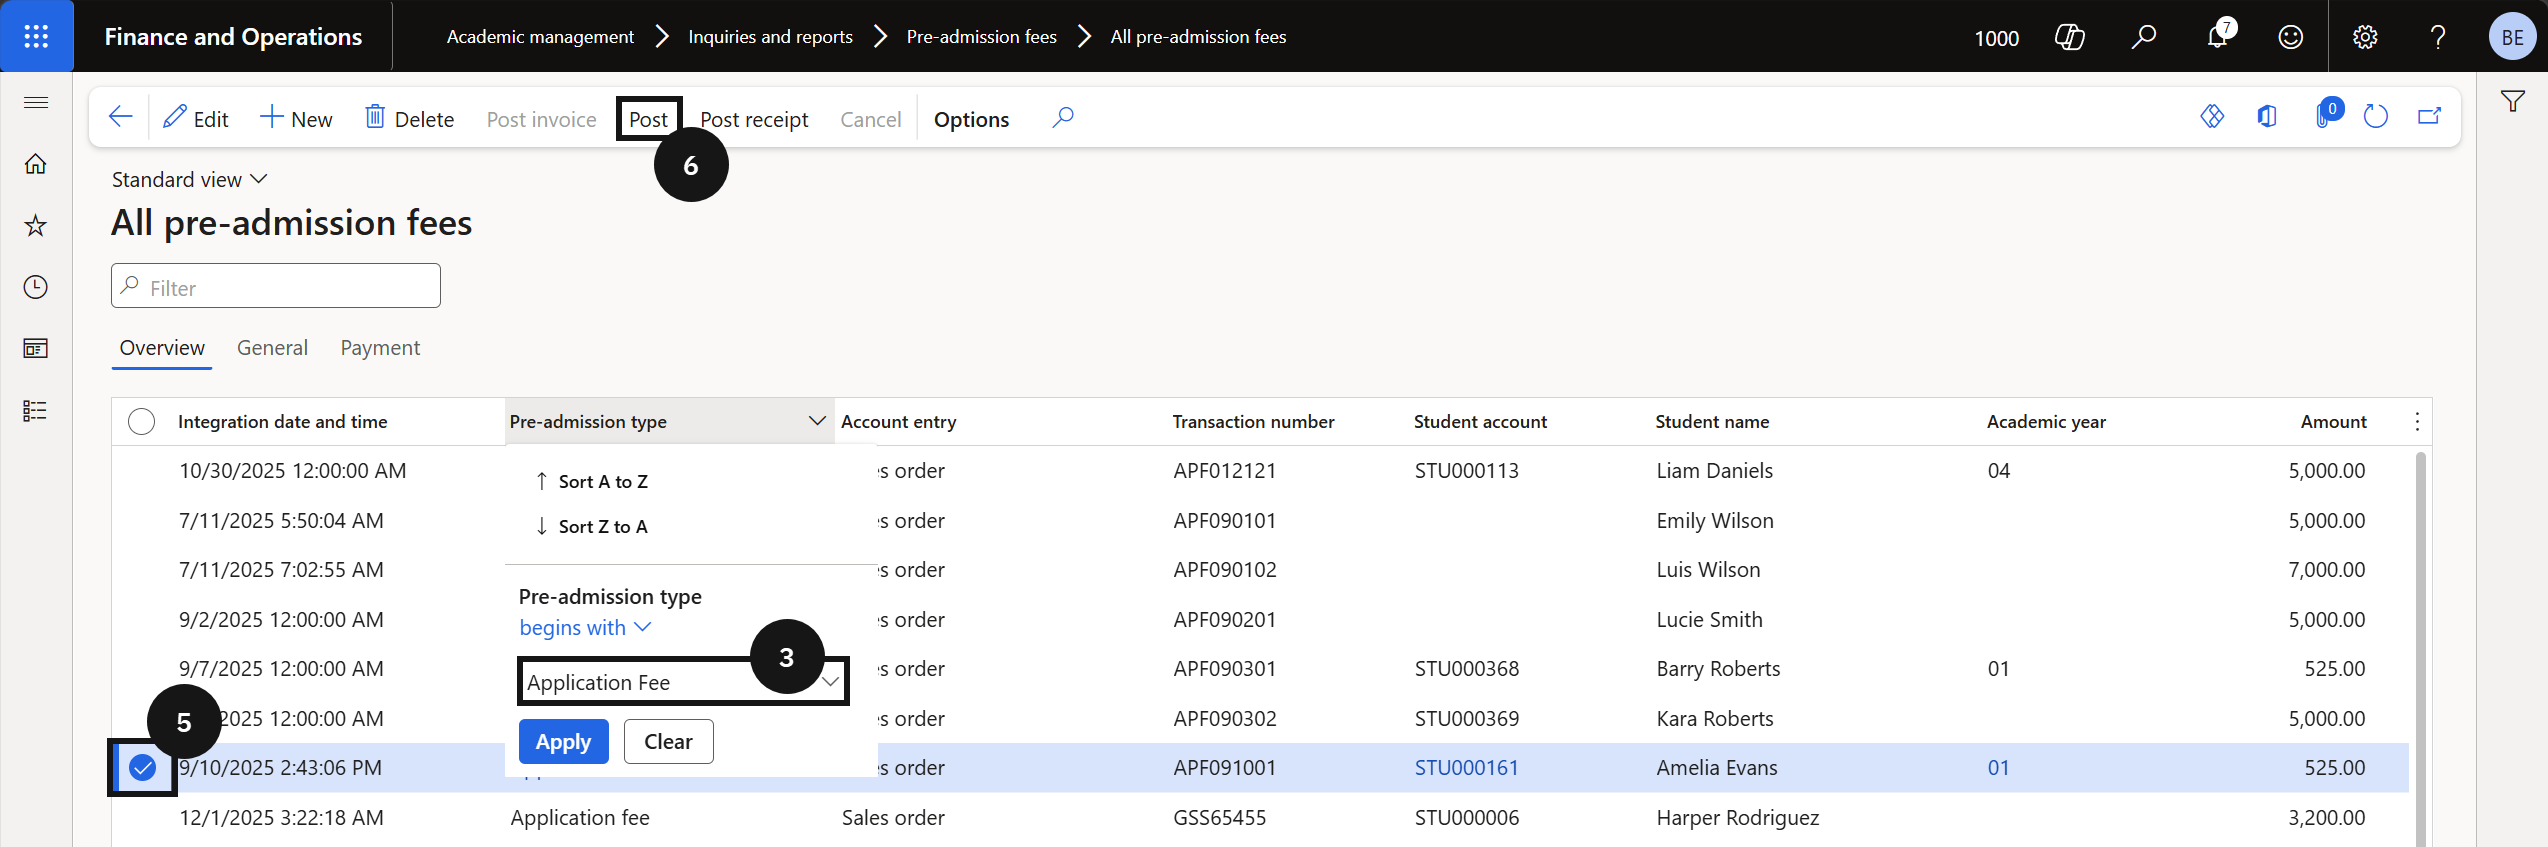
From the FNO dashboard, open Modules ▸ Academic Management, expand Inquiries and reports, then expand Pre-admission fees, and click All pre-admission fees. Filter the Pre-admission type column by Application Fee (③) and locate the correct student record. Select the record using the checkbox (⑤).
Post the fee
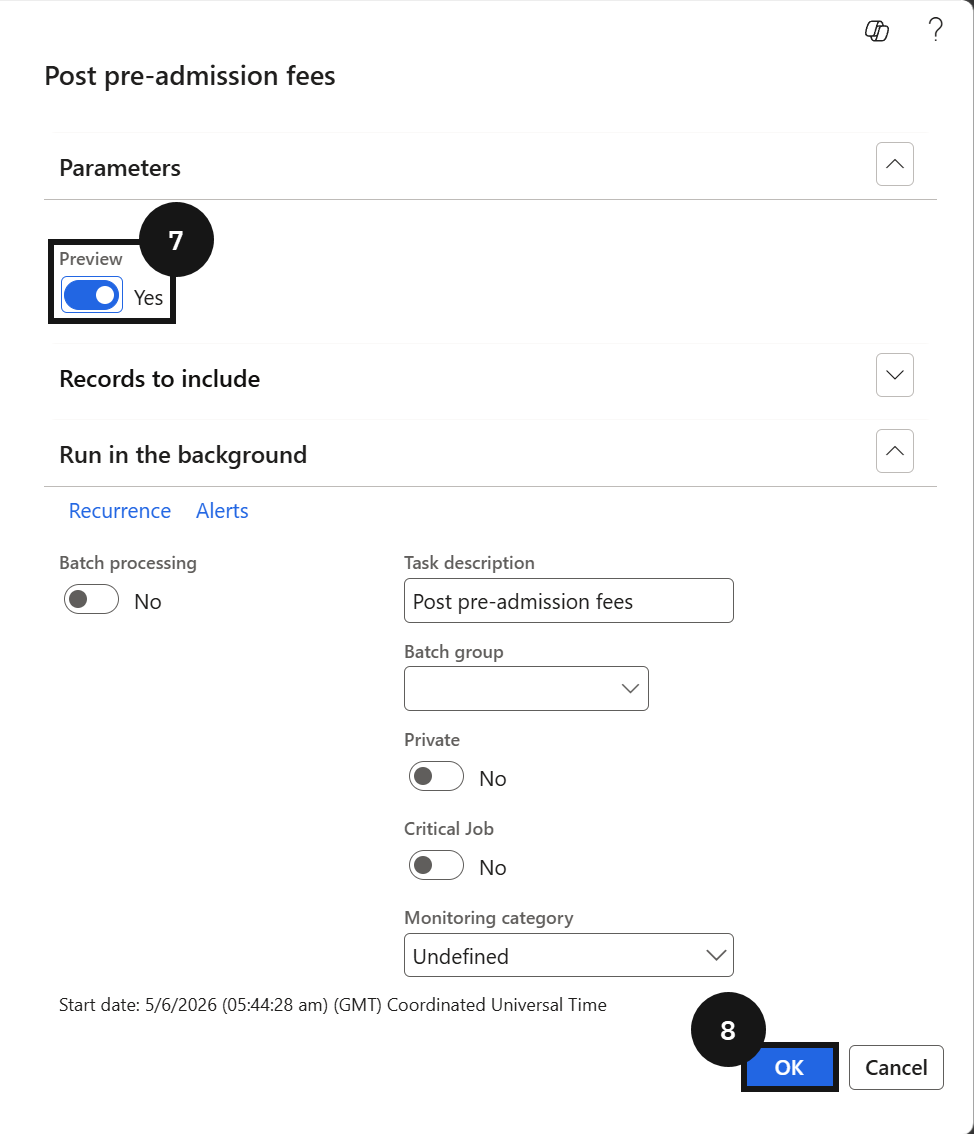
Click Post in the Action Pane (⑥). Ensure the Preview toggle is set to Yes (⑦) to review the posting before it is finalised, then click OK (⑧).
View the sales order
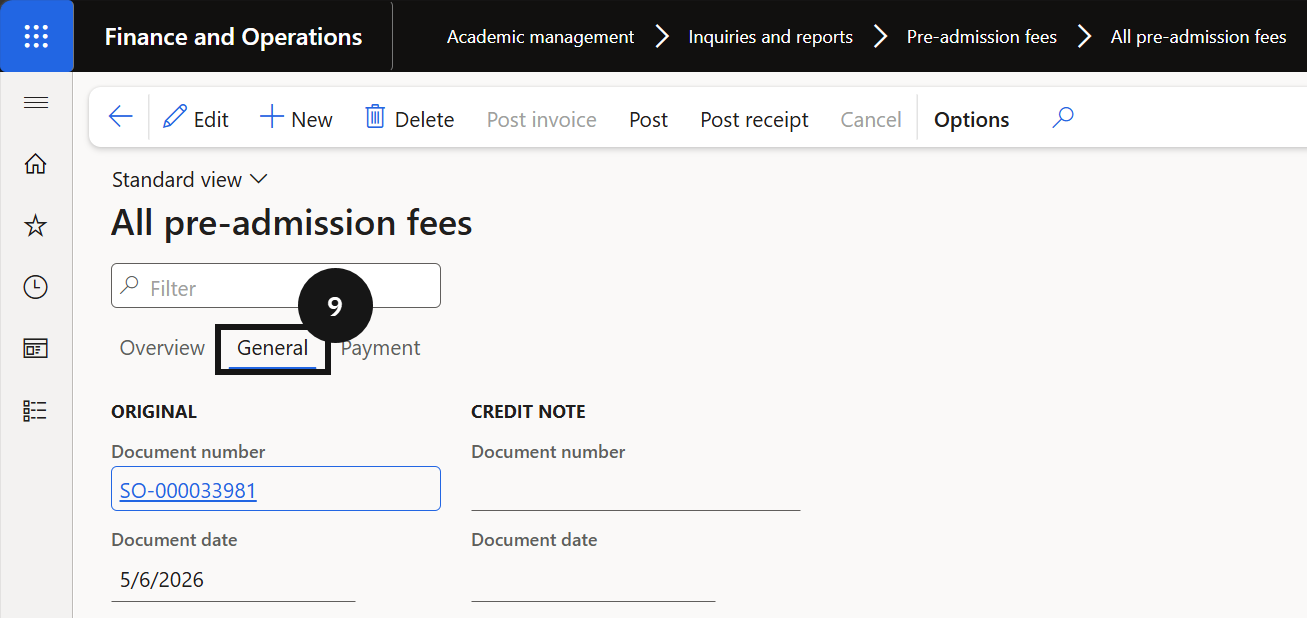
Click the General tab (⑨) to view the created sales order number. Once posted, the sales order is available in Cashier receipt for payment processing.