Forfeiting Deposits
Quick answer
- In Pre-admission deposits, check the deposit, click Forfeit, choose Preview or auto-post, then open the forfeit journal and post the credit line.
- Only deposits with status Received or Partial are eligible to be forfeited.
Deposits are forfeited when a student does not proceed with enrolment and the school elects to retain the funds.
Note: Only deposits with Status = Received or Partial are eligible to be forfeited.
Open Pre-admission deposits and select the deposit
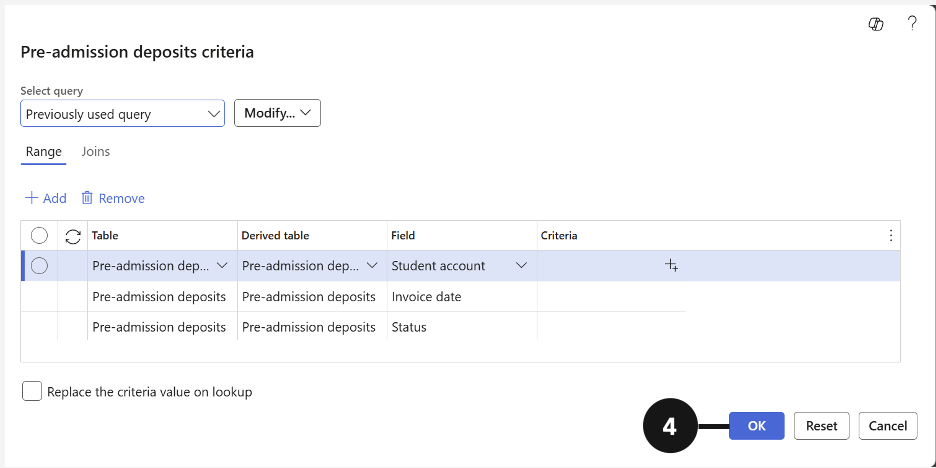
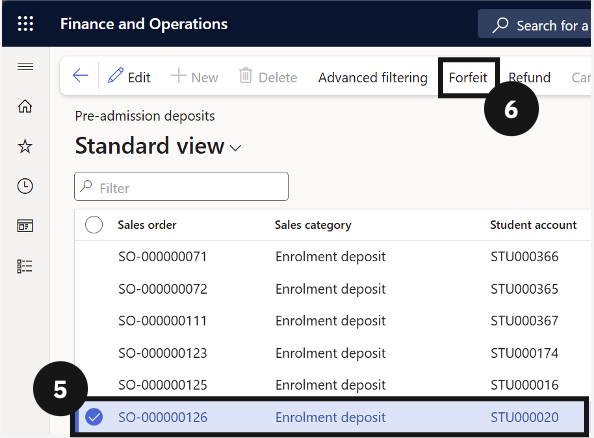
From the FNO dashboard, open Modules ▸ Academic Management, expand Inquiries and reports, then expand Pre-admission fees, and click Pre-admission deposits. When the deposit criteria window opens, click OK (④) to view all deposits. Check the deposit to be forfeited using the checkbox in the far-left column (⑤).
Initiate the forfeit
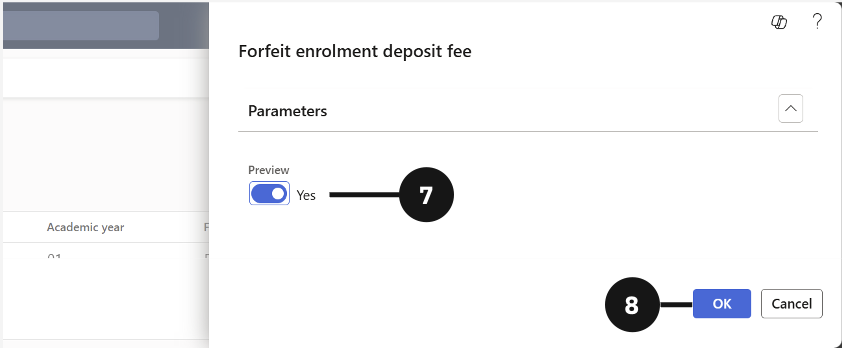
Click Forfeit in the Action Pane (⑥). In the dialog on the right, choose whether to enable Preview (to review before posting) or disable it to post automatically (⑦). Click OK (⑧).
Review and post the forfeit journal
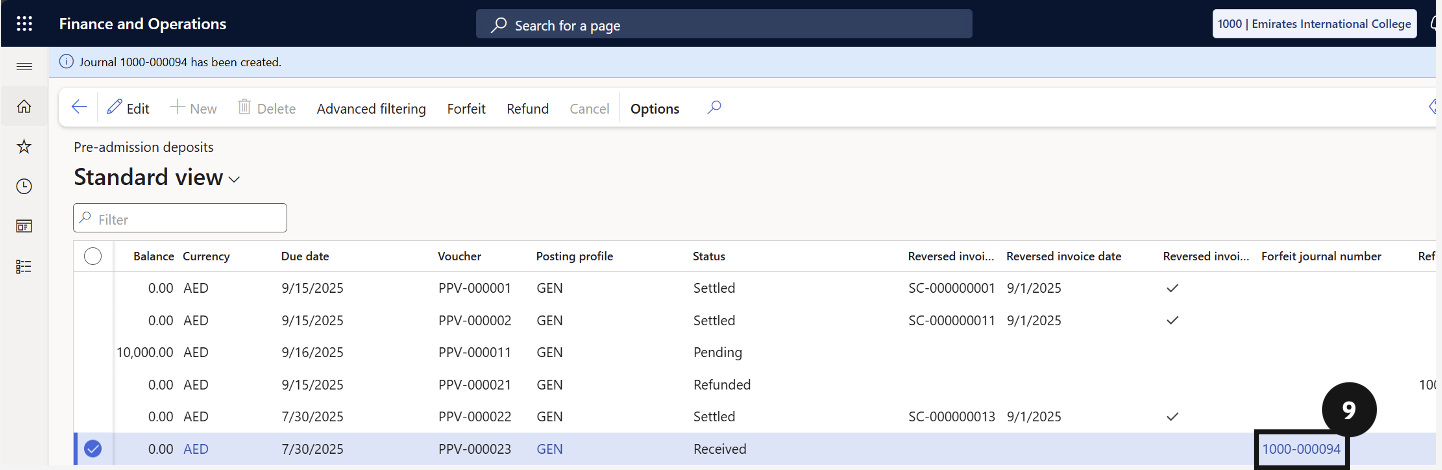
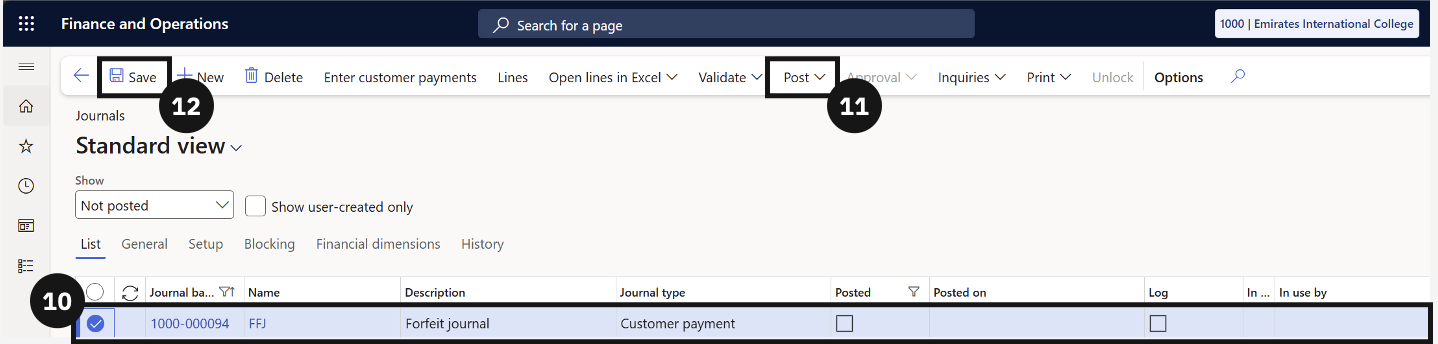
If you selected Preview, click the Forfeit journal number link (⑨). Open the journal by clicking Lines in the toolbar. Select the credit line using the checkbox (⑩), review or edit the VAT as required, and click Post (⑪). Click Save in the toolbar (⑫).
Check the balance
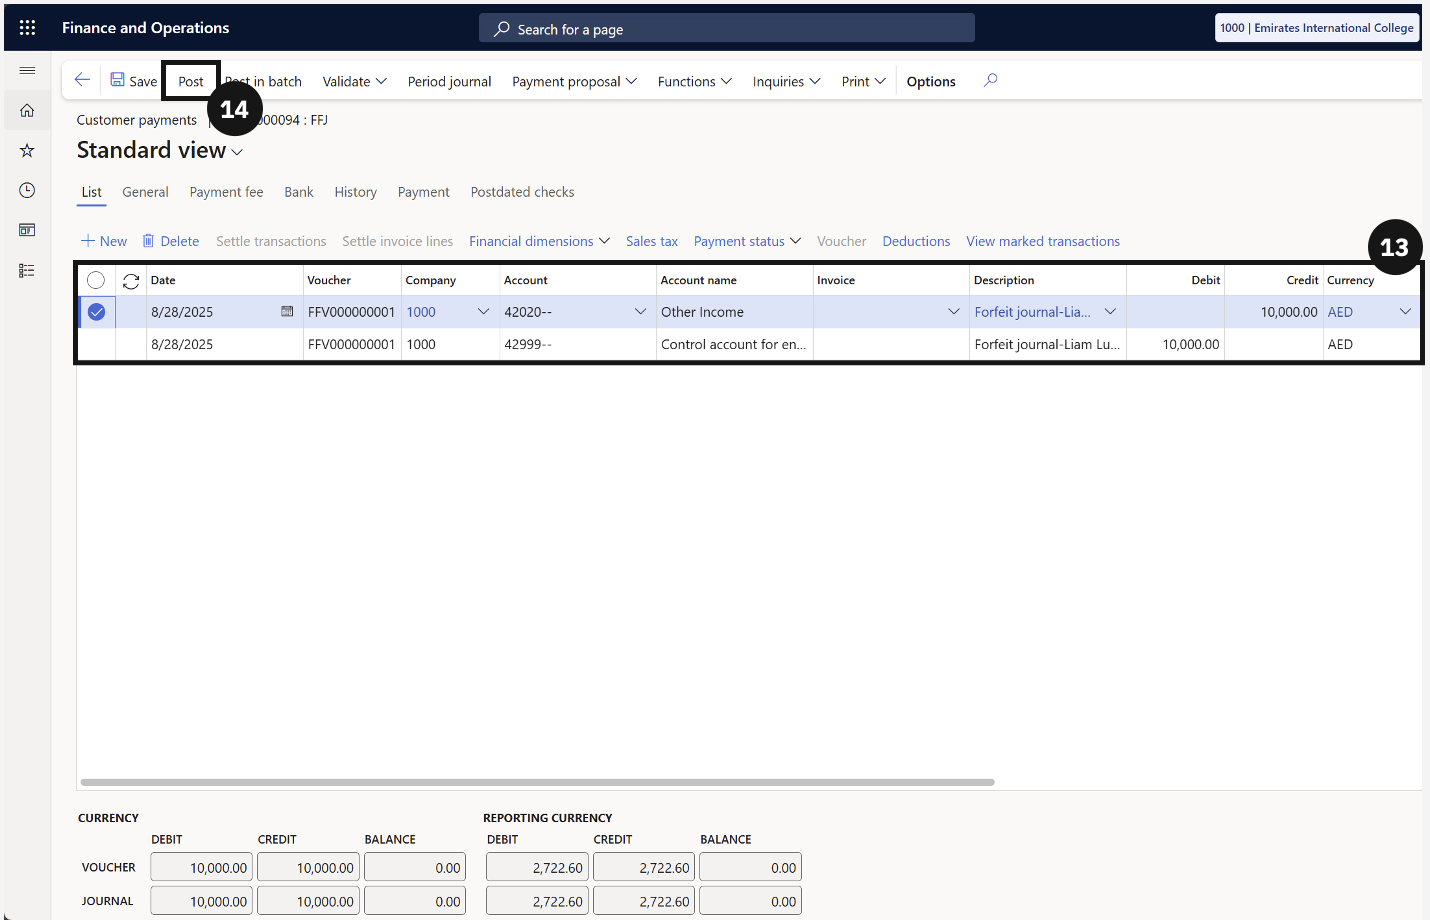
The system will transfer the balance from the forfeited payment to another income account (⑬). The amount will be moved from the forfeited account. Check that the amounts are correct, then click Post (⑭). The deposit status will update to Forfeited.