Set Up Intercompany Channel
Quick answer
- Open Academic Management ▸ Setup ▸ Intercompany journal and click New.
- Configure the originating company's credit account, journal, posting profile, and financial dimensions.
- Repeat the configuration for the destination company, then Save.
The intercompany channel defines the control accounts, journal names, and posting profiles the system uses when generating paired transfer journals between schools. This is a one-time configuration per school pair — complete it in both schools before any credit balance transfer can be processed.
Note: This setup must be completed in both the originating school and the destination school before any credit balance transfer can be processed.
Open Intercompany journal setup
From the FNO dashboard, open Modules ▸ Academic Management, expand Setup, and click Intercompany journal. Click New.
Configure the originating company
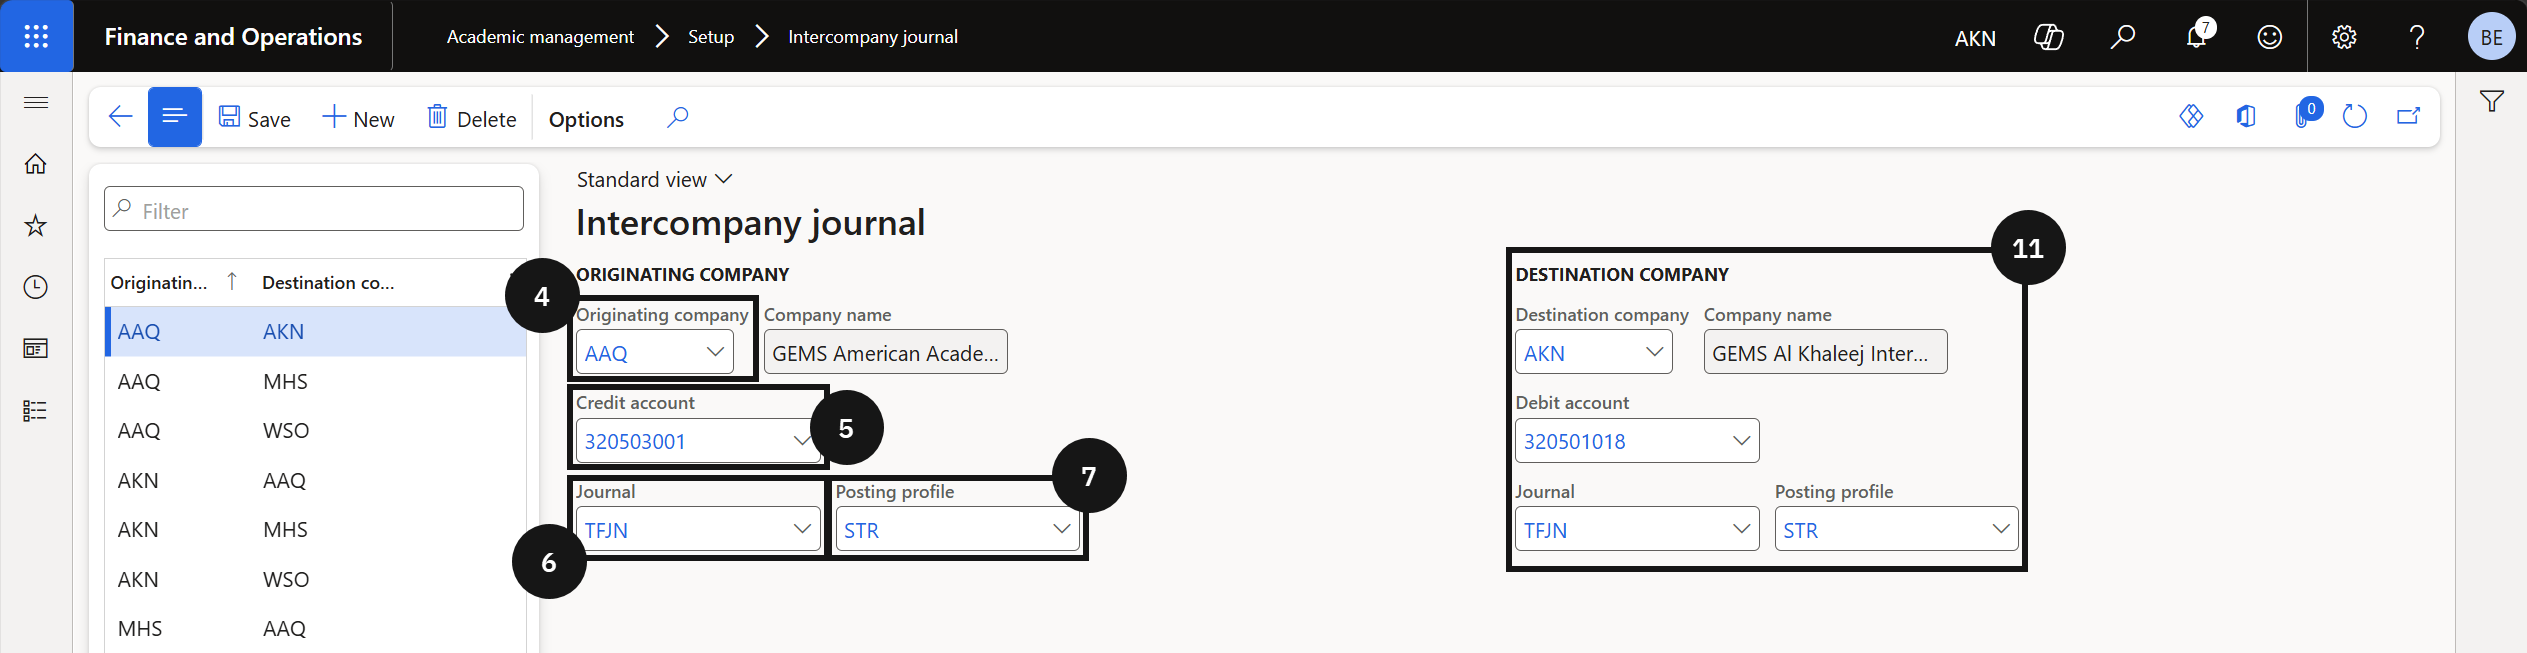
Select the Originating company (④). Enter the Credit account (⑤) to use as the control account for transfers from this school — for the originating school, the transfer posts to the credit side; for the destination school, it posts to the debit side. Enter the Journal name (⑥) and the Posting profile (⑦).
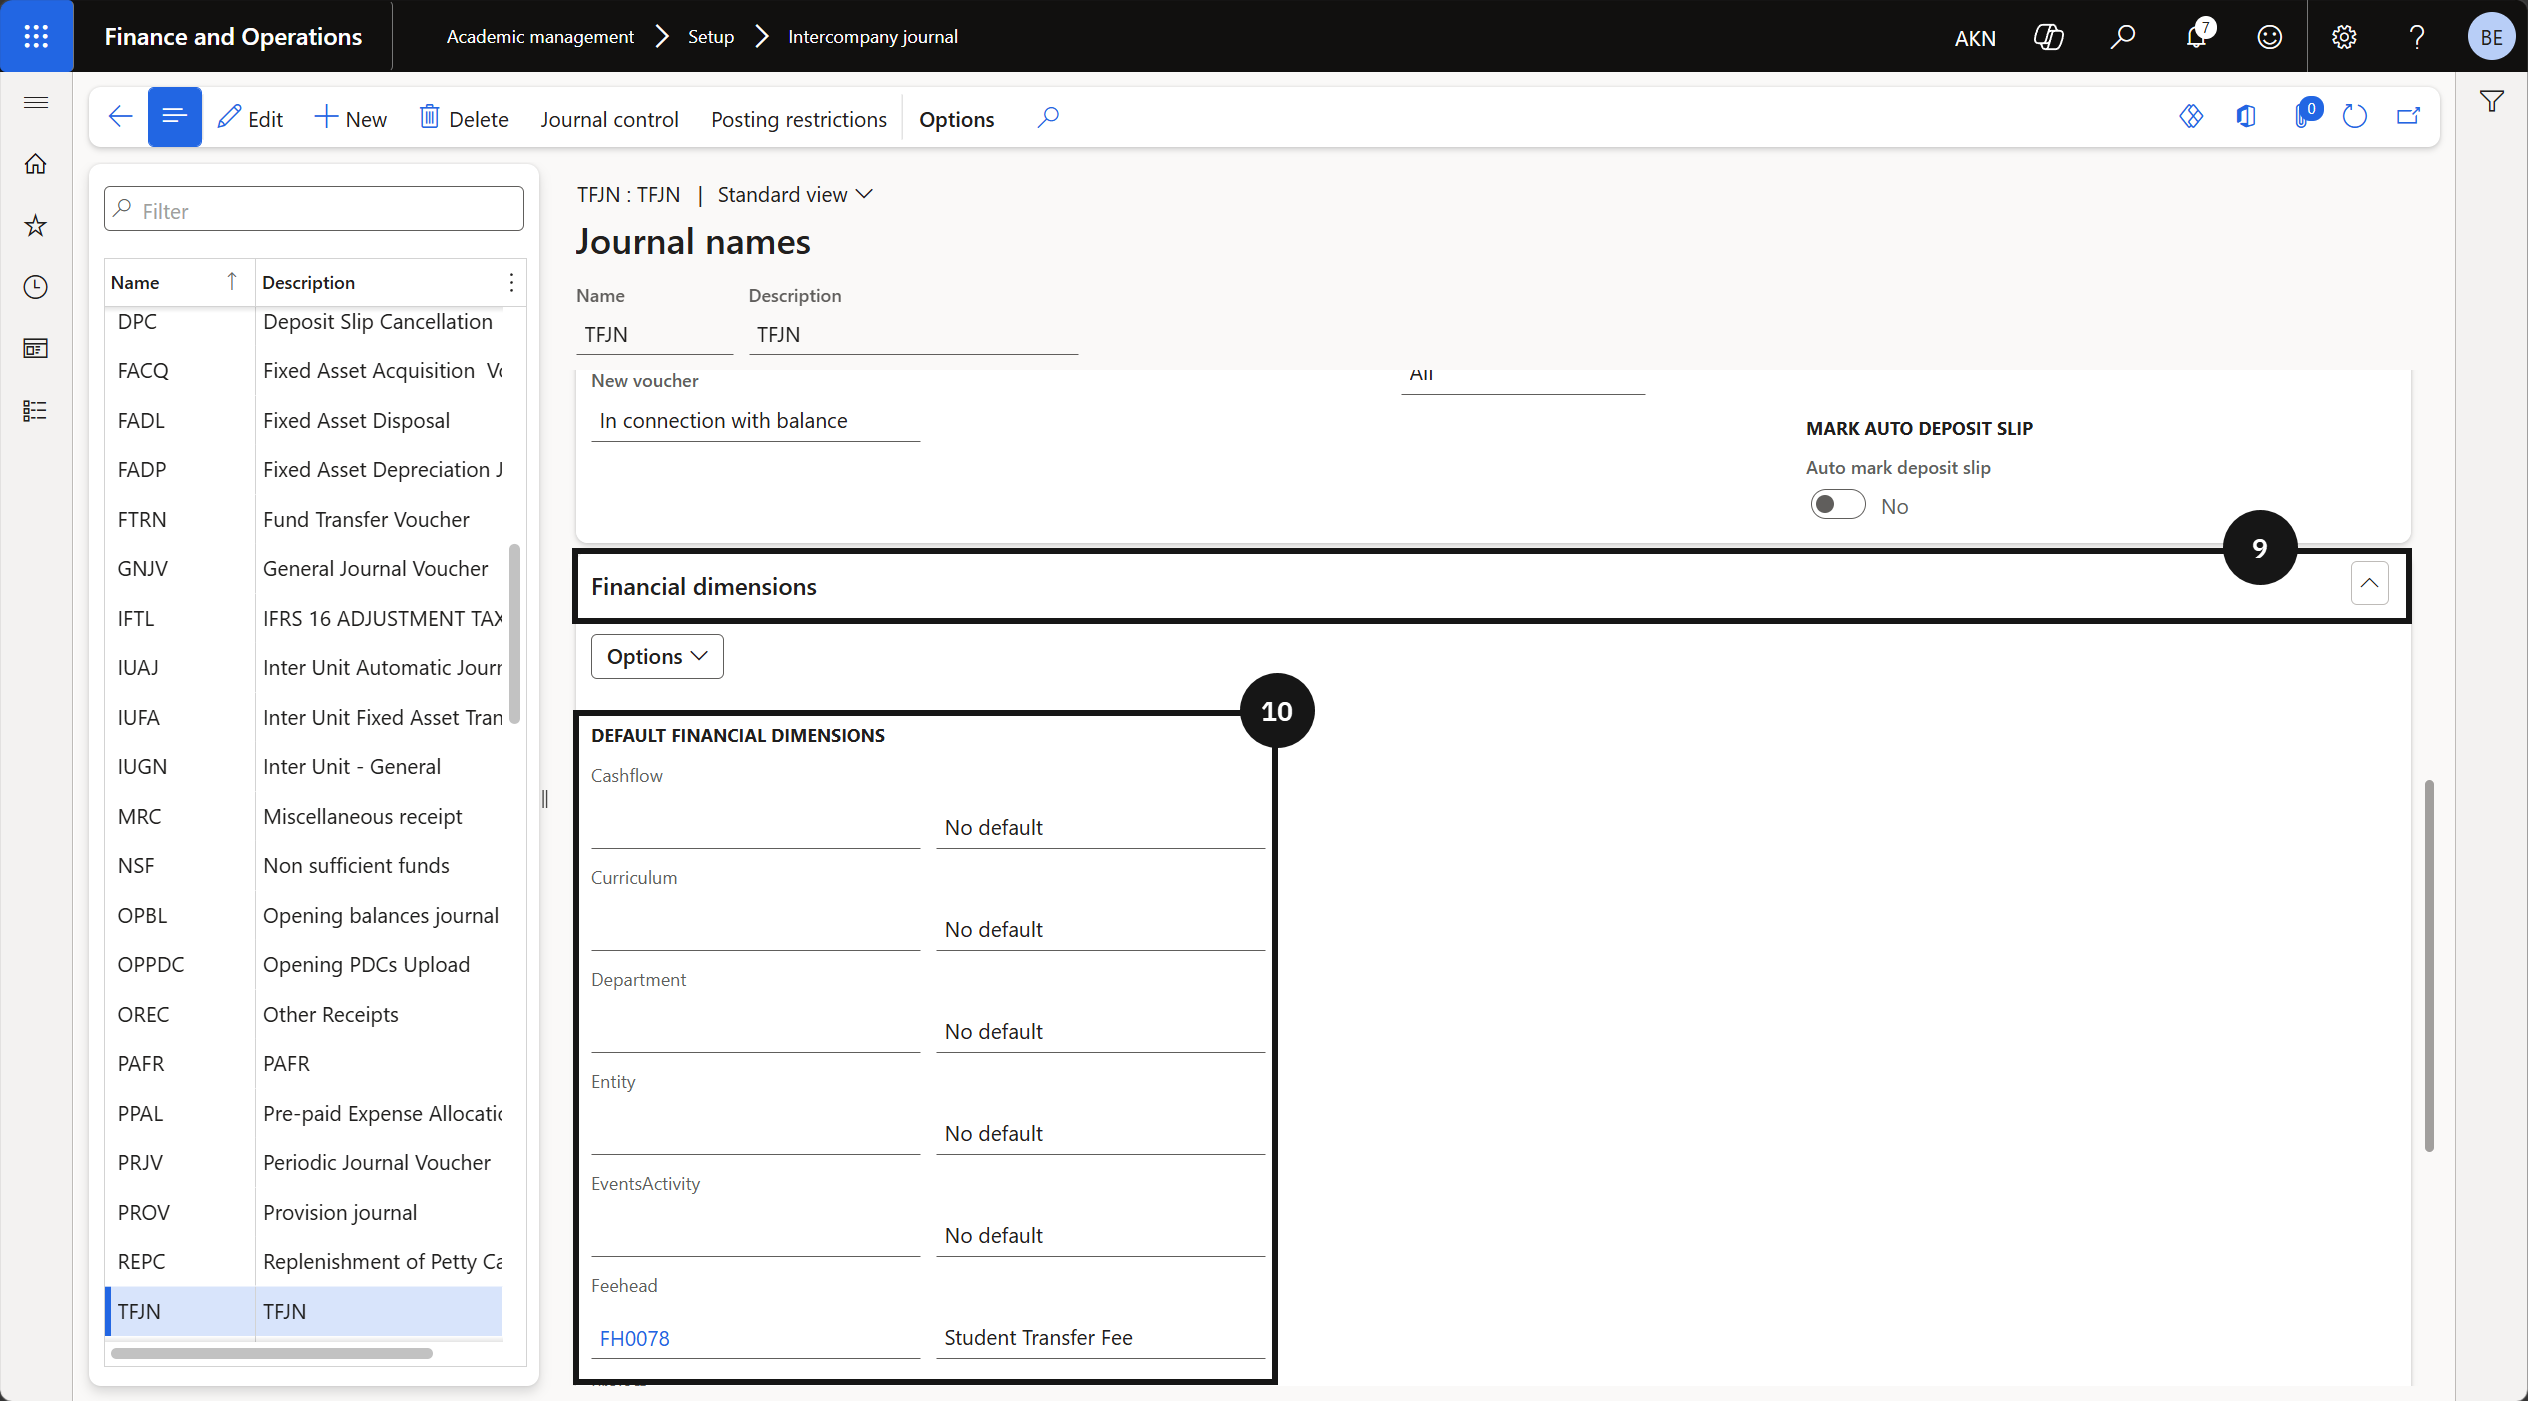
Click the Journal name, open the Financial dimensions tab (⑨), and enter the fee head under the Default financial dimensions (⑩) to default on transfer journals. Dimensions set here are applied automatically to the transfer voucher.
Repeat for the destination company
Repeat the same configuration (steps 2) for the destination company — select the destination company and enter its credit account, journal, posting profile, and financial dimensions.
Save
Click Save, then Back, then Save again.