Intercompany Transactions
The intercompany transfer process is used when a student moves from one school to another and holds a credit balance in the originating school's system. Finance staff transfer that credit balance to the destination school so it can be applied to the student's account there. Before a transfer can be processed, any advanced tax invoices — such as those raised for application fees or enrolment deposits — must be cancelled, as the system only supports the transfer of net credit balances. The system identifies the student across both schools using a shared global Party ID, and automatically generates paired transfer journals in both the originating and destination schools upon completion. A separate intercompany channel setup controls the accounts, journal names, and posting profiles used for these transfer entries.
Prerequisites: Intercompany Channel Setup
Before any credit balance transfer can be processed, the intercompany channel must be configured in both the originating and destination school. This setup defines the control accounts, journal names, and posting profiles the system uses when generating the paired transfer journals. The configuration is a one-time task per school pair and does not need to be repeated unless the accounts or journals change.
Note: This setup must be completed in both the originating school and the destination school before any credit balance transfer can be processed.
From the FNO dashboard, open Modules ▸ Academic Management.
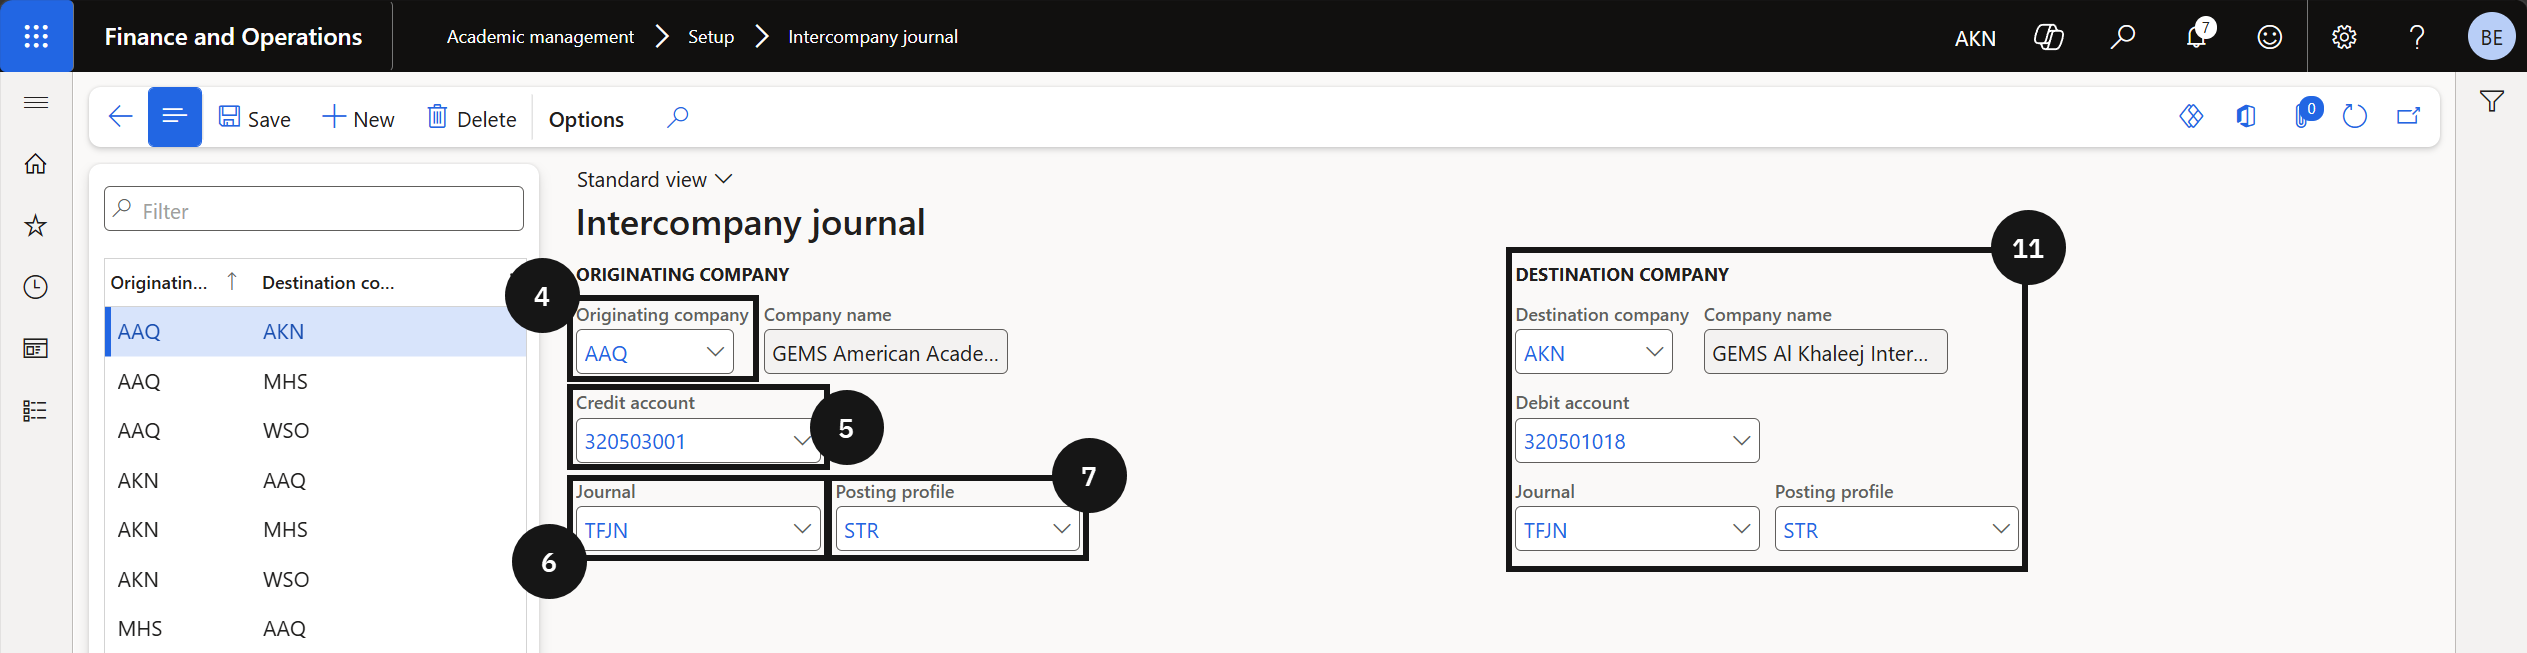
Expand Setup and click Intercompany journal.
Click New.
Select the Originating company.
Enter the Credit account to be used as the control account for the transfer from the originating school.
Note: For the originating school, the transfer posts to the credit side. For the destination school, the transfer posts to the debit side.
Enter the Journal for the originating company.
Enter the Posting profile to be used for the transfer transactions.
Click on the Journal name.
Open Financial dimensions tab.
Enter the fee head or financial dimensions to be defaulted on the transfer journal.
Note: Financial dimensions set here are applied automatically to the transfer voucher. This controls how the transfer is reported against fee heads or cost centres.
Repeat steps 4-10 for the destination company.
Click Save.
Click Back.
Click Save.

Transfer Customer Credit Balance
When a student transfers from one school to another within the group, any credit balance held at the originating school must be moved so it can be applied to the student's account at the destination school. Before initiating the transfer, staff must confirm the student record exists in the destination school and that the Party ID matches across both companies. Any outstanding advanced tax invoices such as those raised for application fees or enrolment deposits must also be cancelled, as the system transfers net credit balances only. Once confirmed, the transfer is initiated from the originating school's student record. The system automatically generates paired journal entries: one to clear the credit at the originating school and one to post it to the student's account at the destination school.
Note: Before transferring, confirm that the student exists in the destination school and that the Party ID (global ID) is identical in both the originating and destination school. The system uses the Party ID to match the student account across companies. The student account number may differ between schools.
From the FNO dashboard, open Modules ▸ Academic Management.
Expand Students and click All Students.
Search for and open the student record.
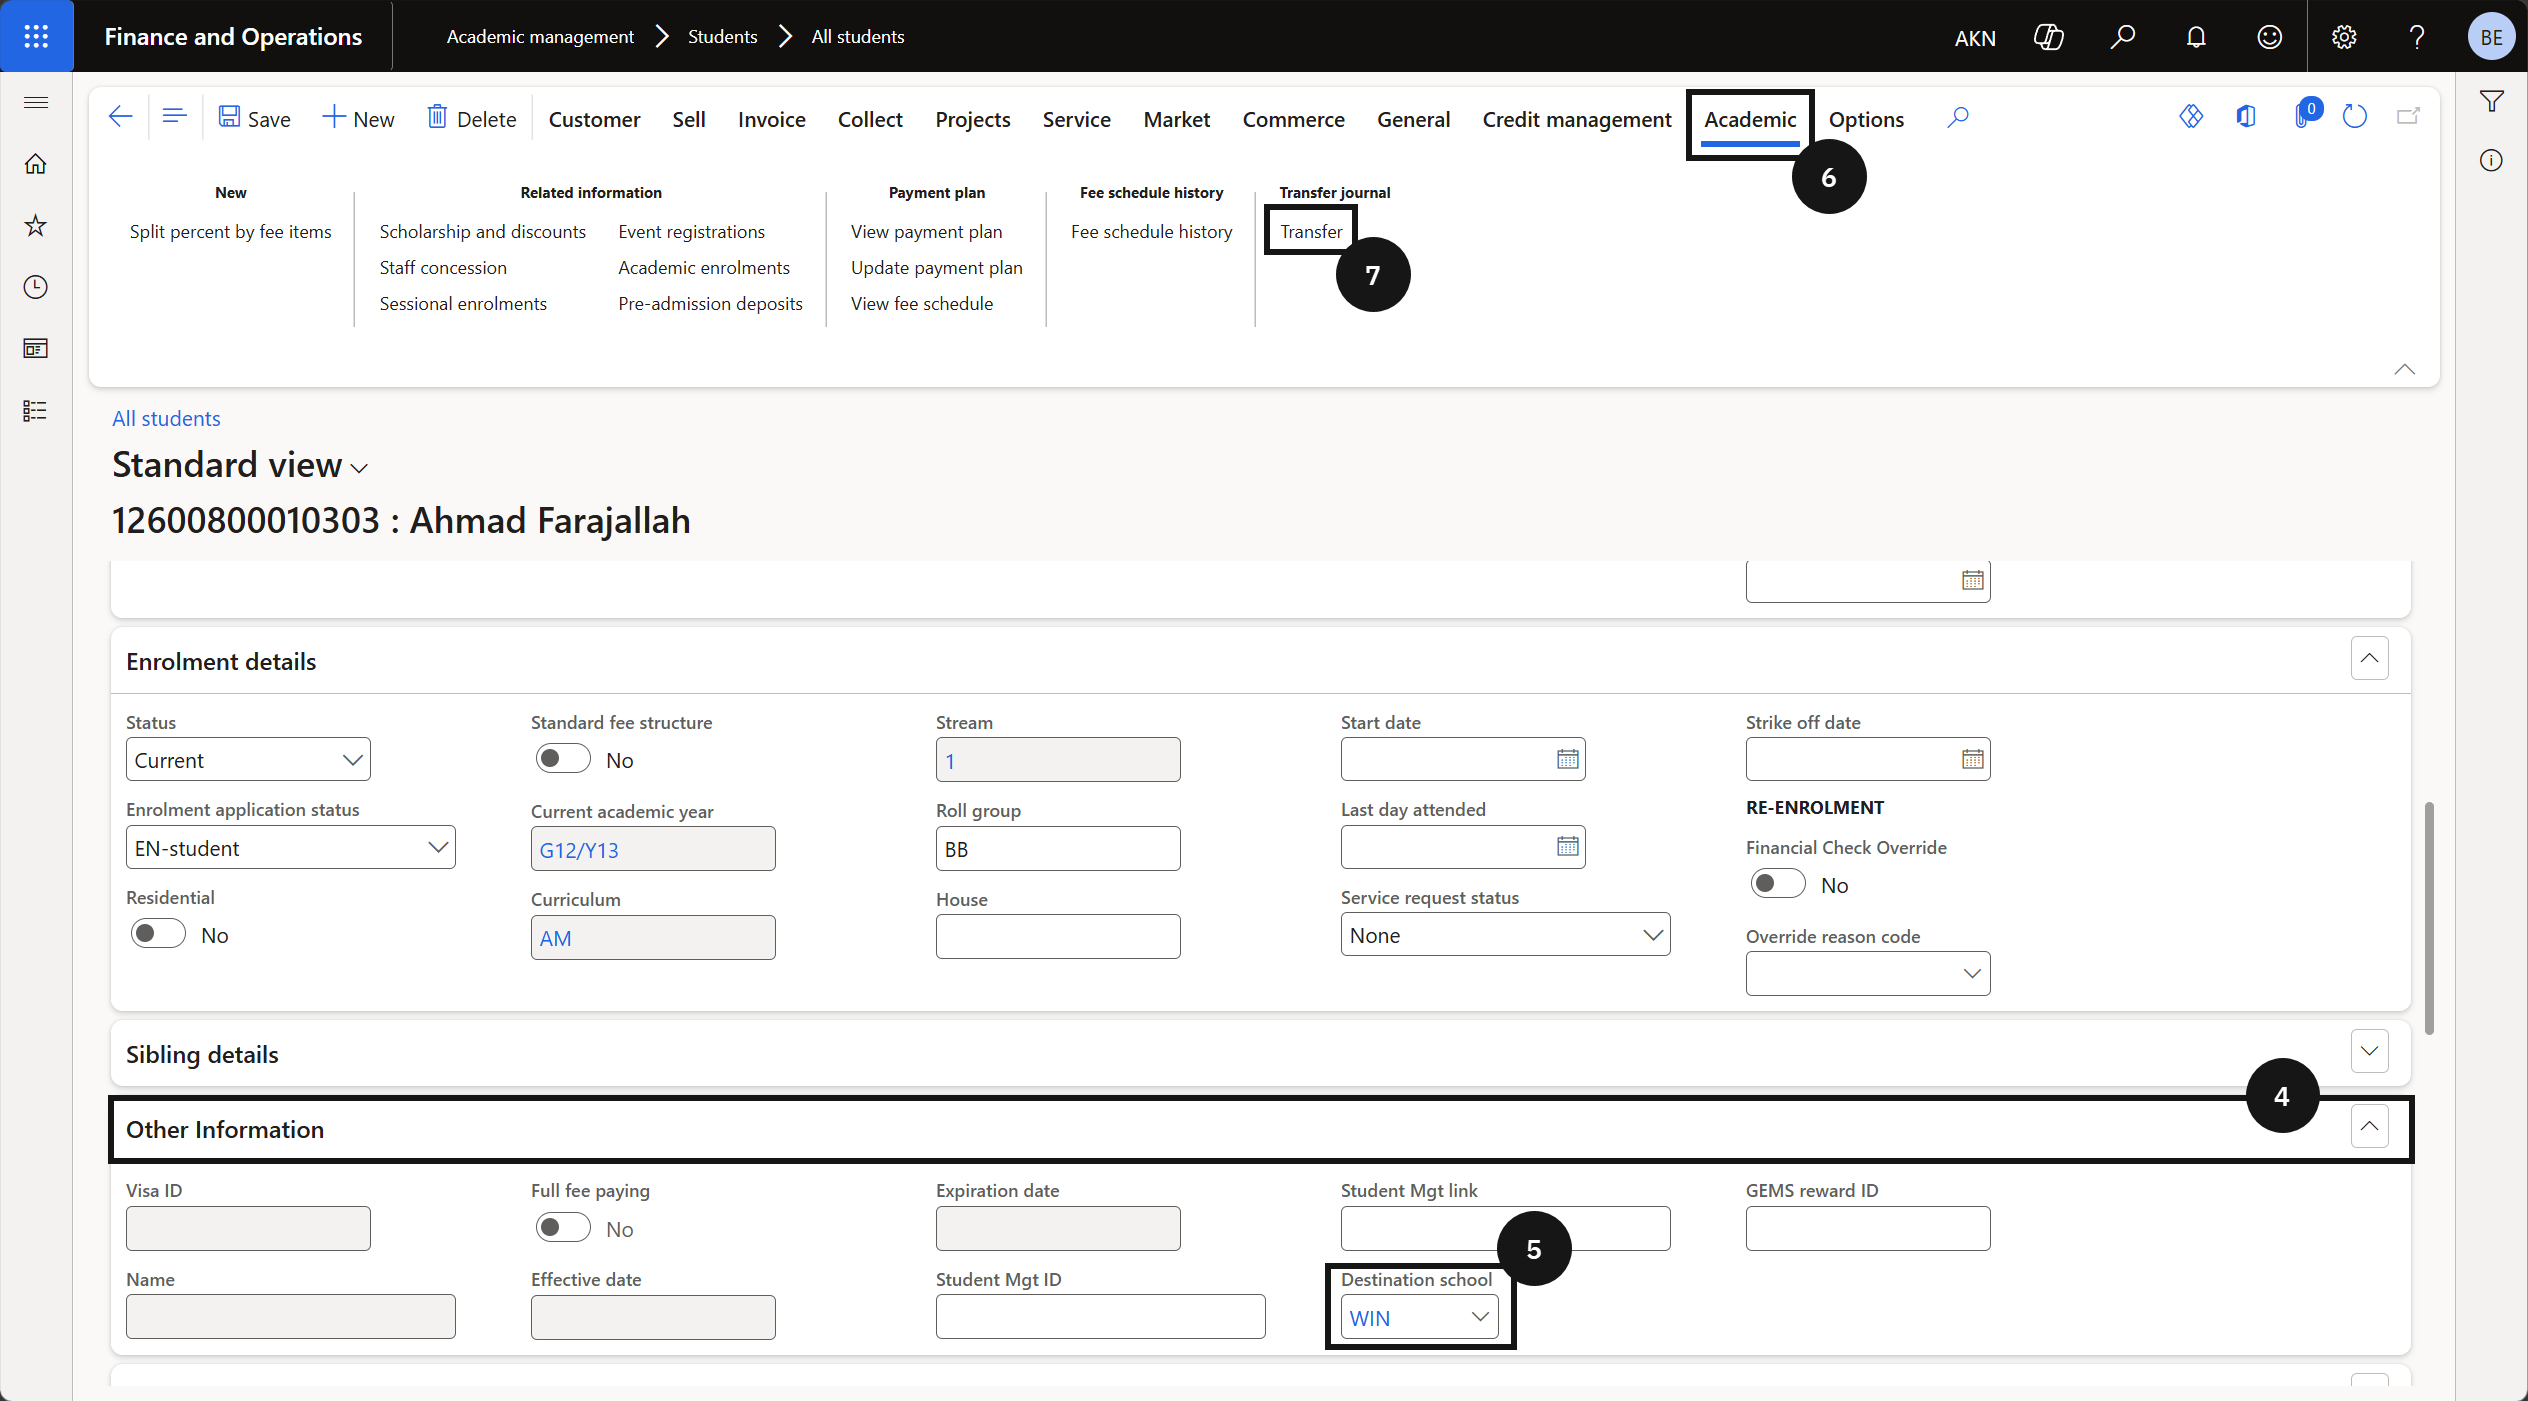
Expand Other Information.
Verify the Destination school field has been populated by the CE system.
Note: The CE system updates the Destination school field in the student master automatically when a transfer is initiated. This field identifies which company the credit balance will be transferred to.
Open Academic in the toolbar.
Click Transfer.
Note: Confirm the student's balance is in credit and that no advanced tax invoices remain outstanding before transferring.
Review the credit balance displayed in the confirmation dialog.
Click OK to confirm the transfer.
Note: The system automatically generates two transfer journals — one in the originating school to clear the student's credit balance, and one in the destination school to post the corresponding credit to the student's account there.