Debt Follow-up
Debt Follow-Up supports the management and resolution of outstanding student balances. It covers processes for customer write-back, bulk write-off of unrecoverable debts, debt classification, and the use of Excel upload options to manage excluded students or update debt records in bulk. These tools allow finance teams to maintain accurate accounts receivable records and manage aged debt in a structured and auditable way.
Customer Write-back
Customer Bulk Write-off
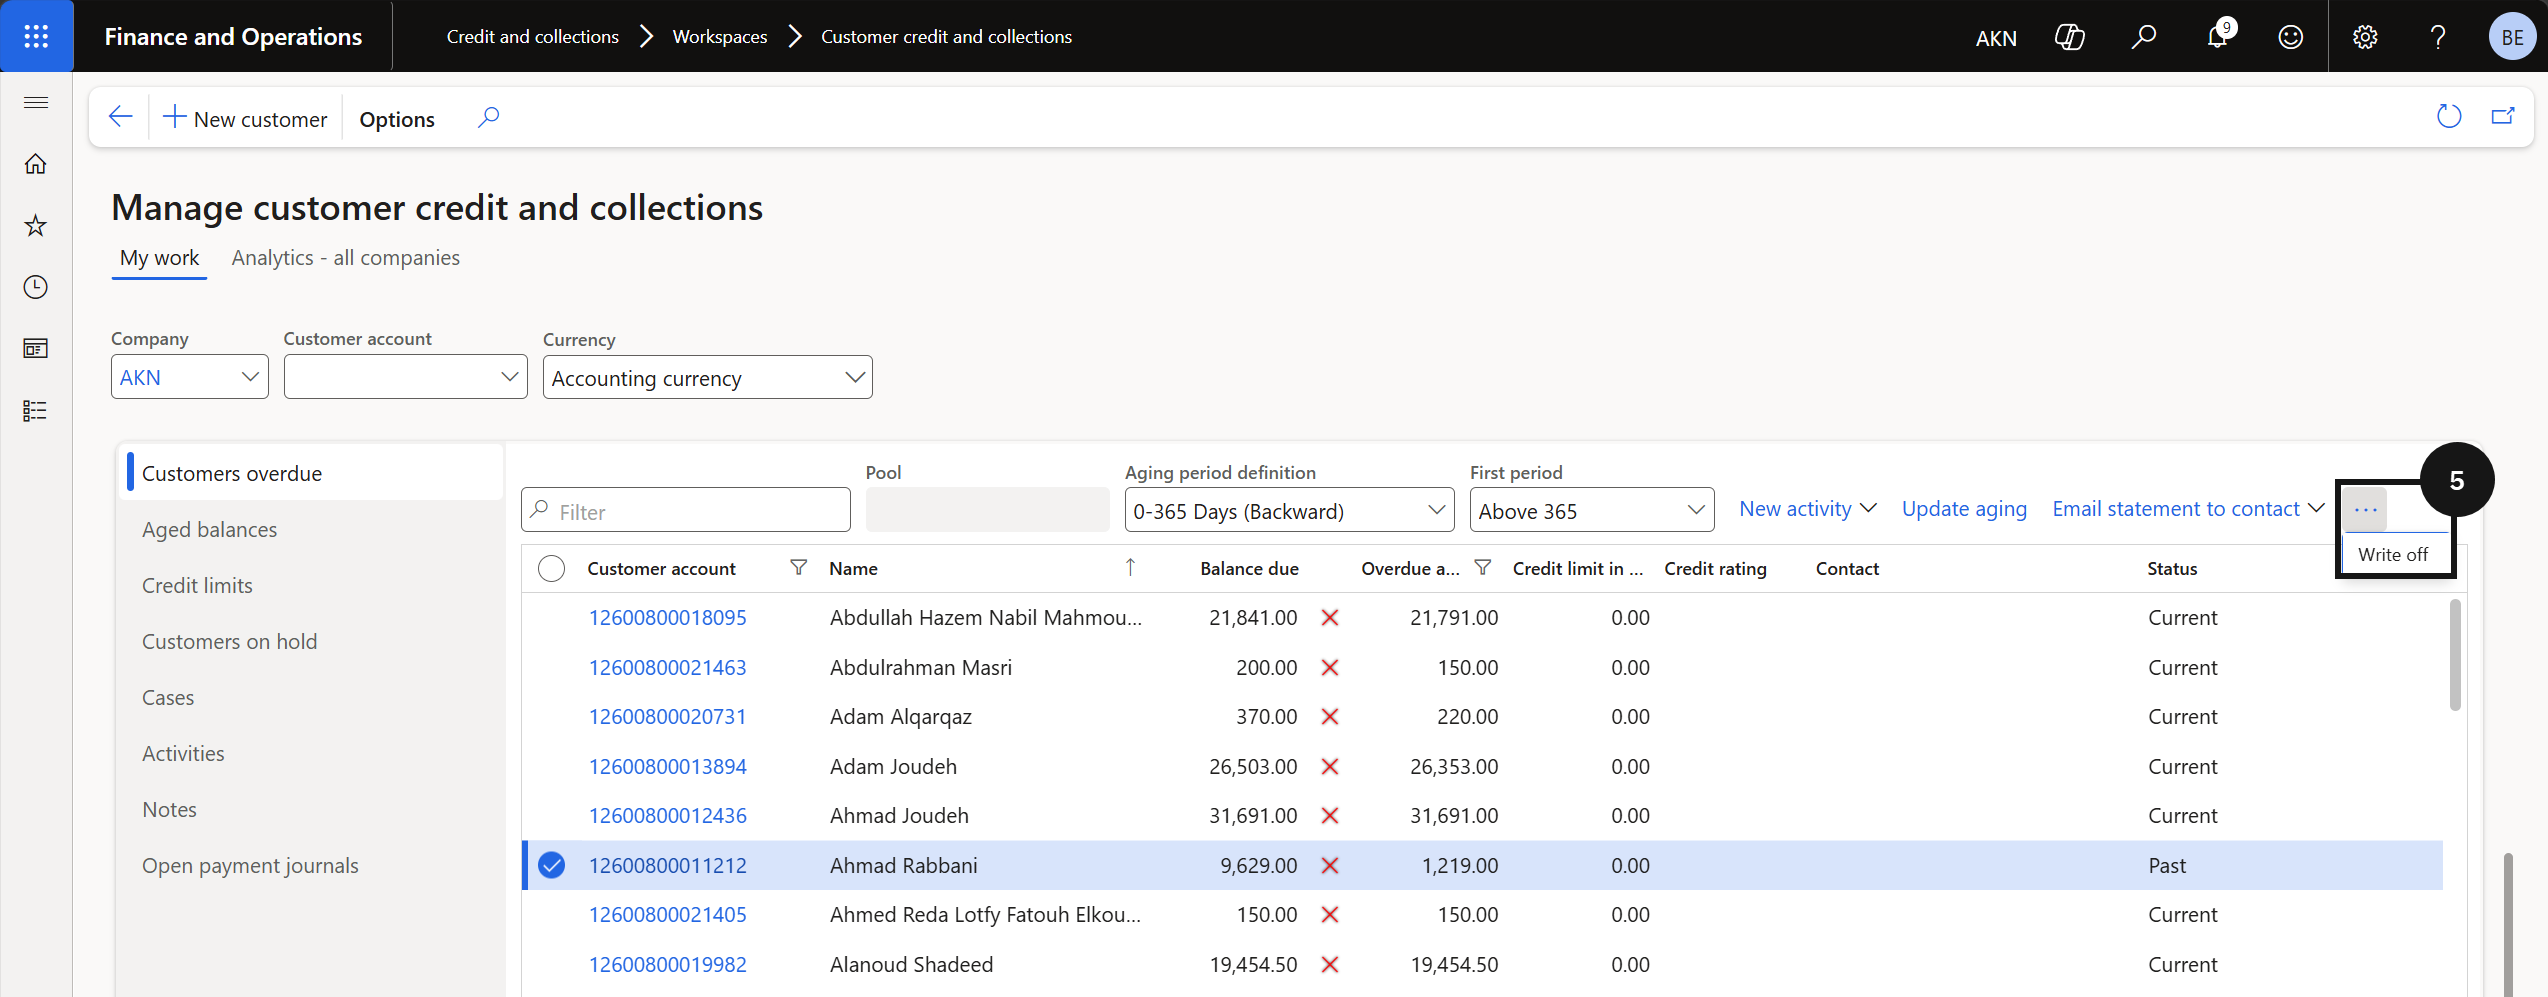
The bulk write-off process removes unrecoverable debt balances from accounts receivable by posting an offsetting journal entry to the configured bad debt account. Before running a write-off, ageing definitions, reason codes, and the posting account must already be in place. Staff access the write-off function from the Customer credit and collections workspace, specify the date and reason code, and either submit the resulting journal for approval or post it directly if no workflow is active.
Note: Ageing definitions, reason codes, and posting accounts must already be configured.
From the FNO dashboard, open Modules ▸ Credit and Collections.
Expand Setup then click Aging period definitions.
Review the ageing criteria and identify the overdue customers or transactions.
Go back to Credit and Collections, expand Workspaces, then click Customer credit and collections.
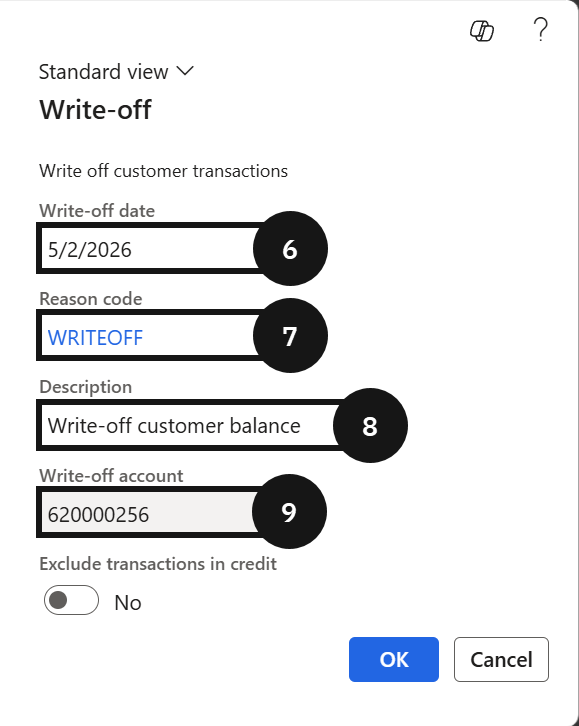
Click Write Off.
Enter the Write Off Date.
Select the Reason Code.
Enter a Description.
Confirm the Posting account.
Click OK to create the write-off journal.
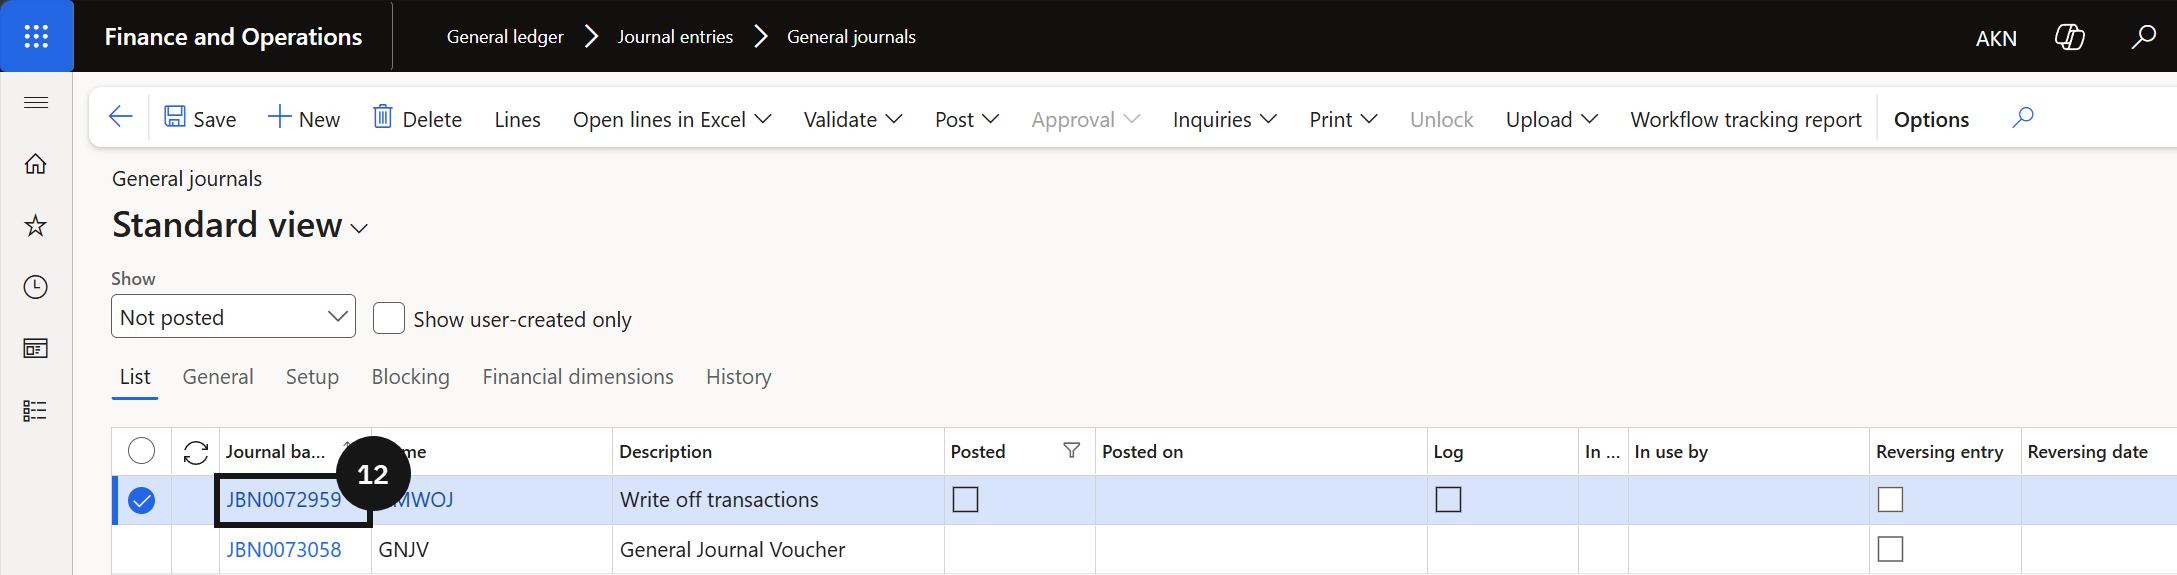
Go to Modules ▸ General Ledger ▸ Journal entries ▸ General journals.
Locate and open the new journal.
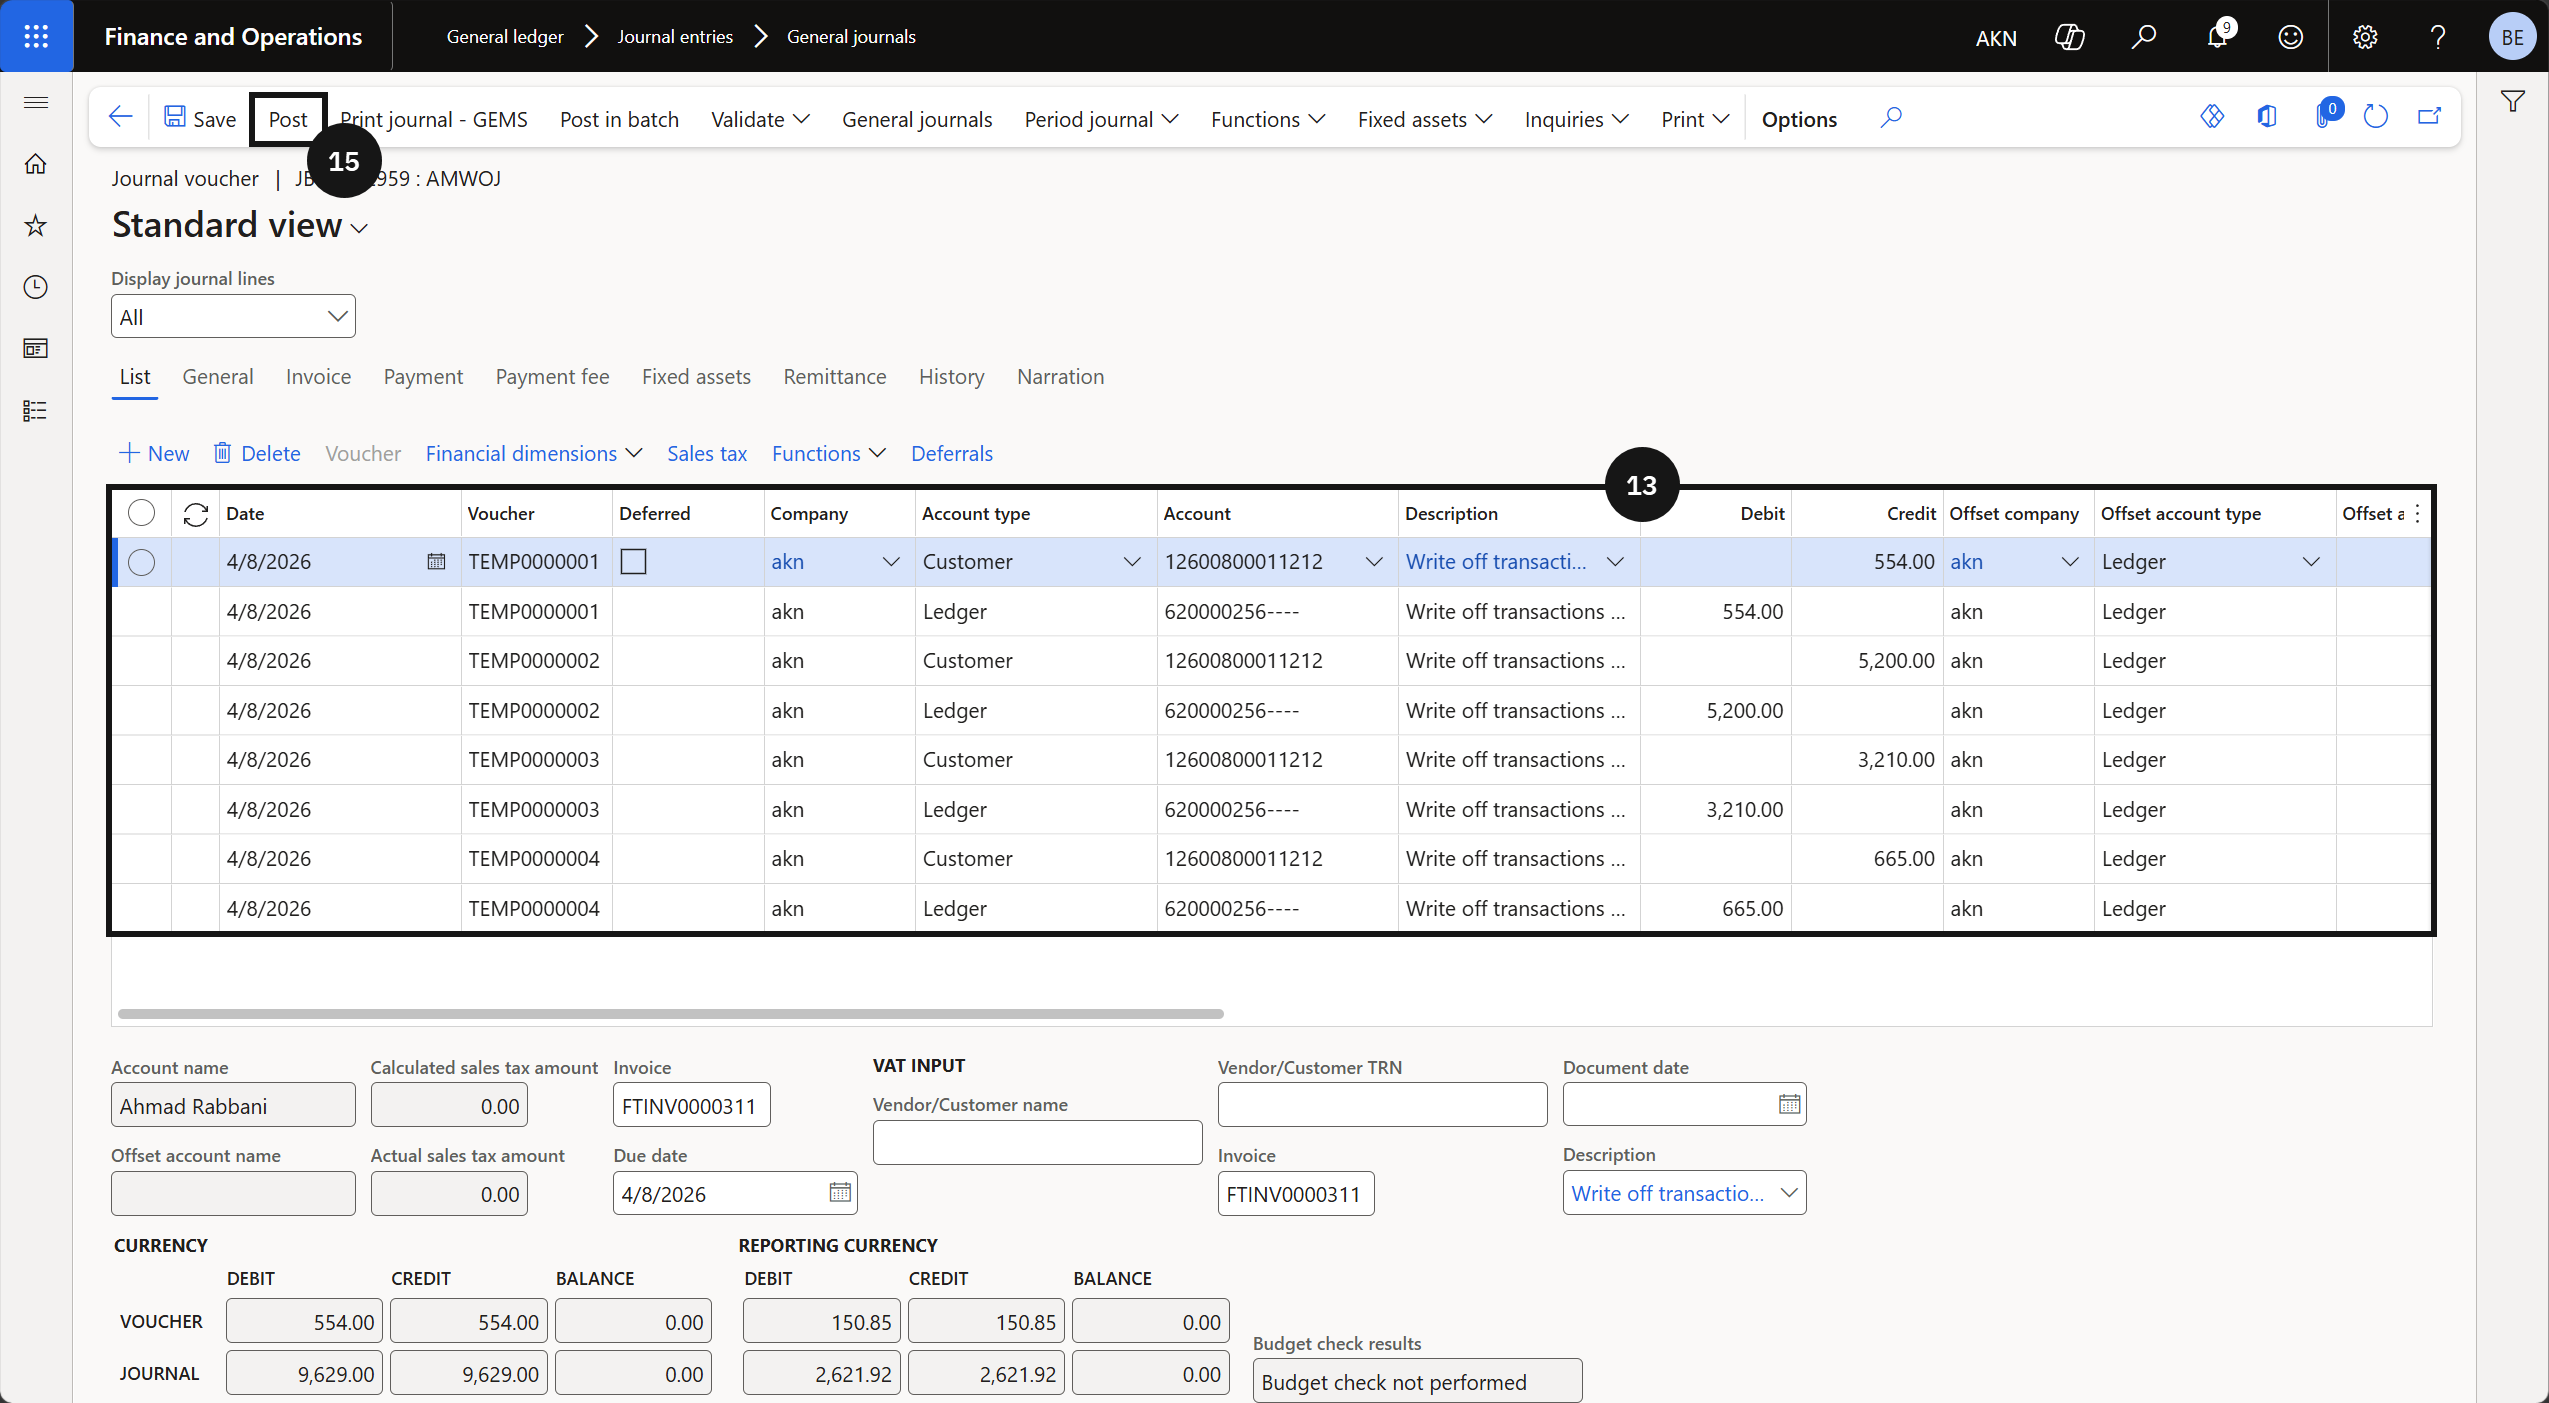
Review the new journal.
Submit the journal for workflow approval, if required.
Click Post to finalise the write-off.
Note: If workflow is not enabled, post the journal directly.
Debt Classification
Excel Upload Options
Bad Debt Provision
Record Debtor Notes
Debtor notes are used to record interactions with fee payers — such as phone calls or promises to pay — directly against the customer's account. Notes can be dated and filtered, and each entry can be reviewed in full detail at any time through the customer collections view.
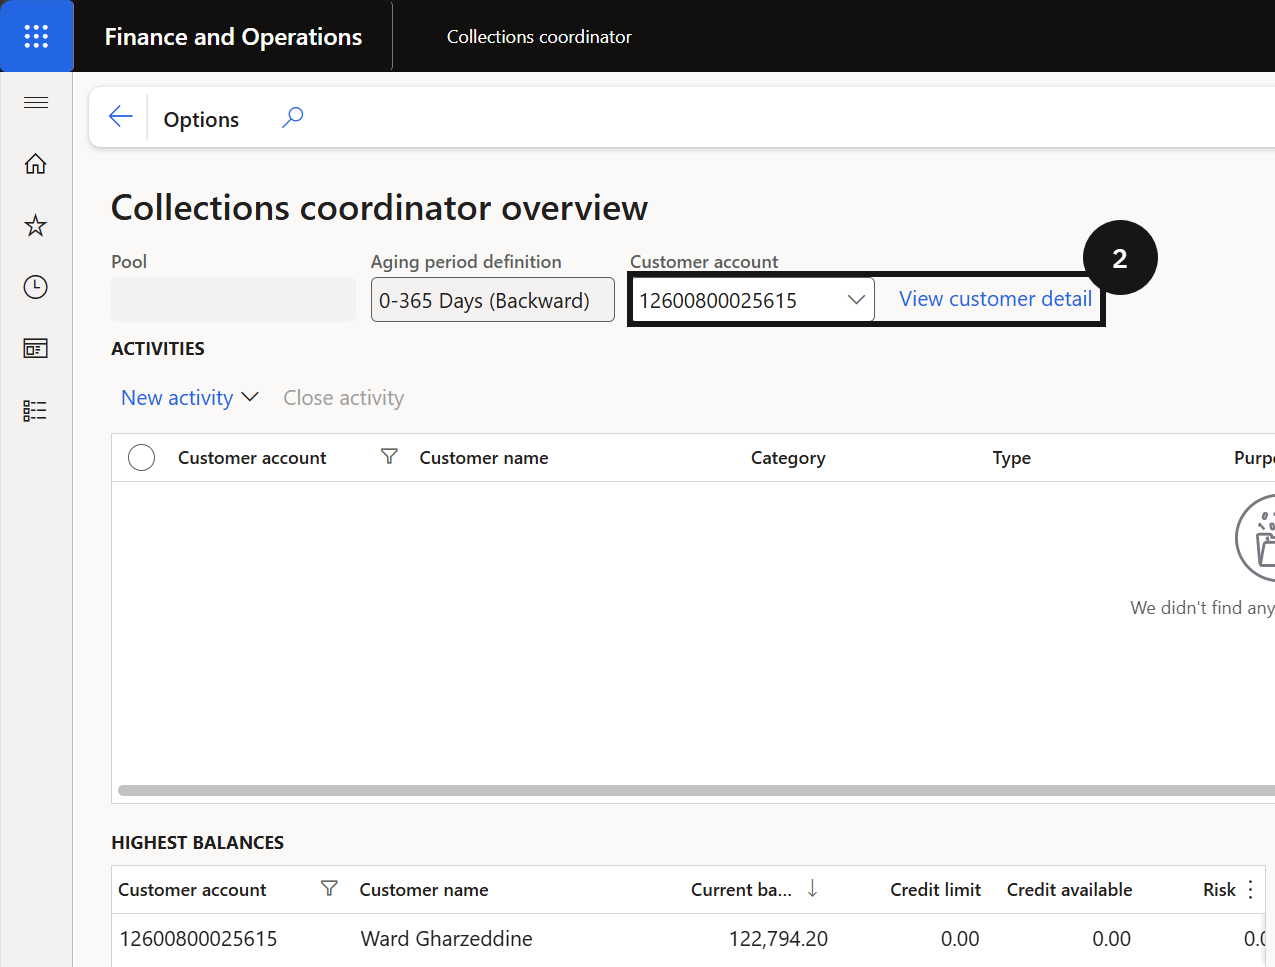
From the FNO dashboard, open Modules ▸ Workspaces ▸ Collections coordinator.
Locate the relevant debtor account and click View customer detail.
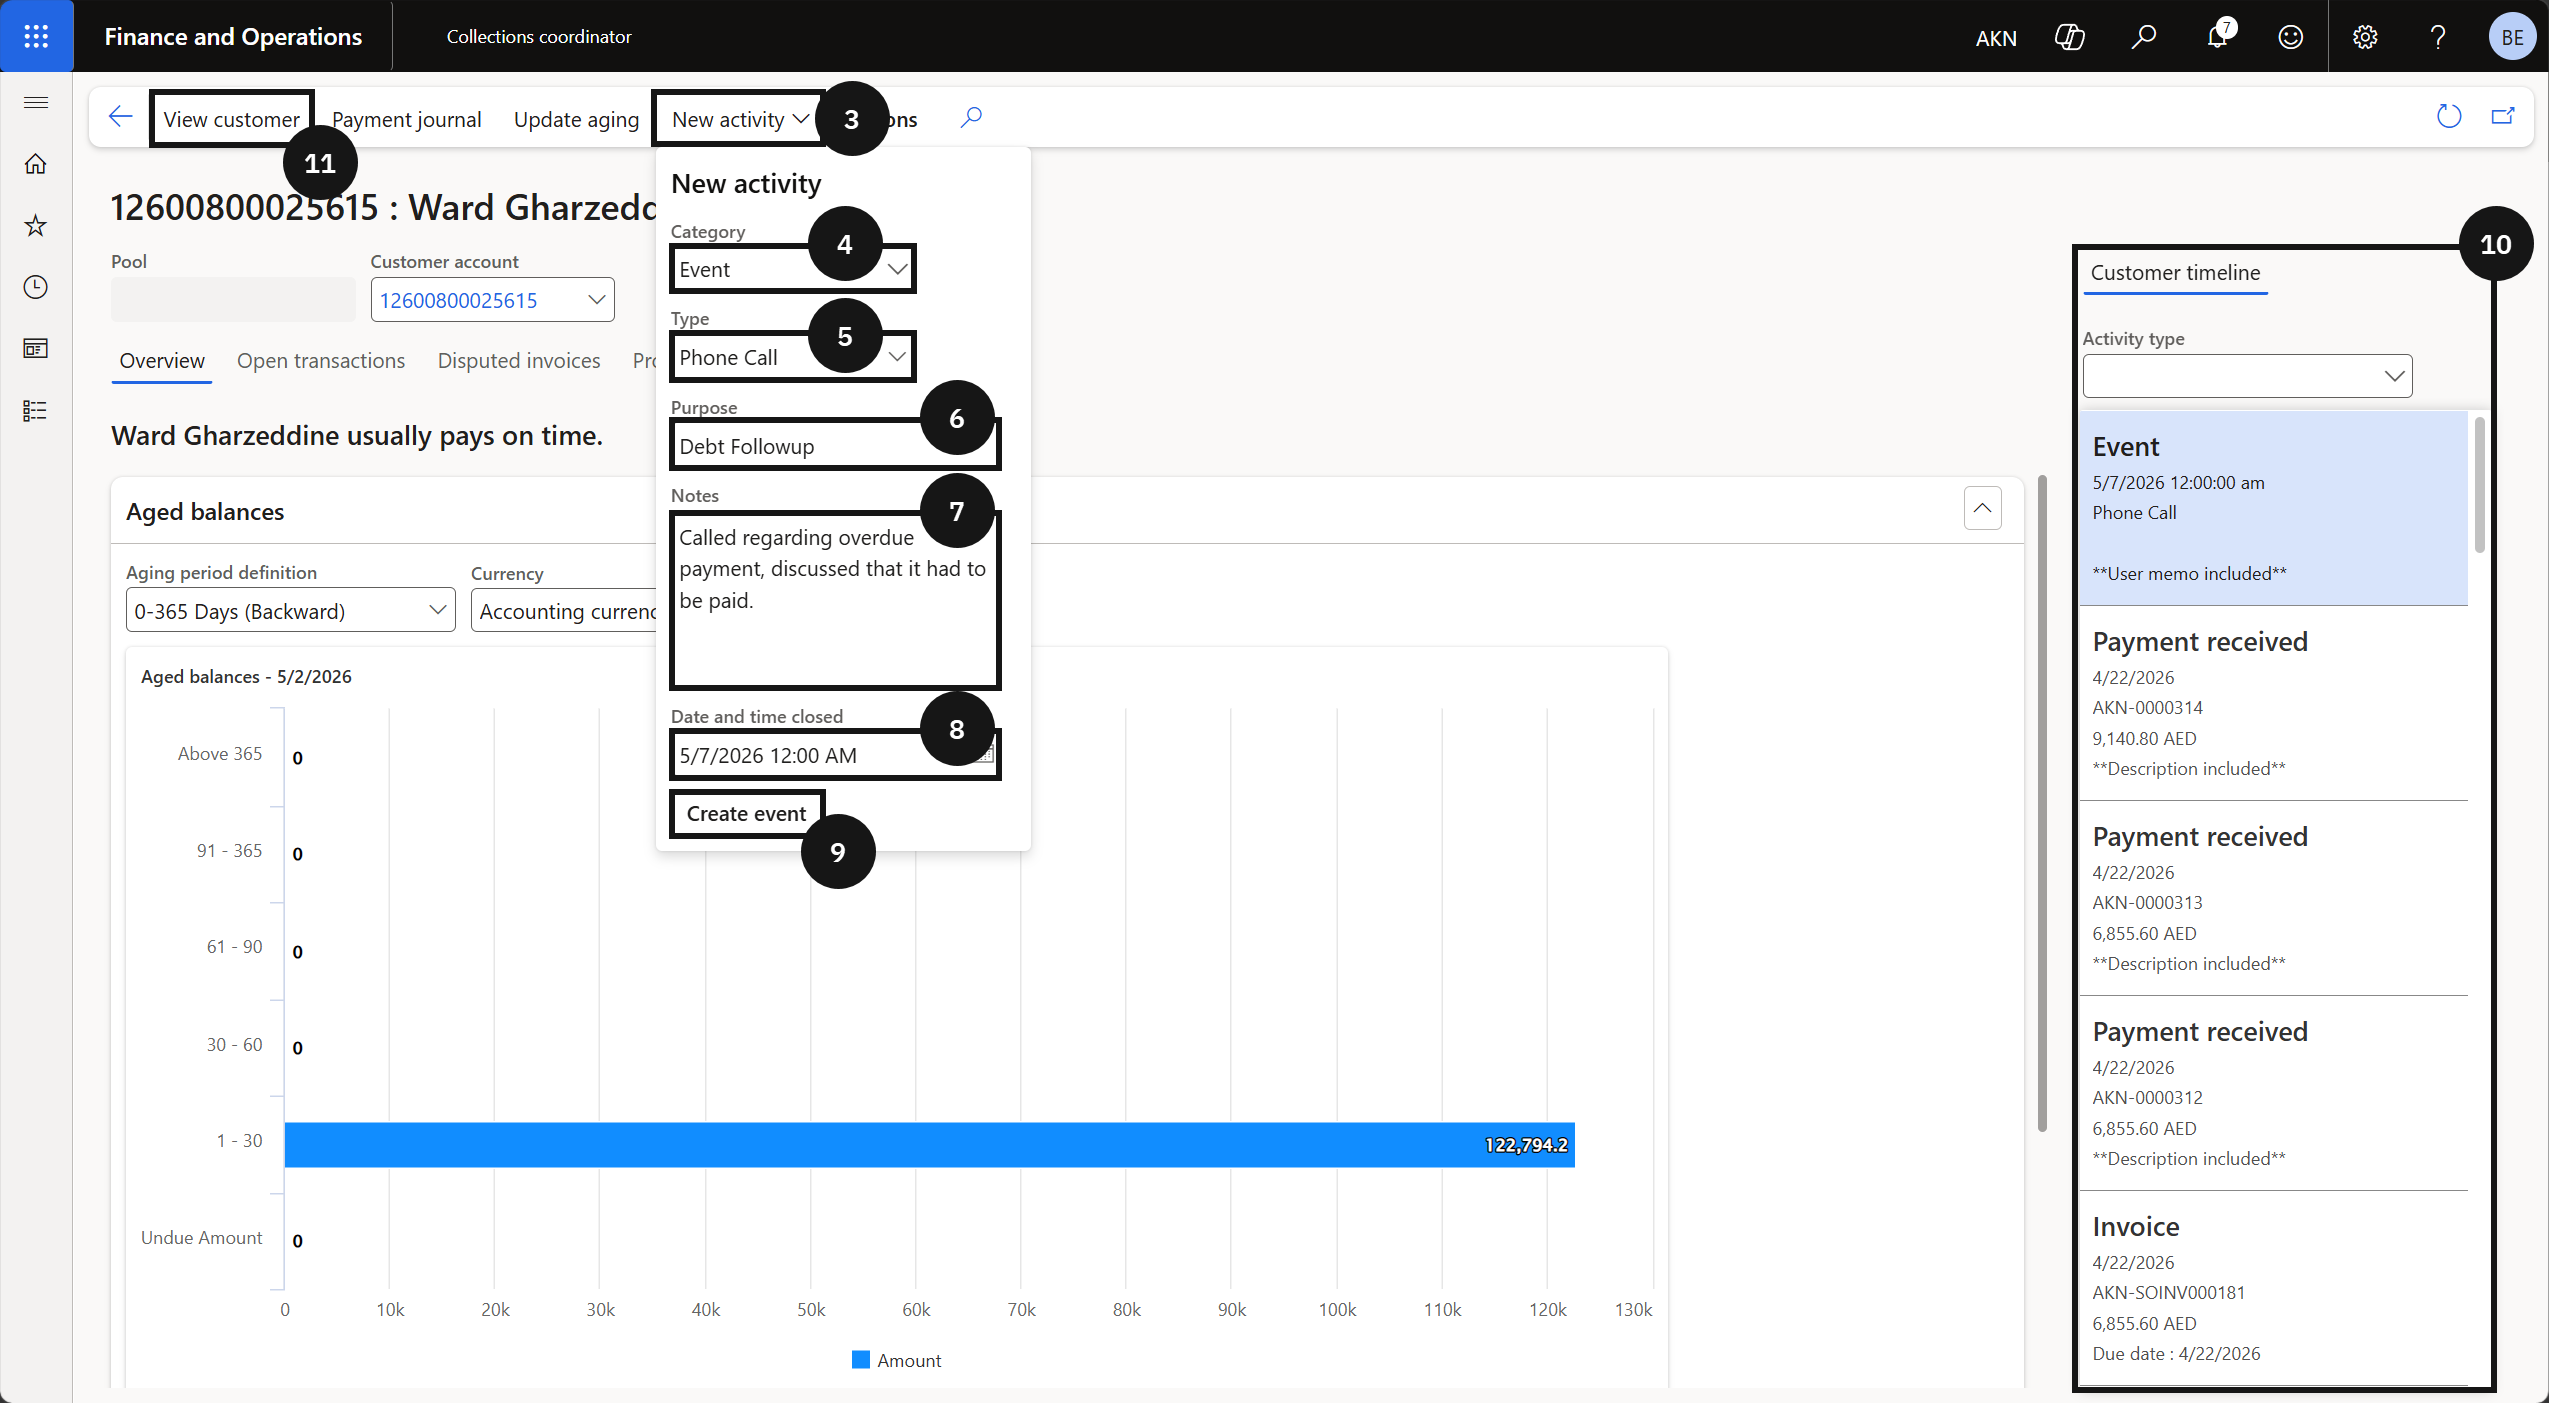
Click the New activity dropdown.
Select the Event category.
Select the Type.
Enter the Purpose of the interaction.
Enter the details of the interaction in the Notes field.
Set the Date and time of the interaction.
Note: The date and time field can be set to a future date to record a scheduled follow-up activity.
Click Create event.
Review the created note in the Events list on the Customer detail screen.
Note: Hover over a note in the events list to preview the note content without opening the full record.
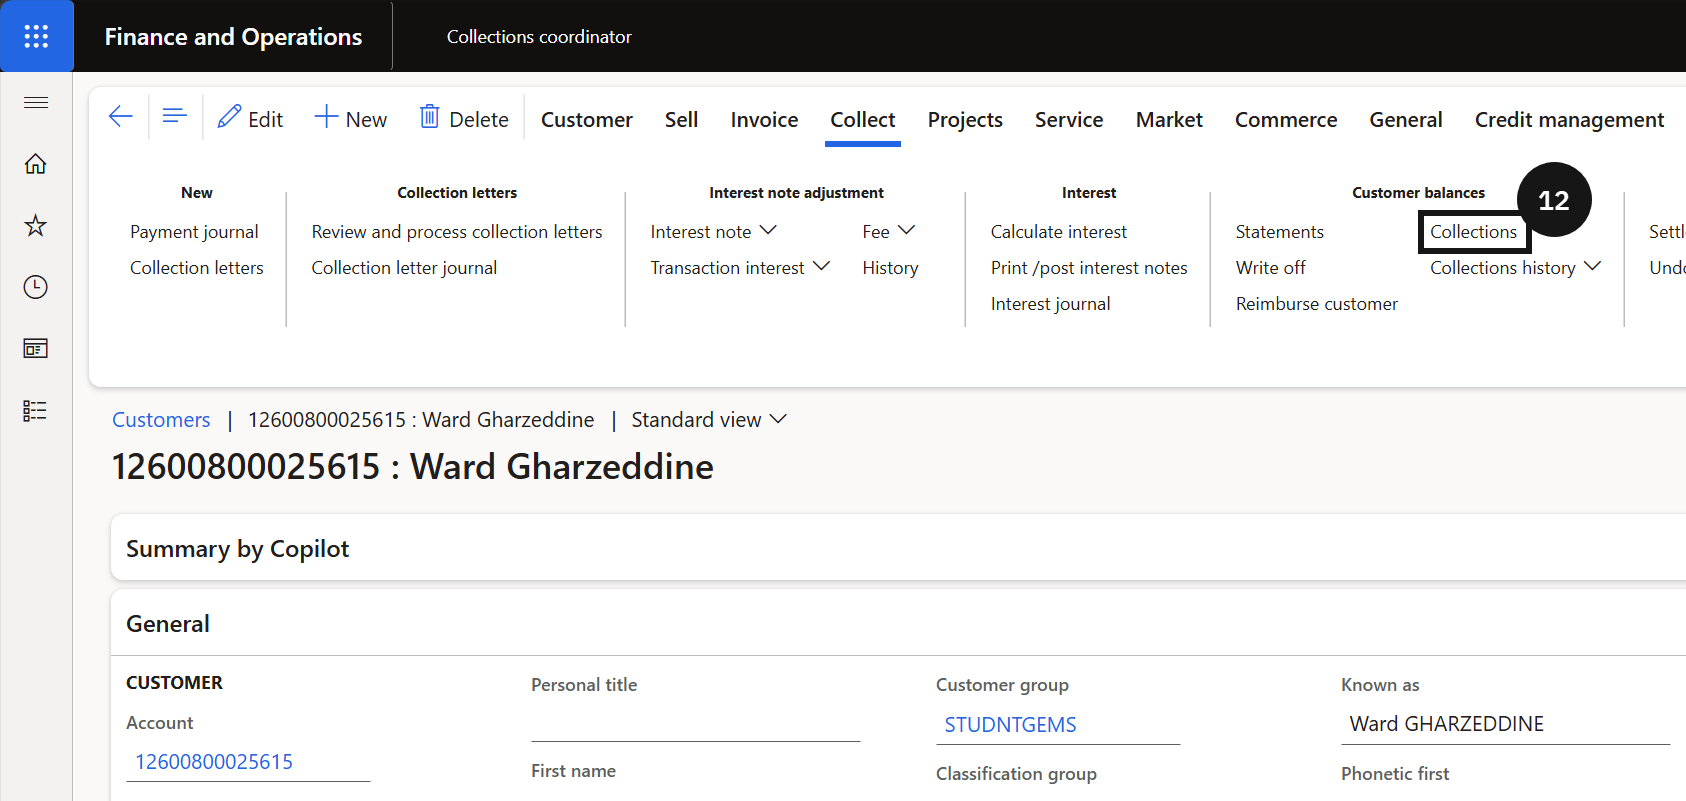
Click View customer to open the full note history.
Open Collect and click Collections.
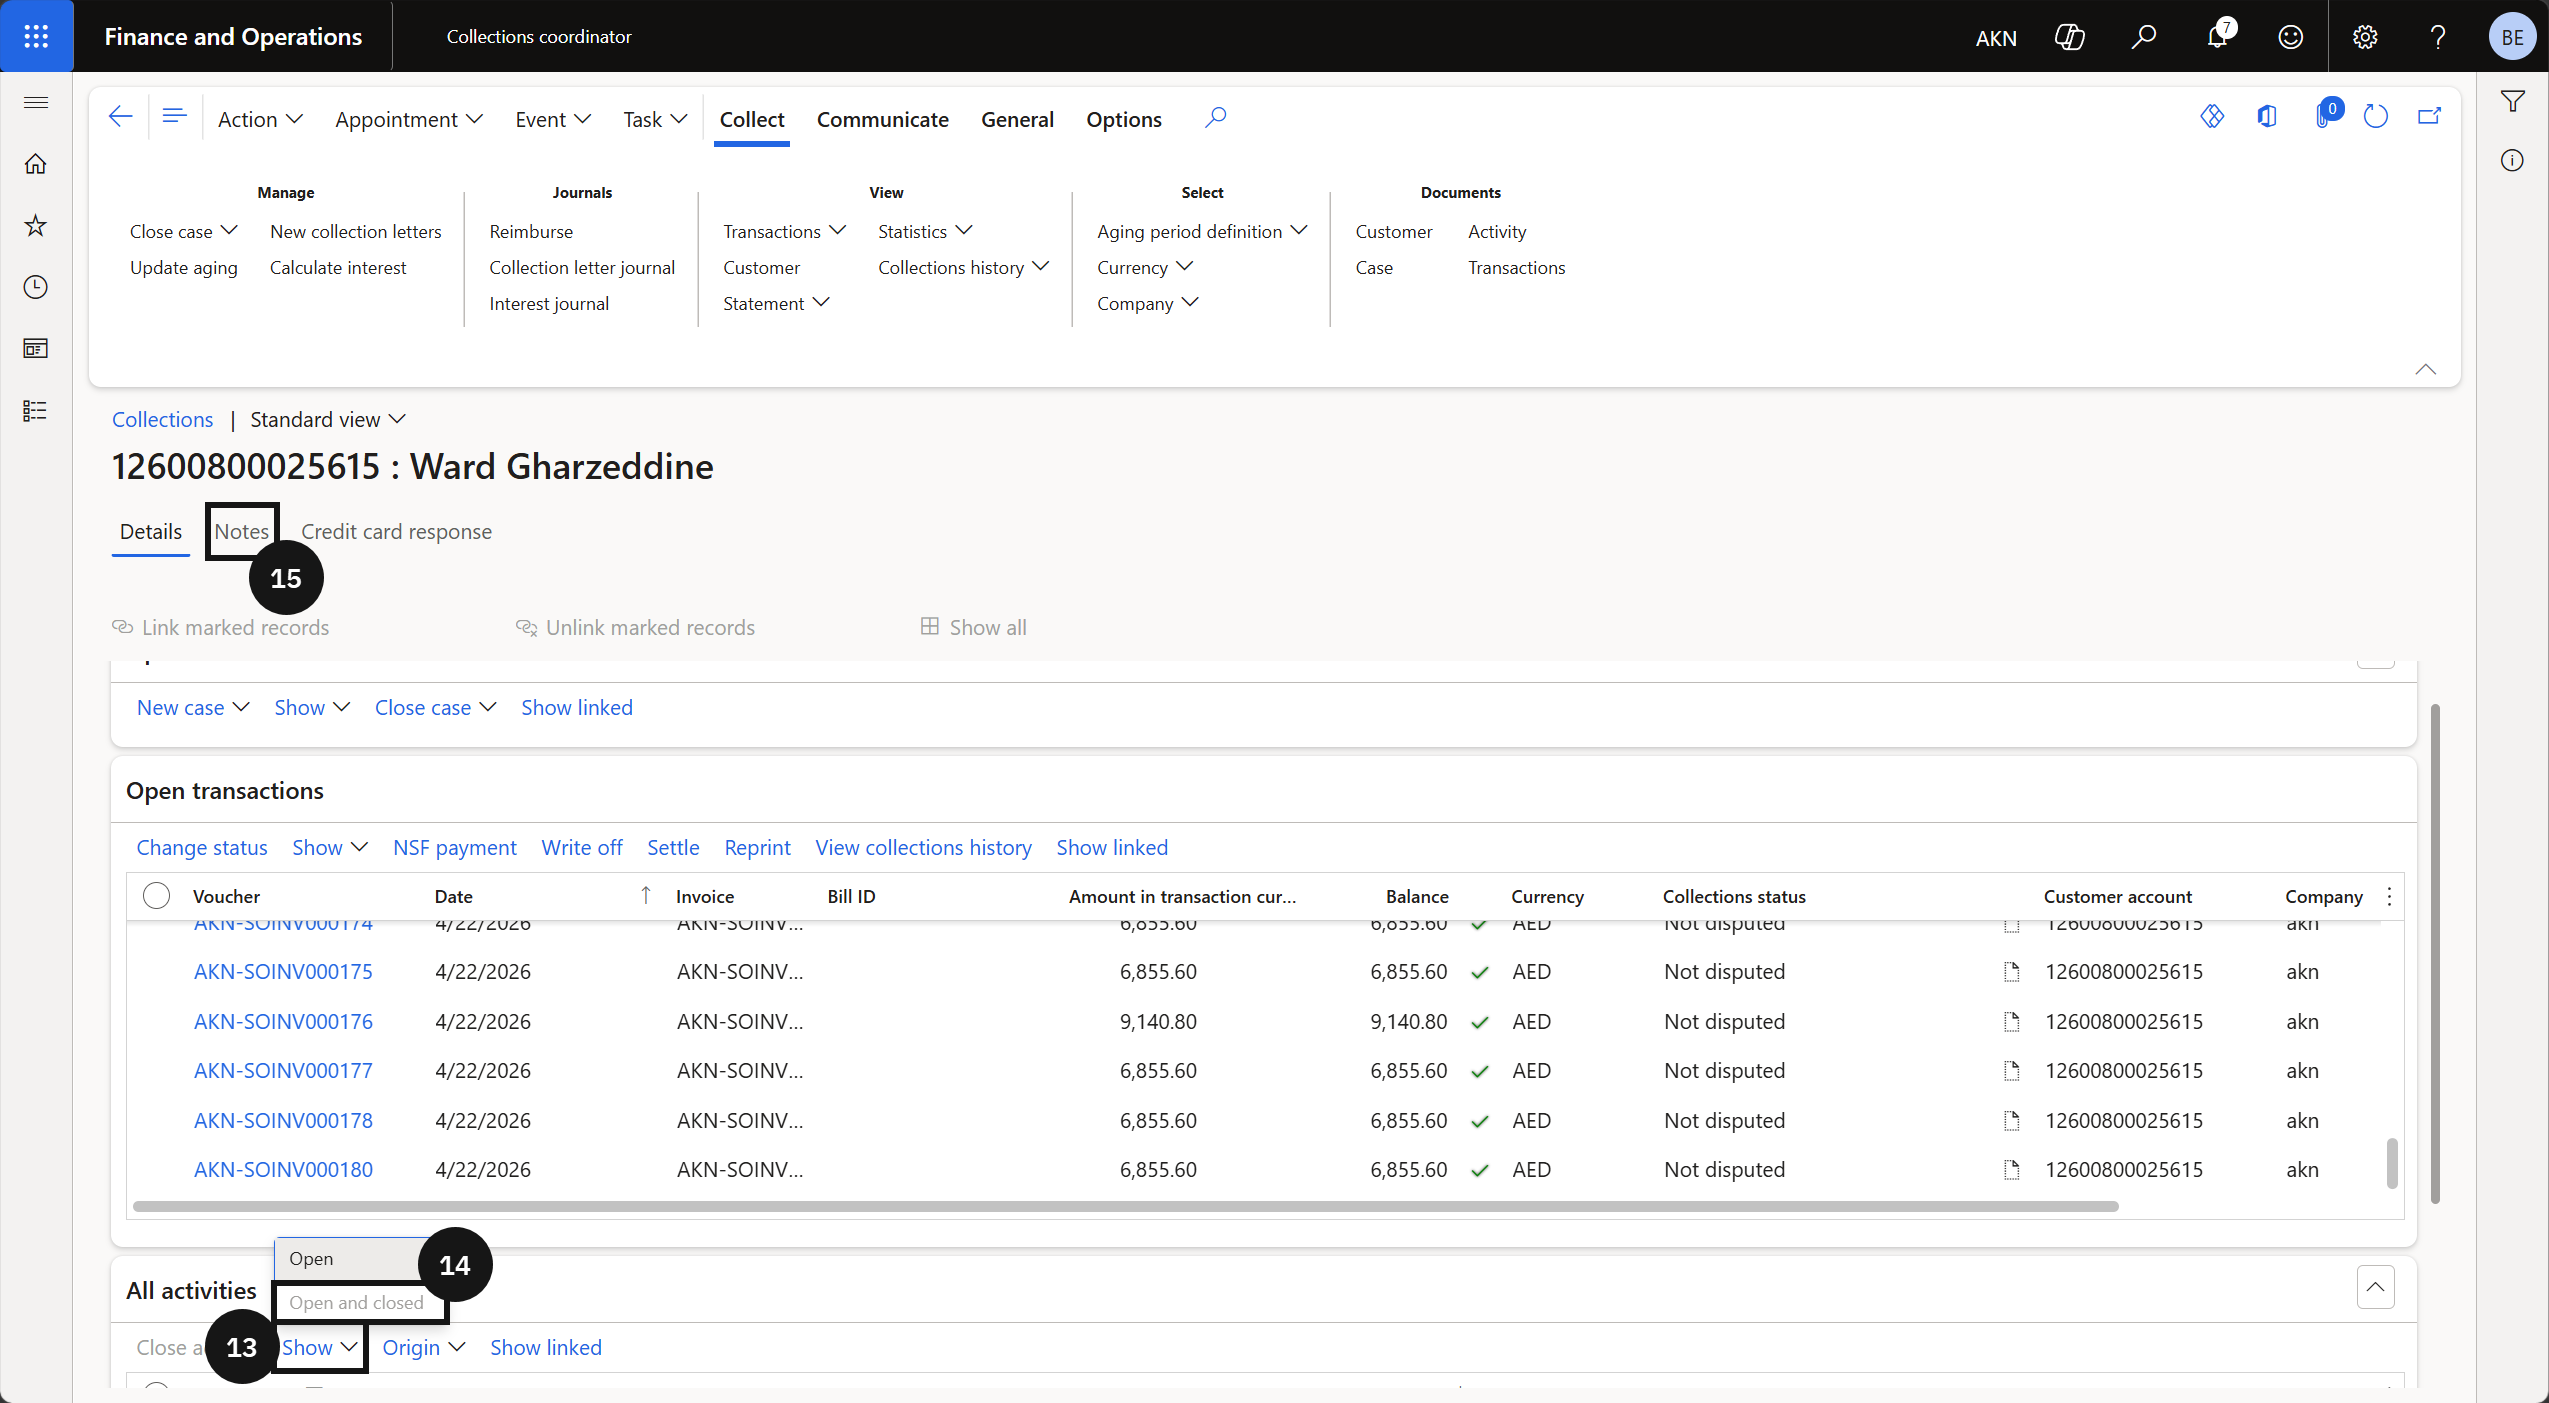
Click Show in All activities.
Select Open and closed to display all notes, including resolved items.
Click the Notes tab to review.