Dana
Post Fee Invoices
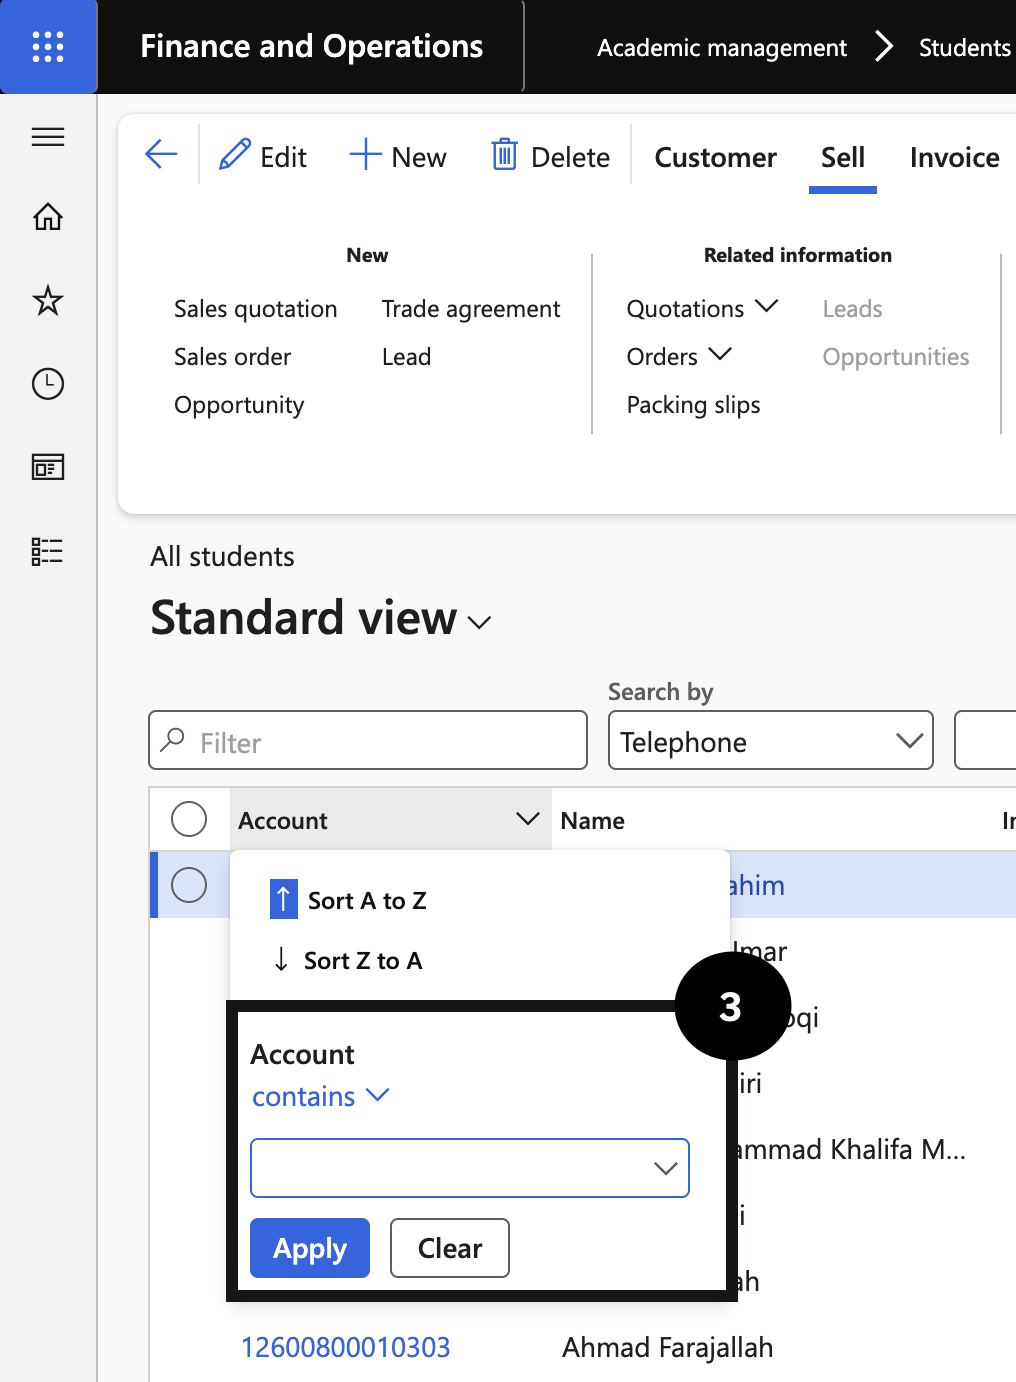
Navigate to Modules ▸ Academic Management ▸ Students ▸ All students.
Open the Account column filter.
Enter the student’s account number in the Account field using the contains filter operator, then click Apply.
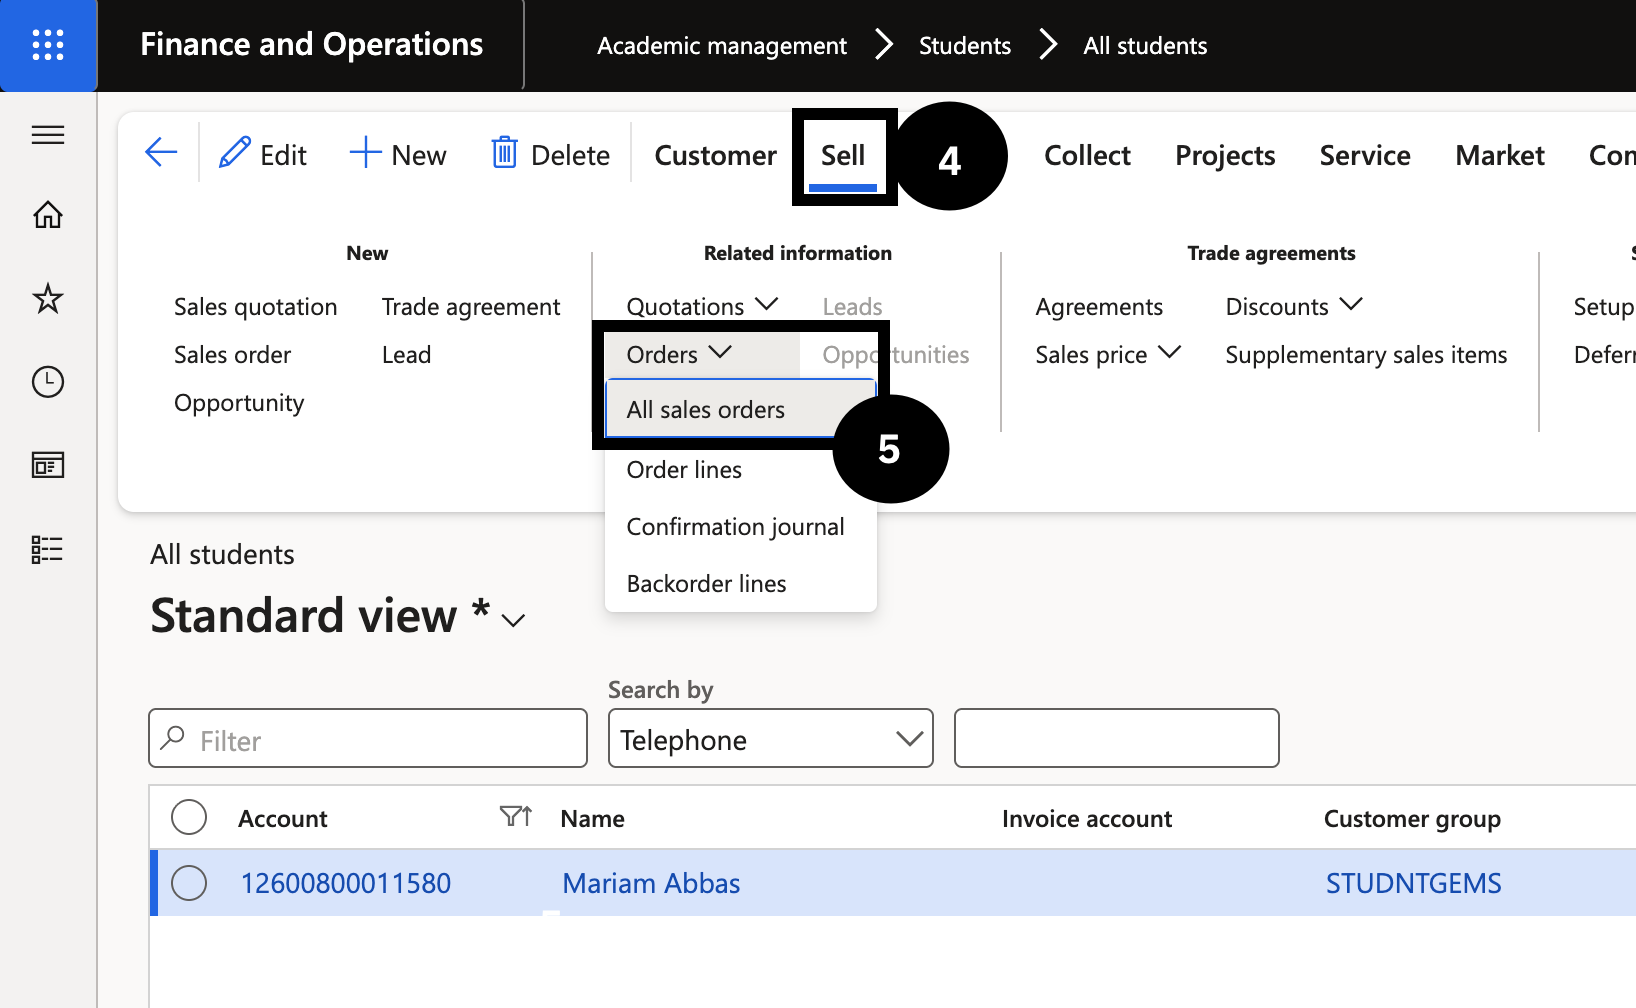
Click Sell in the toolbar.
Expand Orders in the Action Pane and click All sales orders to locate the open proforma invoice.
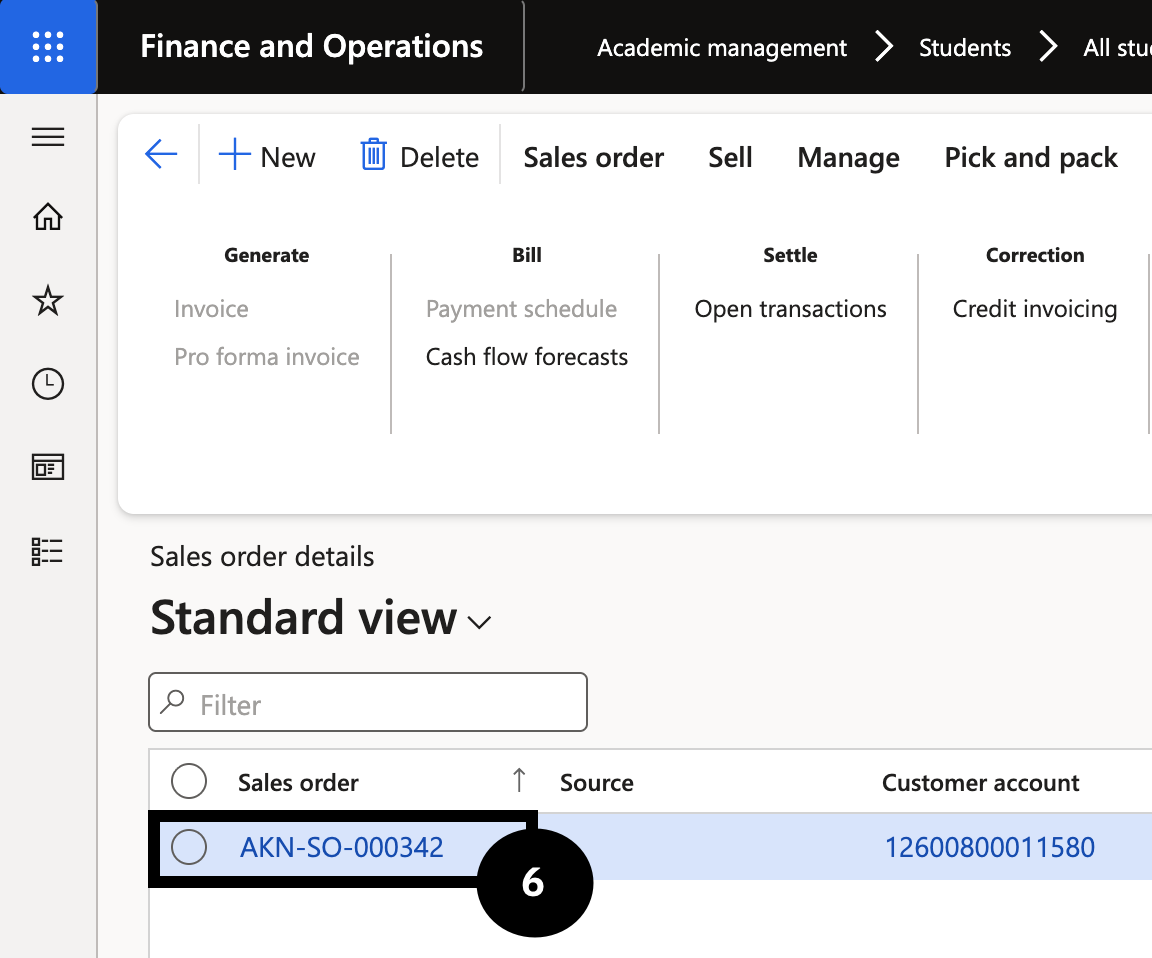
Click on the link in the Sales column for sales order details.
Note: The status of the sales order must be open to complete the next steps.
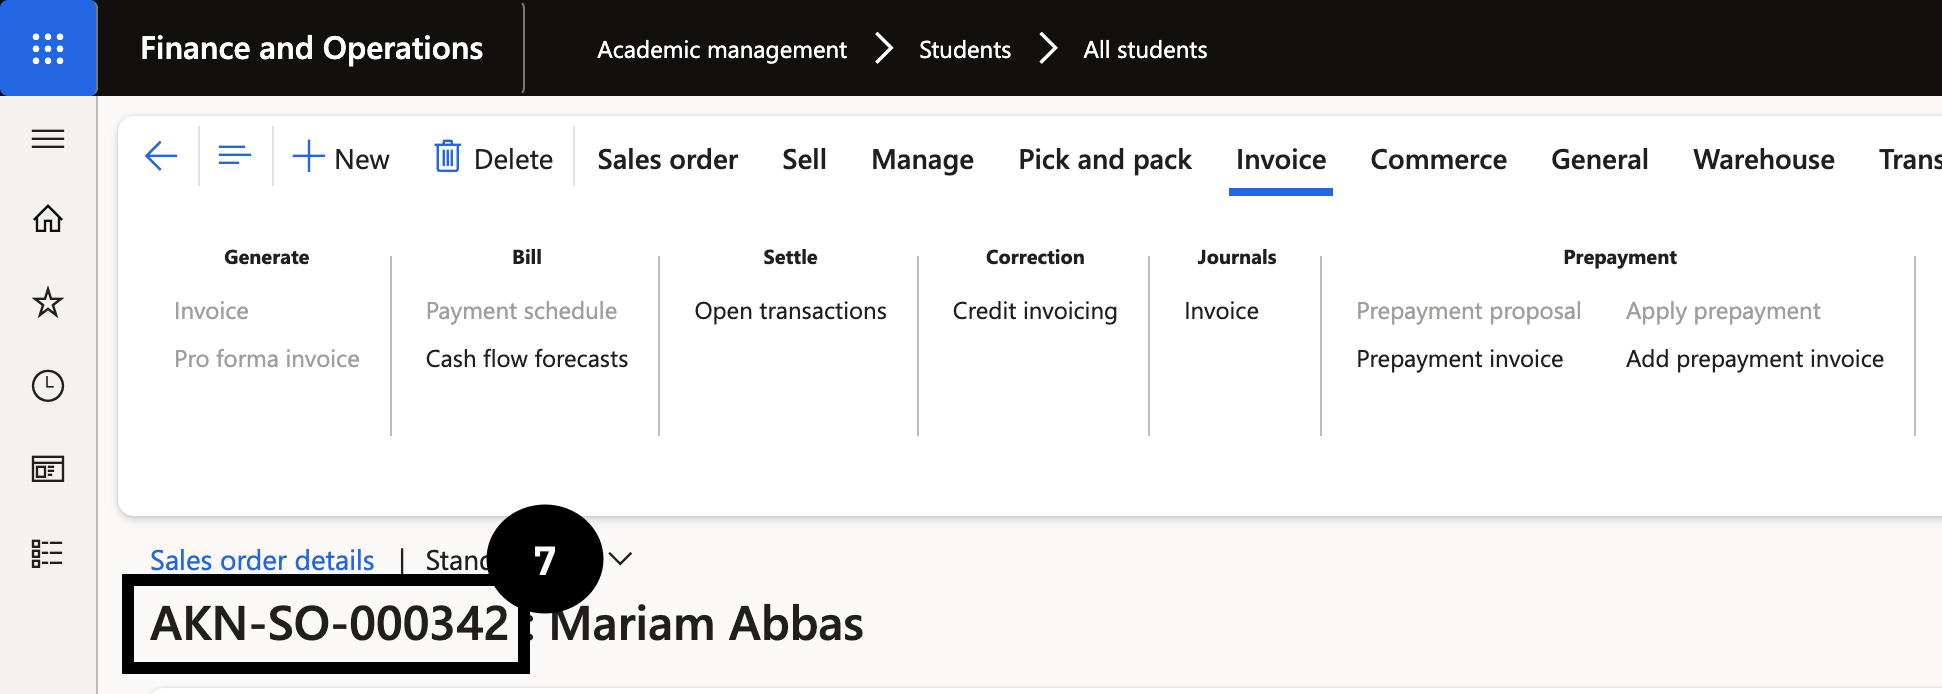
Copy the sales order number from the header.
Close the page.
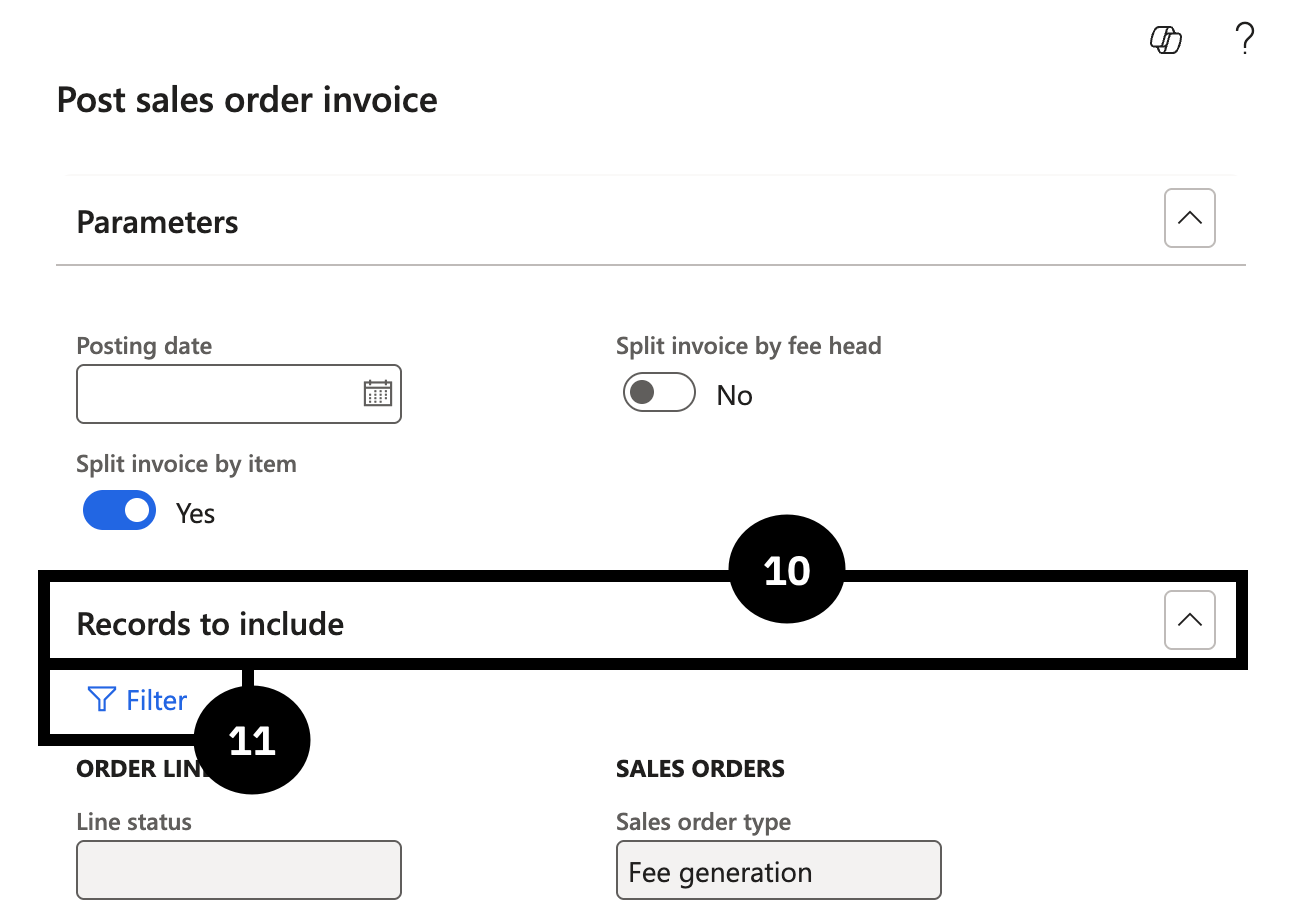
Navigate to Modules ▸ Academic Management ▸ Periodic Tasks ▸ Post sales order invoice.
Expand Records to include.
Click Filter.
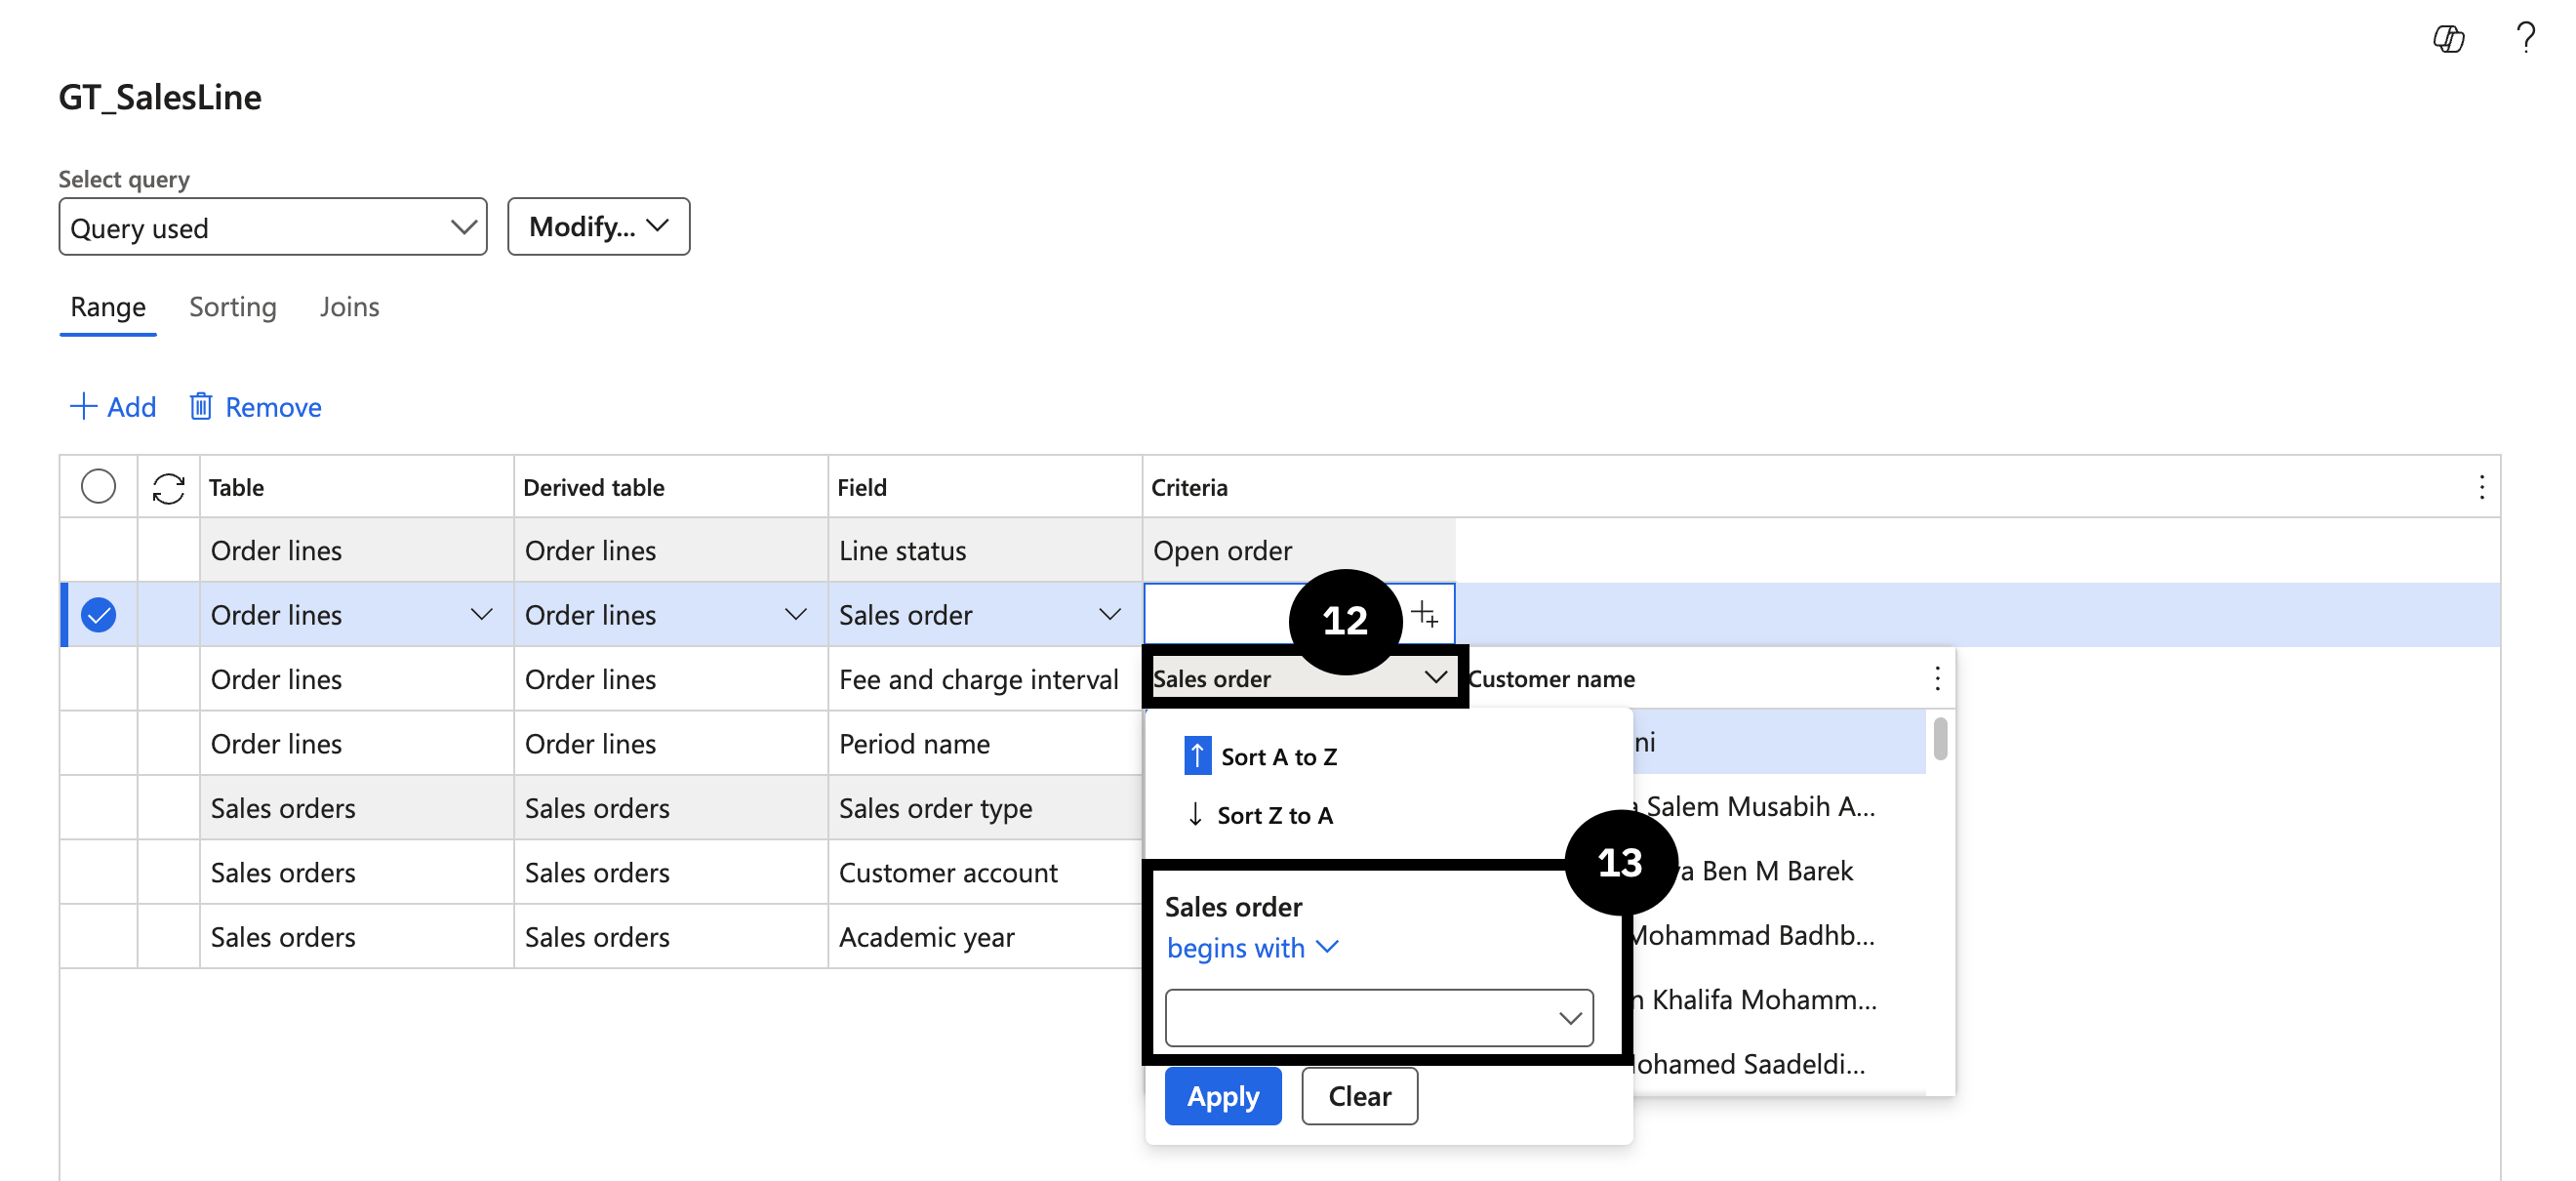
Click the empty Criteria cell in the column to the right of Sales order.
Enter the sales order number copied earlier into the Sales order field using the begins with filter operator.
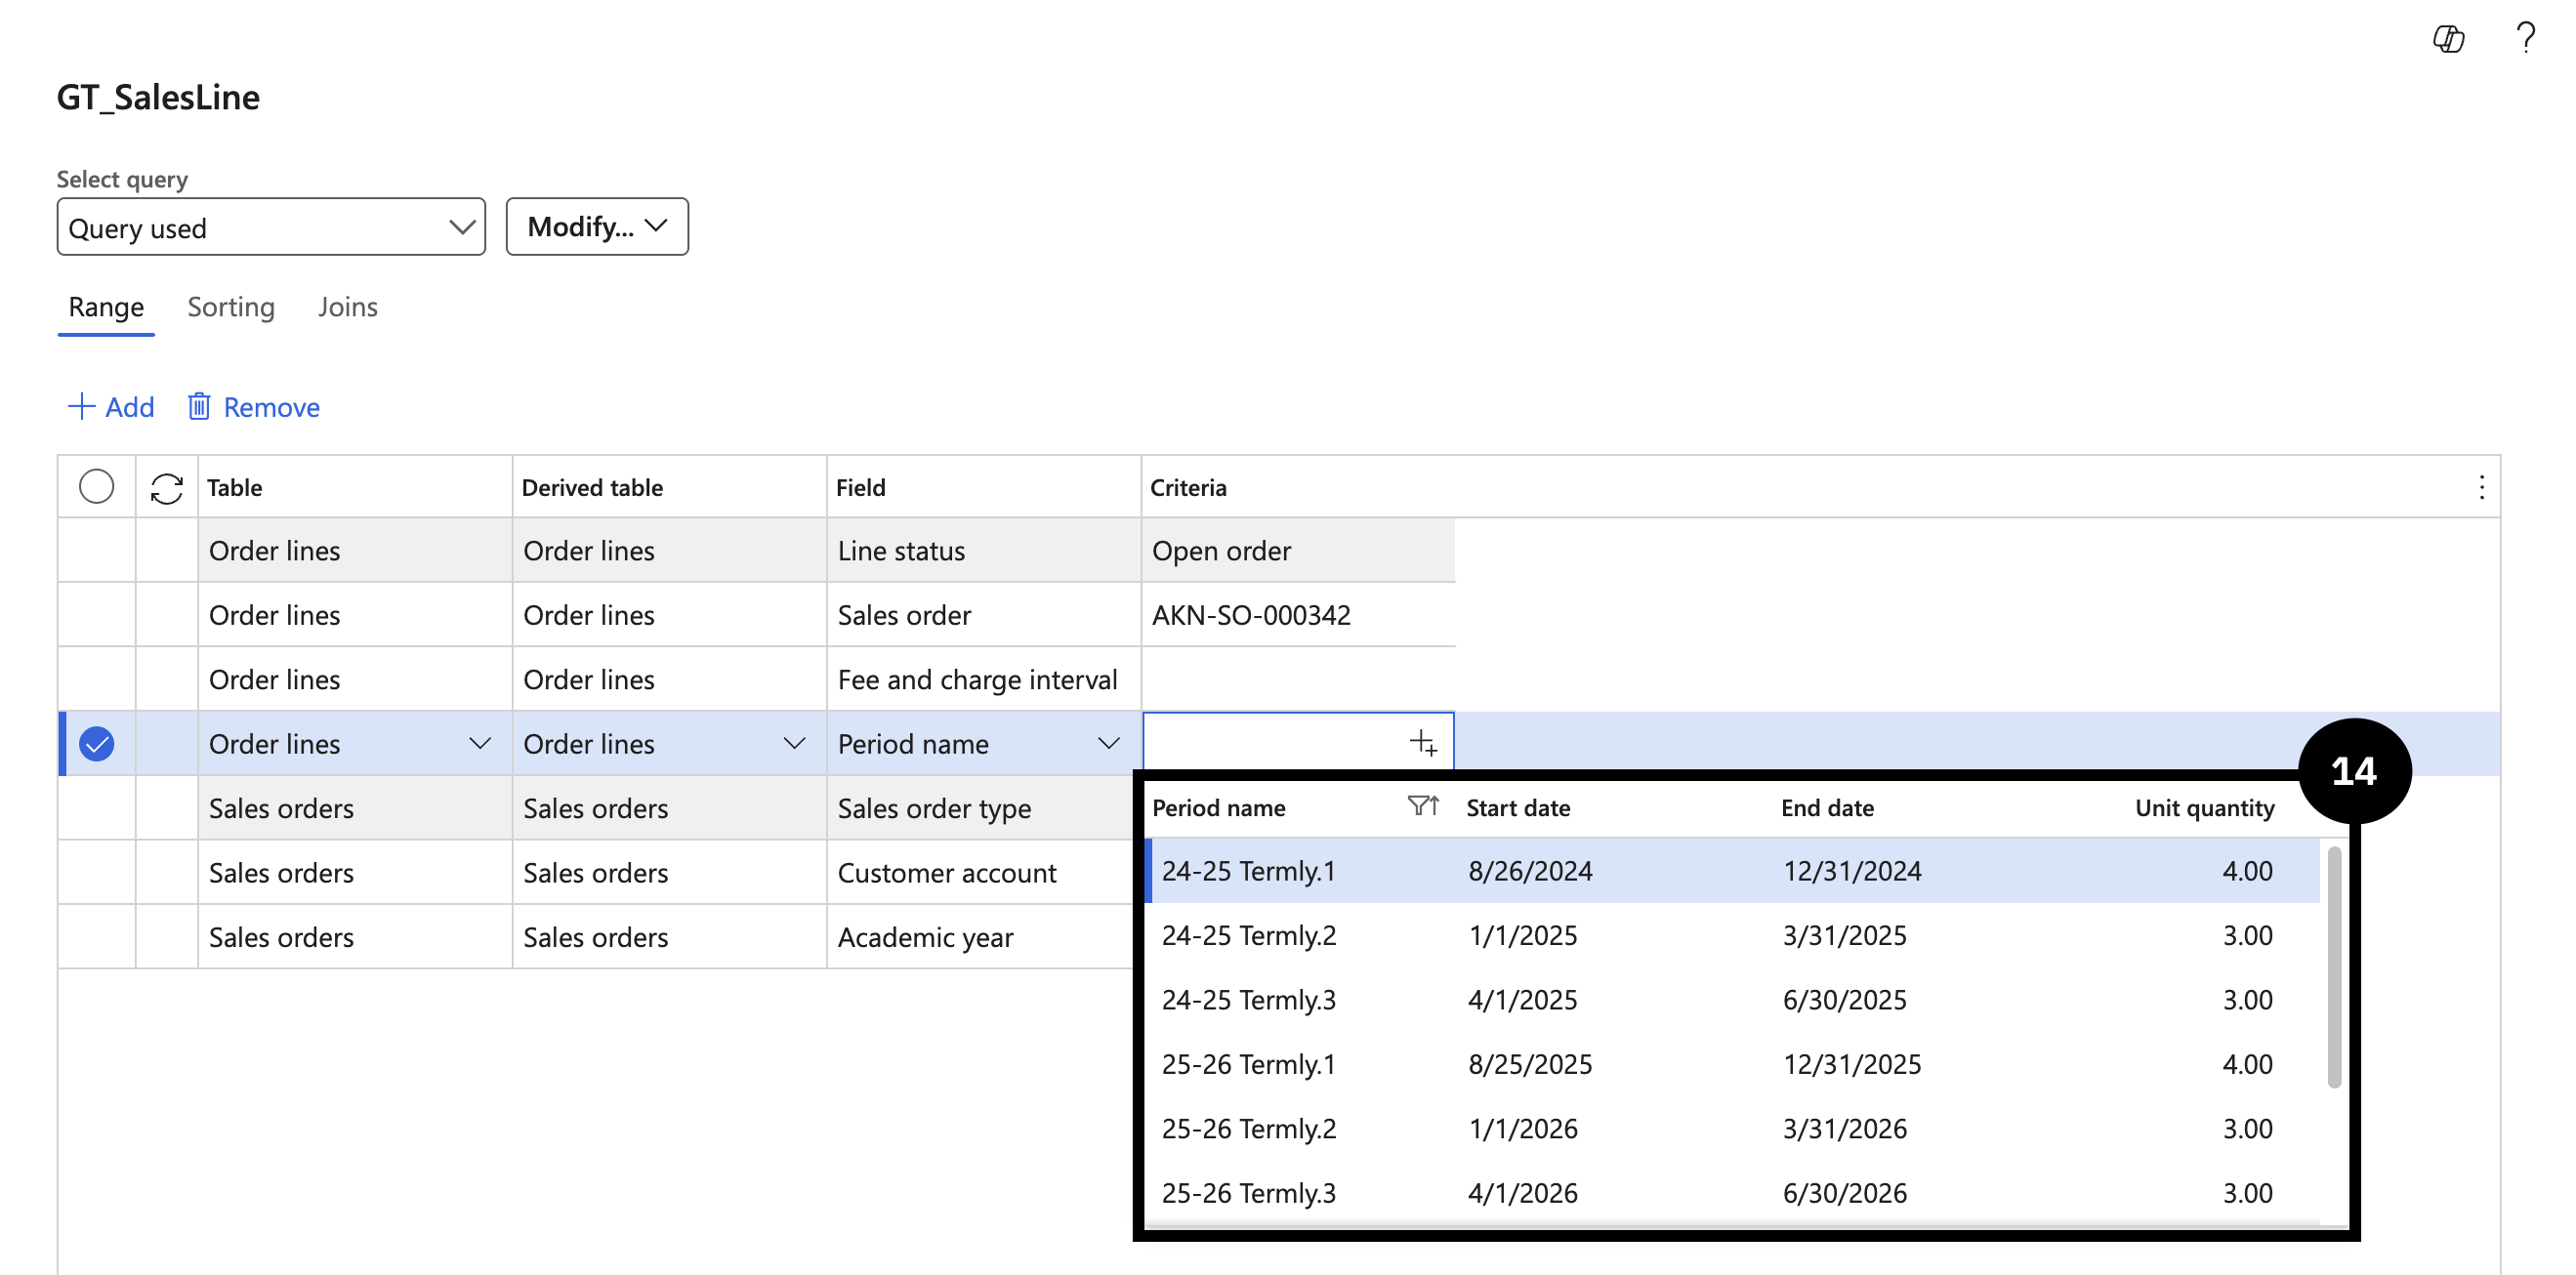
In Period name, select the term you want to invoice for and click OK.
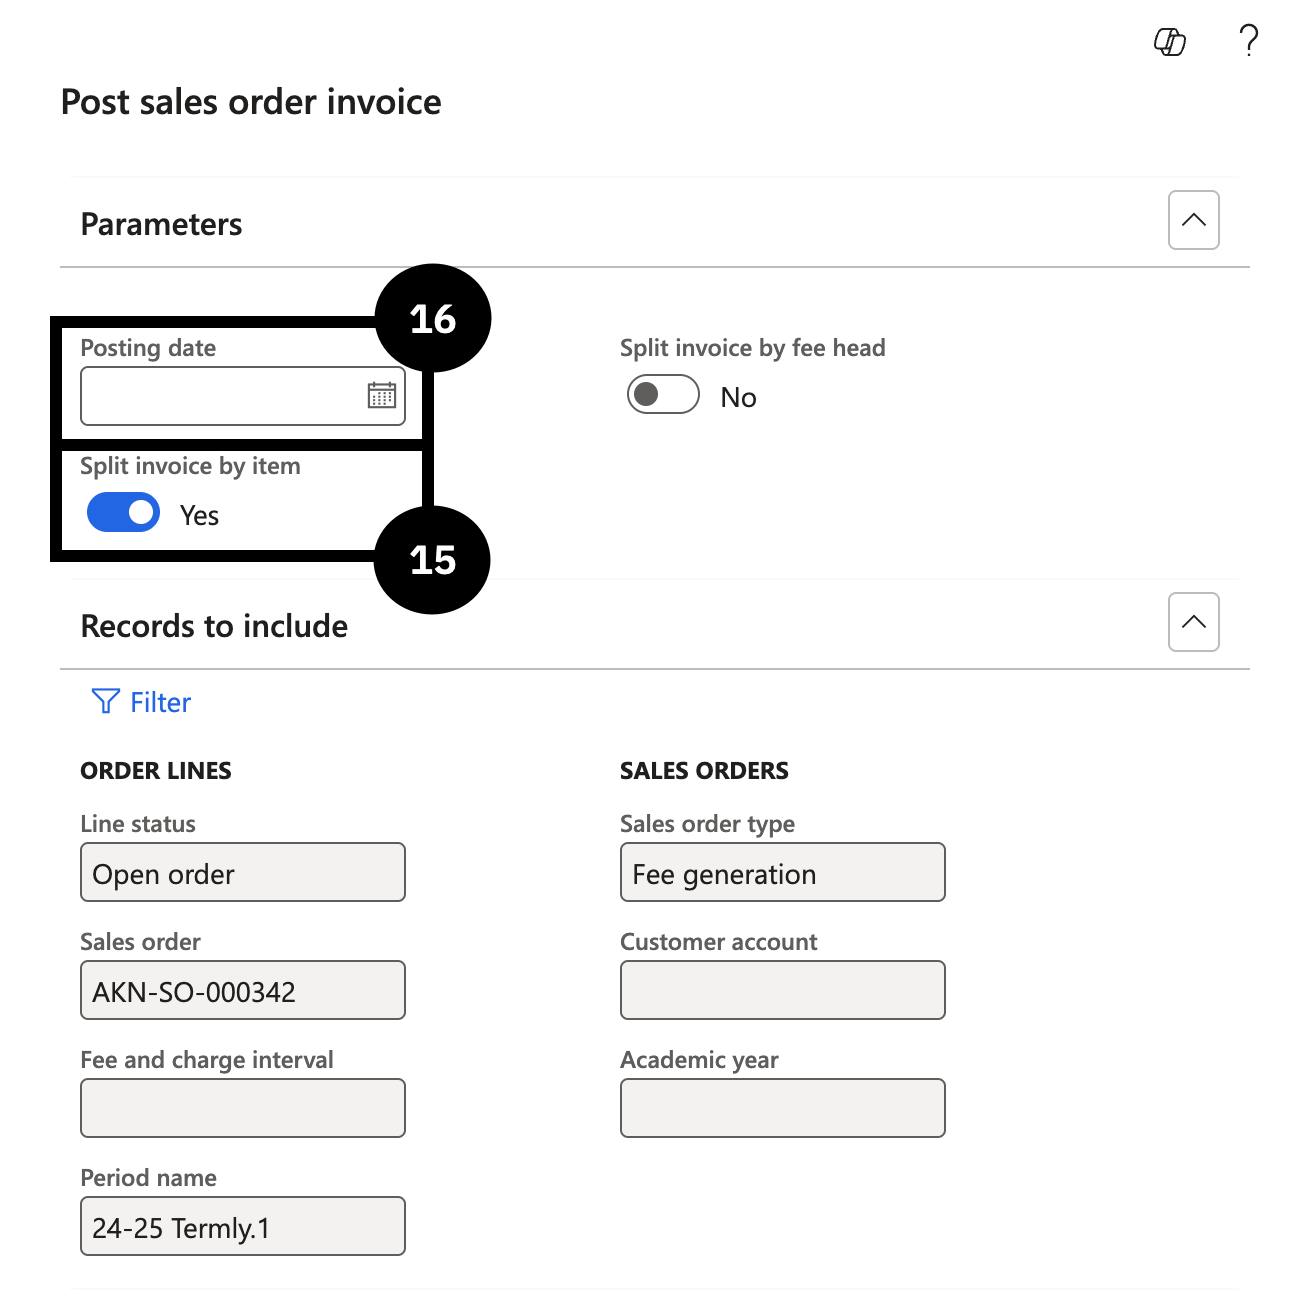
To separate into an itemised invoice, select Yes in the Split invoice by item field.
Enter a date in the Posting date field, then click OK.
Return to Modules ▸ Academic Management ▸ Students ▸ All students.
Open the Account column filter.
Enter the student’s account number in the Account field using the contains filter operator.
Click Orders ▸ All sales orders.
Click on the link in the Sales column of the selected row.
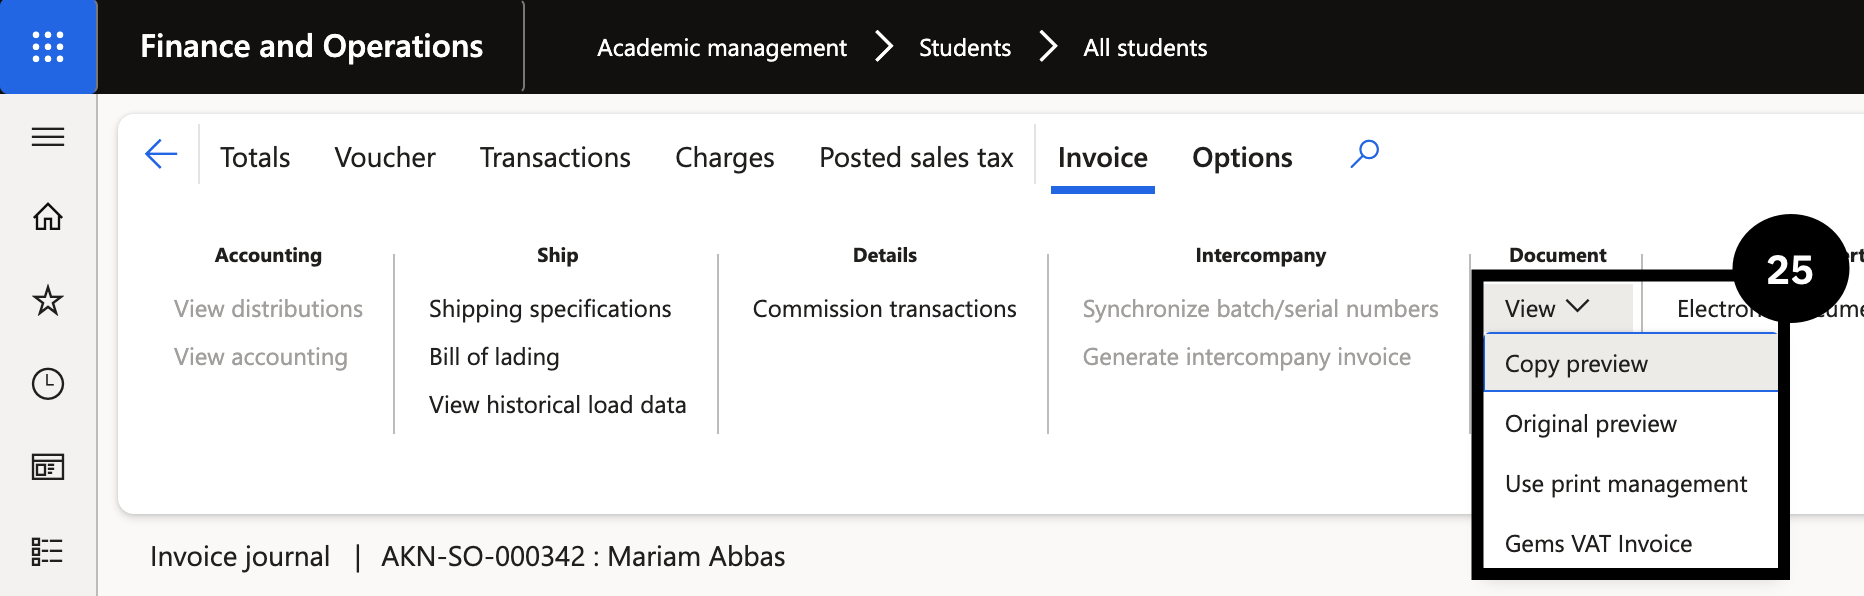
On the Action Pane, select Invoice.
Under Journals, click Invoice.
Find and select the desired invoice.
Expand View, then select GEMS VAT invoice.

Note: After posting, the system will create an Advance Tax Invoice. The following steps show how to print the advance tax invoice from the customer record in D365 F&O.
Navigate to Modules ▸ Credit and collections ▸ Customers ▸ All customers.
Open the relevant customer record.
Click Collect ▸ Invoices ▸ Invoice journal.
Locate the Advance tax invoice created for the fee head (document type = Advance/FTI).
Open the invoice record.
From the Action Pane, click Print ▸ Tax invoice (which uses the FTI template).
Select the required print options and print or preview the invoice.
Then, create the Sales order invoice. This step is automated when the payment is made online.
Navigate to Academic management ▸ Inquiries and reports ▸ Pre-admission fees ▸ All admission fees.
Use the Pre-admission filter to search for Application fee.
Find and select the correct student record.
Select Post receipt from the Action Pane.
Ensure Preview is toggled on.
View the sales order by clicking General.
Note: The sales order will be available in cashier receipt for payment.
Fee Refunds of Credit Balances
Navigate to Modules ▸ Accounts receivable ▸ Payments ▸ Customer payment journal.
Click New.
In the Name field, select Customer refund journal.
Click Lines.
In the list, mark the selected row. Select Student account in the Account field.
Type a value in the Description field.
Select the refund method in the Method of payment field on the far right.
Click Settle transactions above the table to identify the refund invoice.
Find and select the desired invoice. Select the Mark checkbox.
Click OK.
Above the table, click Financial dimensions and select Account.
In the Feehead value field, select a value, then click OK.
Click Financial dimensions.
Click on the Offset account field, then in the Cashflow field, select Refund.
Click OK.
Click Post.