Import Scholarship and Discount Data via Excel
Quick answer
- Open Scholarship and discount details, click Open in Microsoft Office, and download the Excel template.
- Enable editing, wait for the add-in to sign in, then use Design to add all available fields.
- Enter or update records, then click Publish. Rows highlighted in red failed validation — correct and republish.
Use this process to enter or update scholarship and discount records in bulk using the Microsoft Excel add-in, rather than creating records one at a time in the interface.
Download the Excel template
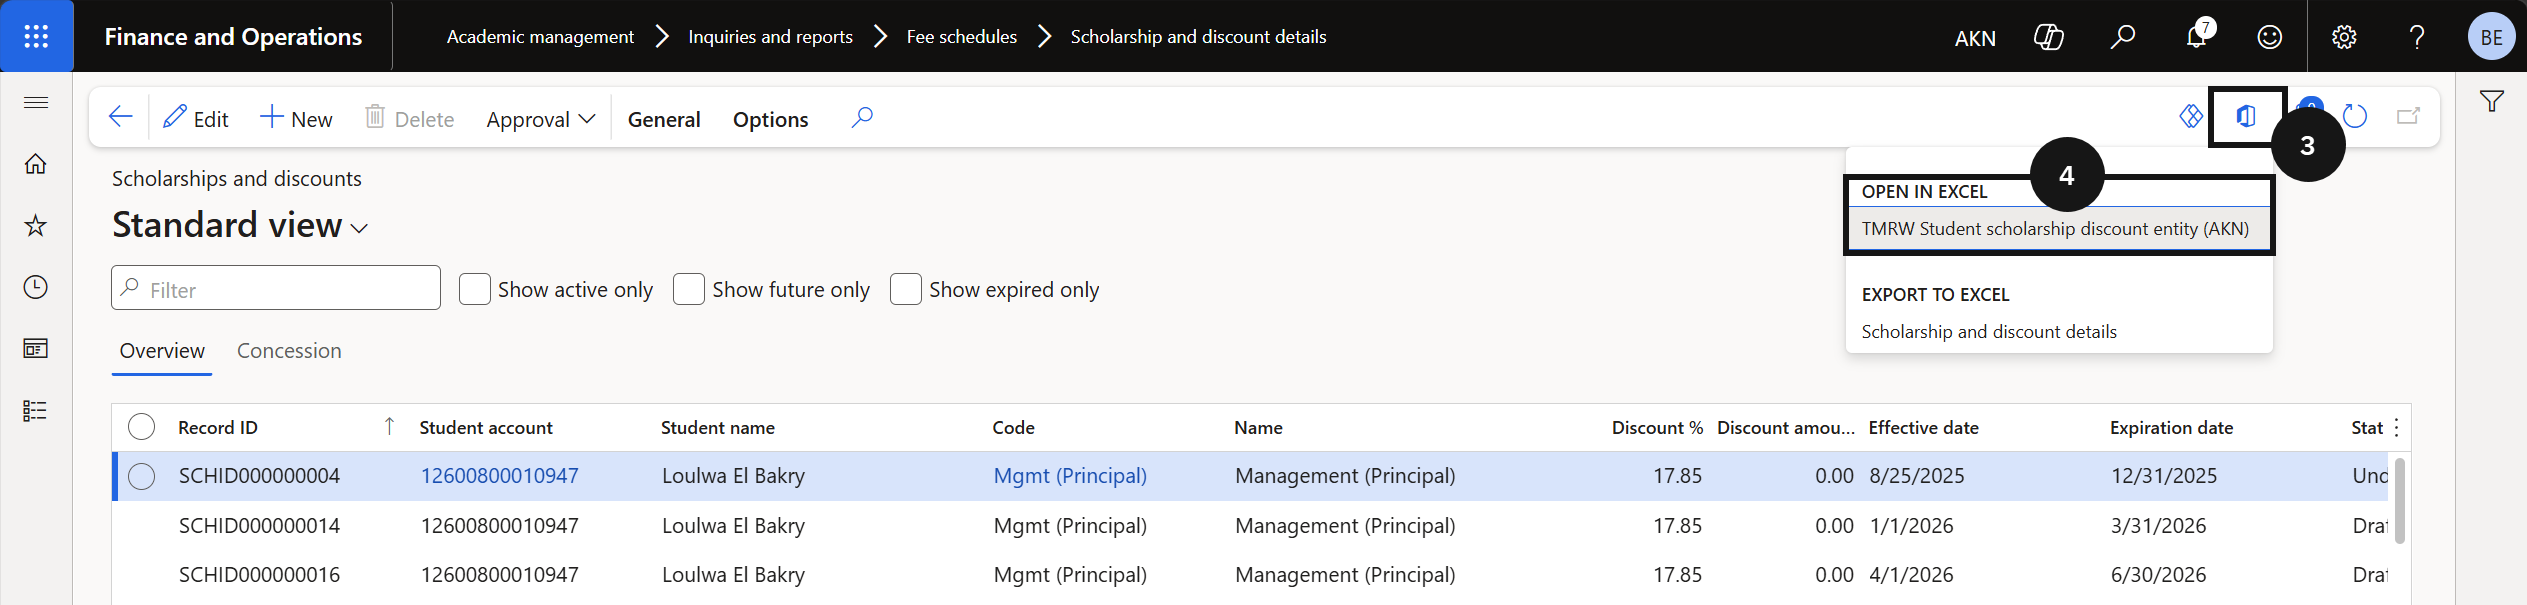
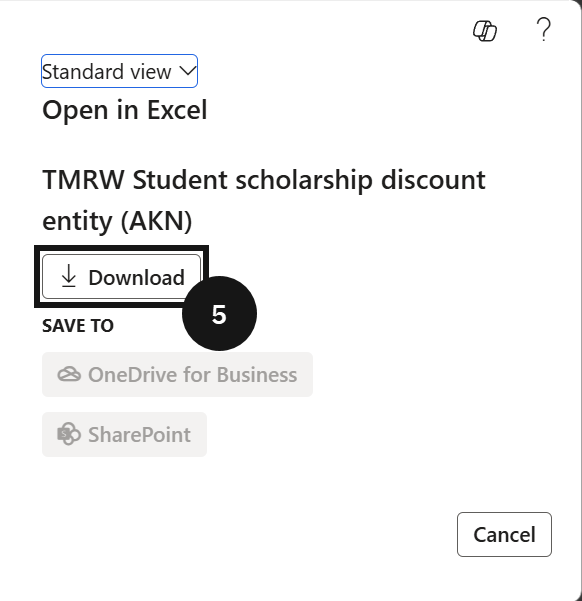
From the FNO dashboard, open Modules ▸ Academic Management, expand Inquiries and reports ▸ Fee schedules, and click Scholarship and discount details. Click Open in Microsoft Office in the Action Pane (③), select TMRW Student scholarship discount entity (④), and click Download (⑤). An Excel file containing the pre-configured data entity template will download to your computer.
Open the file and wait for the add-in
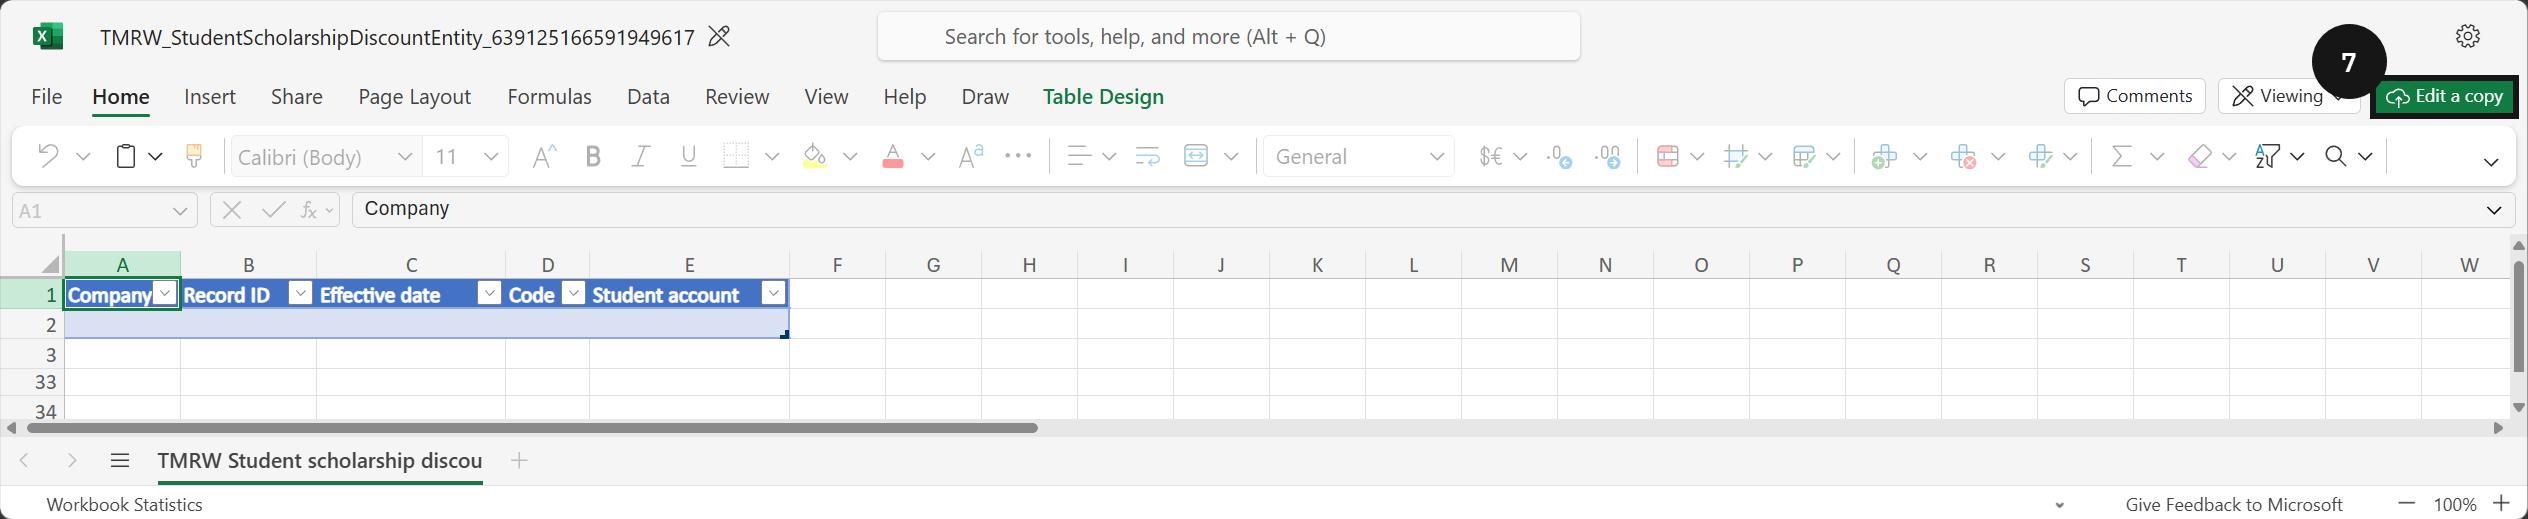
Open the downloaded Excel file, click Edit a copy (⑦), and open it in the desktop app. Wait for the Excel add-in to complete sign-in before proceeding — the add-in connects to the environment to read and write data.
Add all available fields
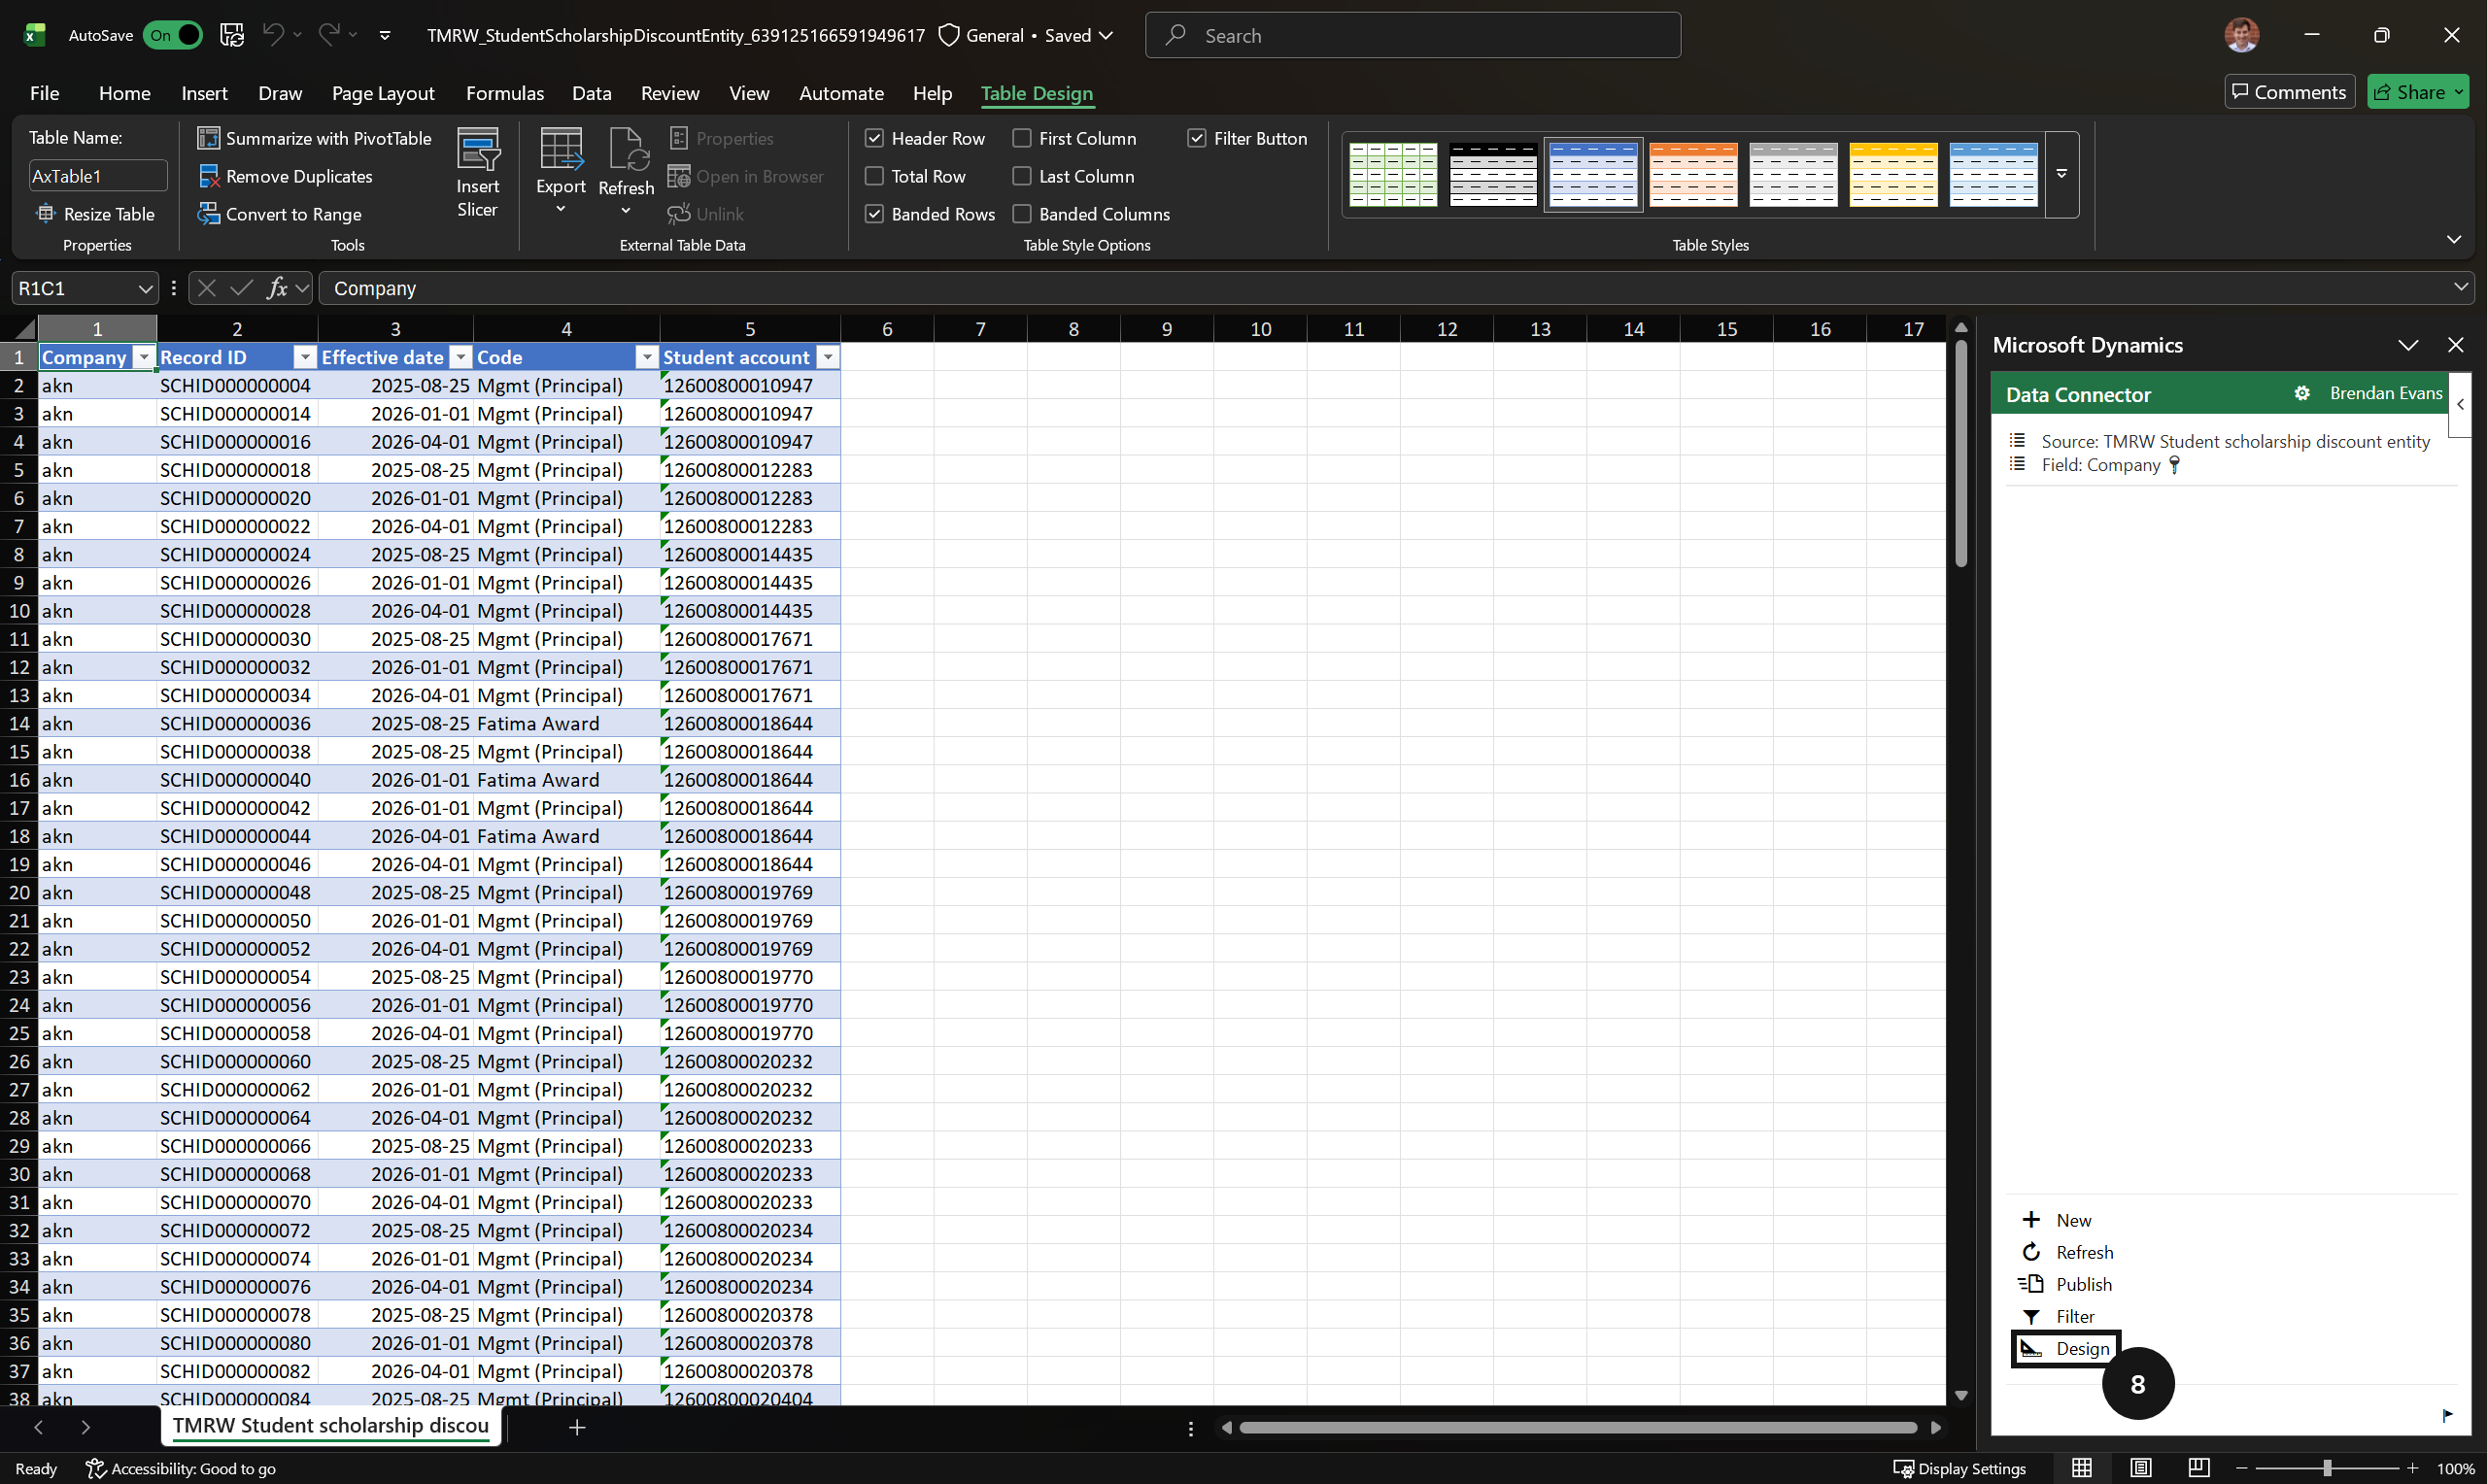
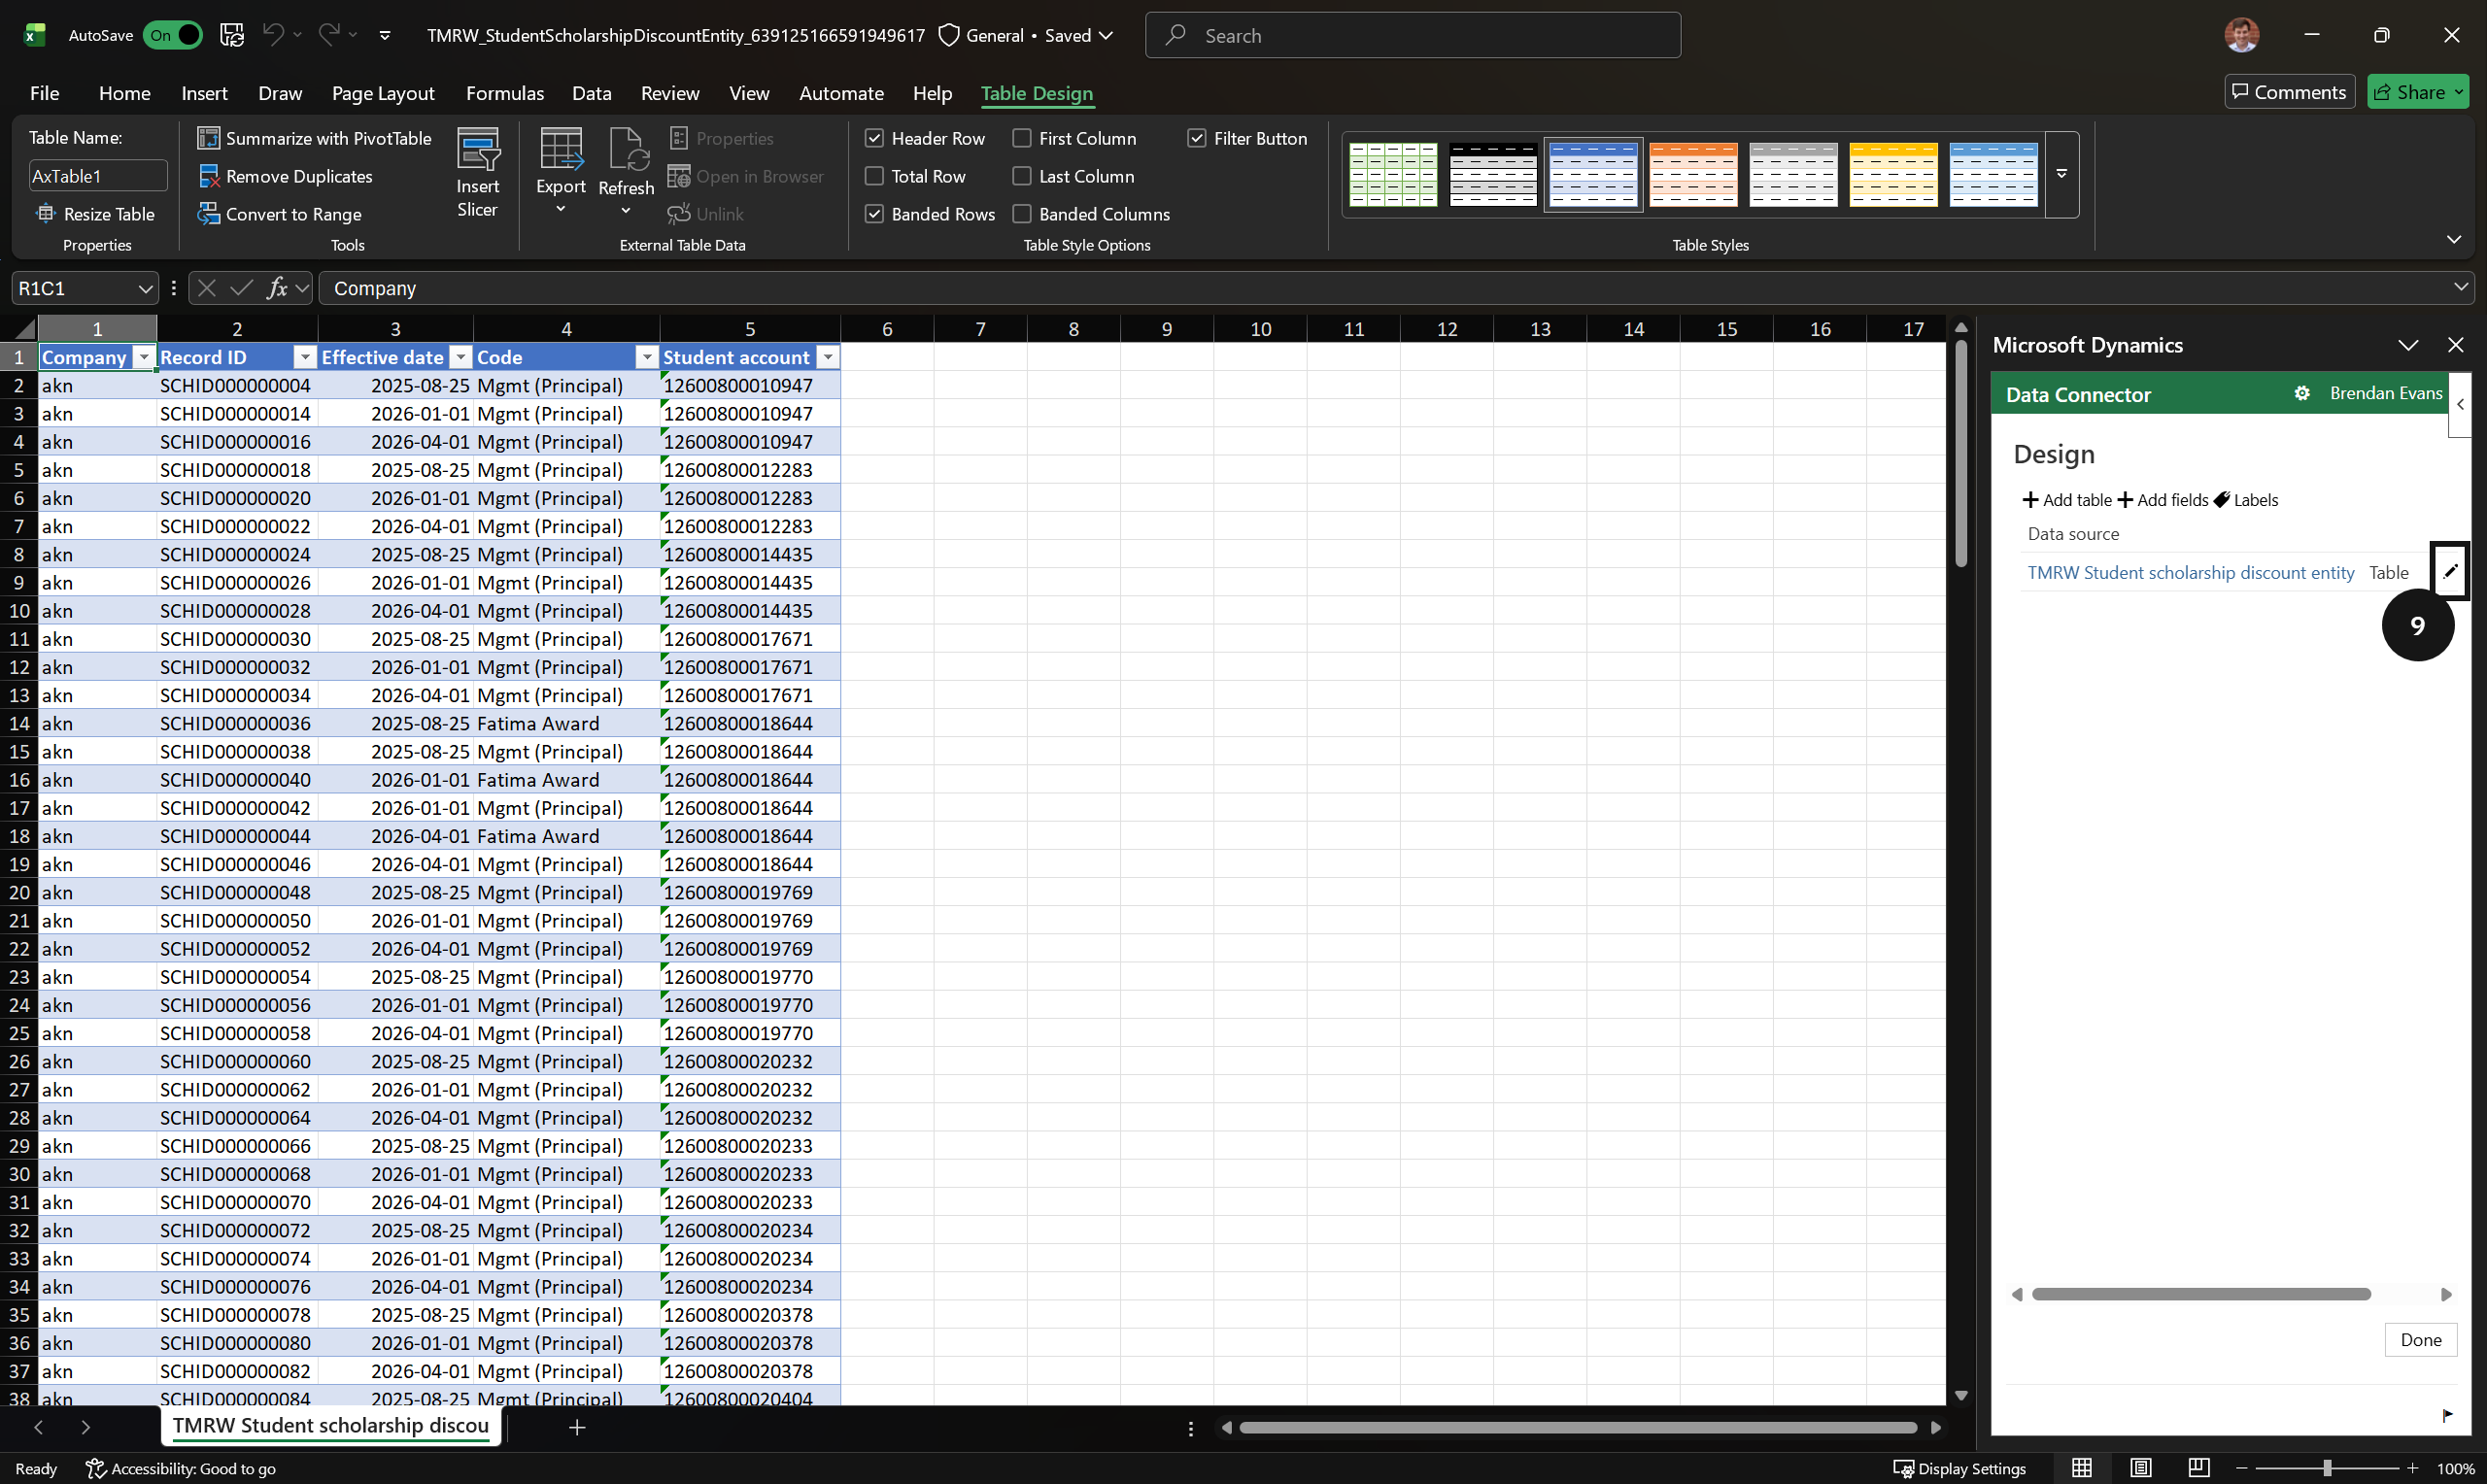
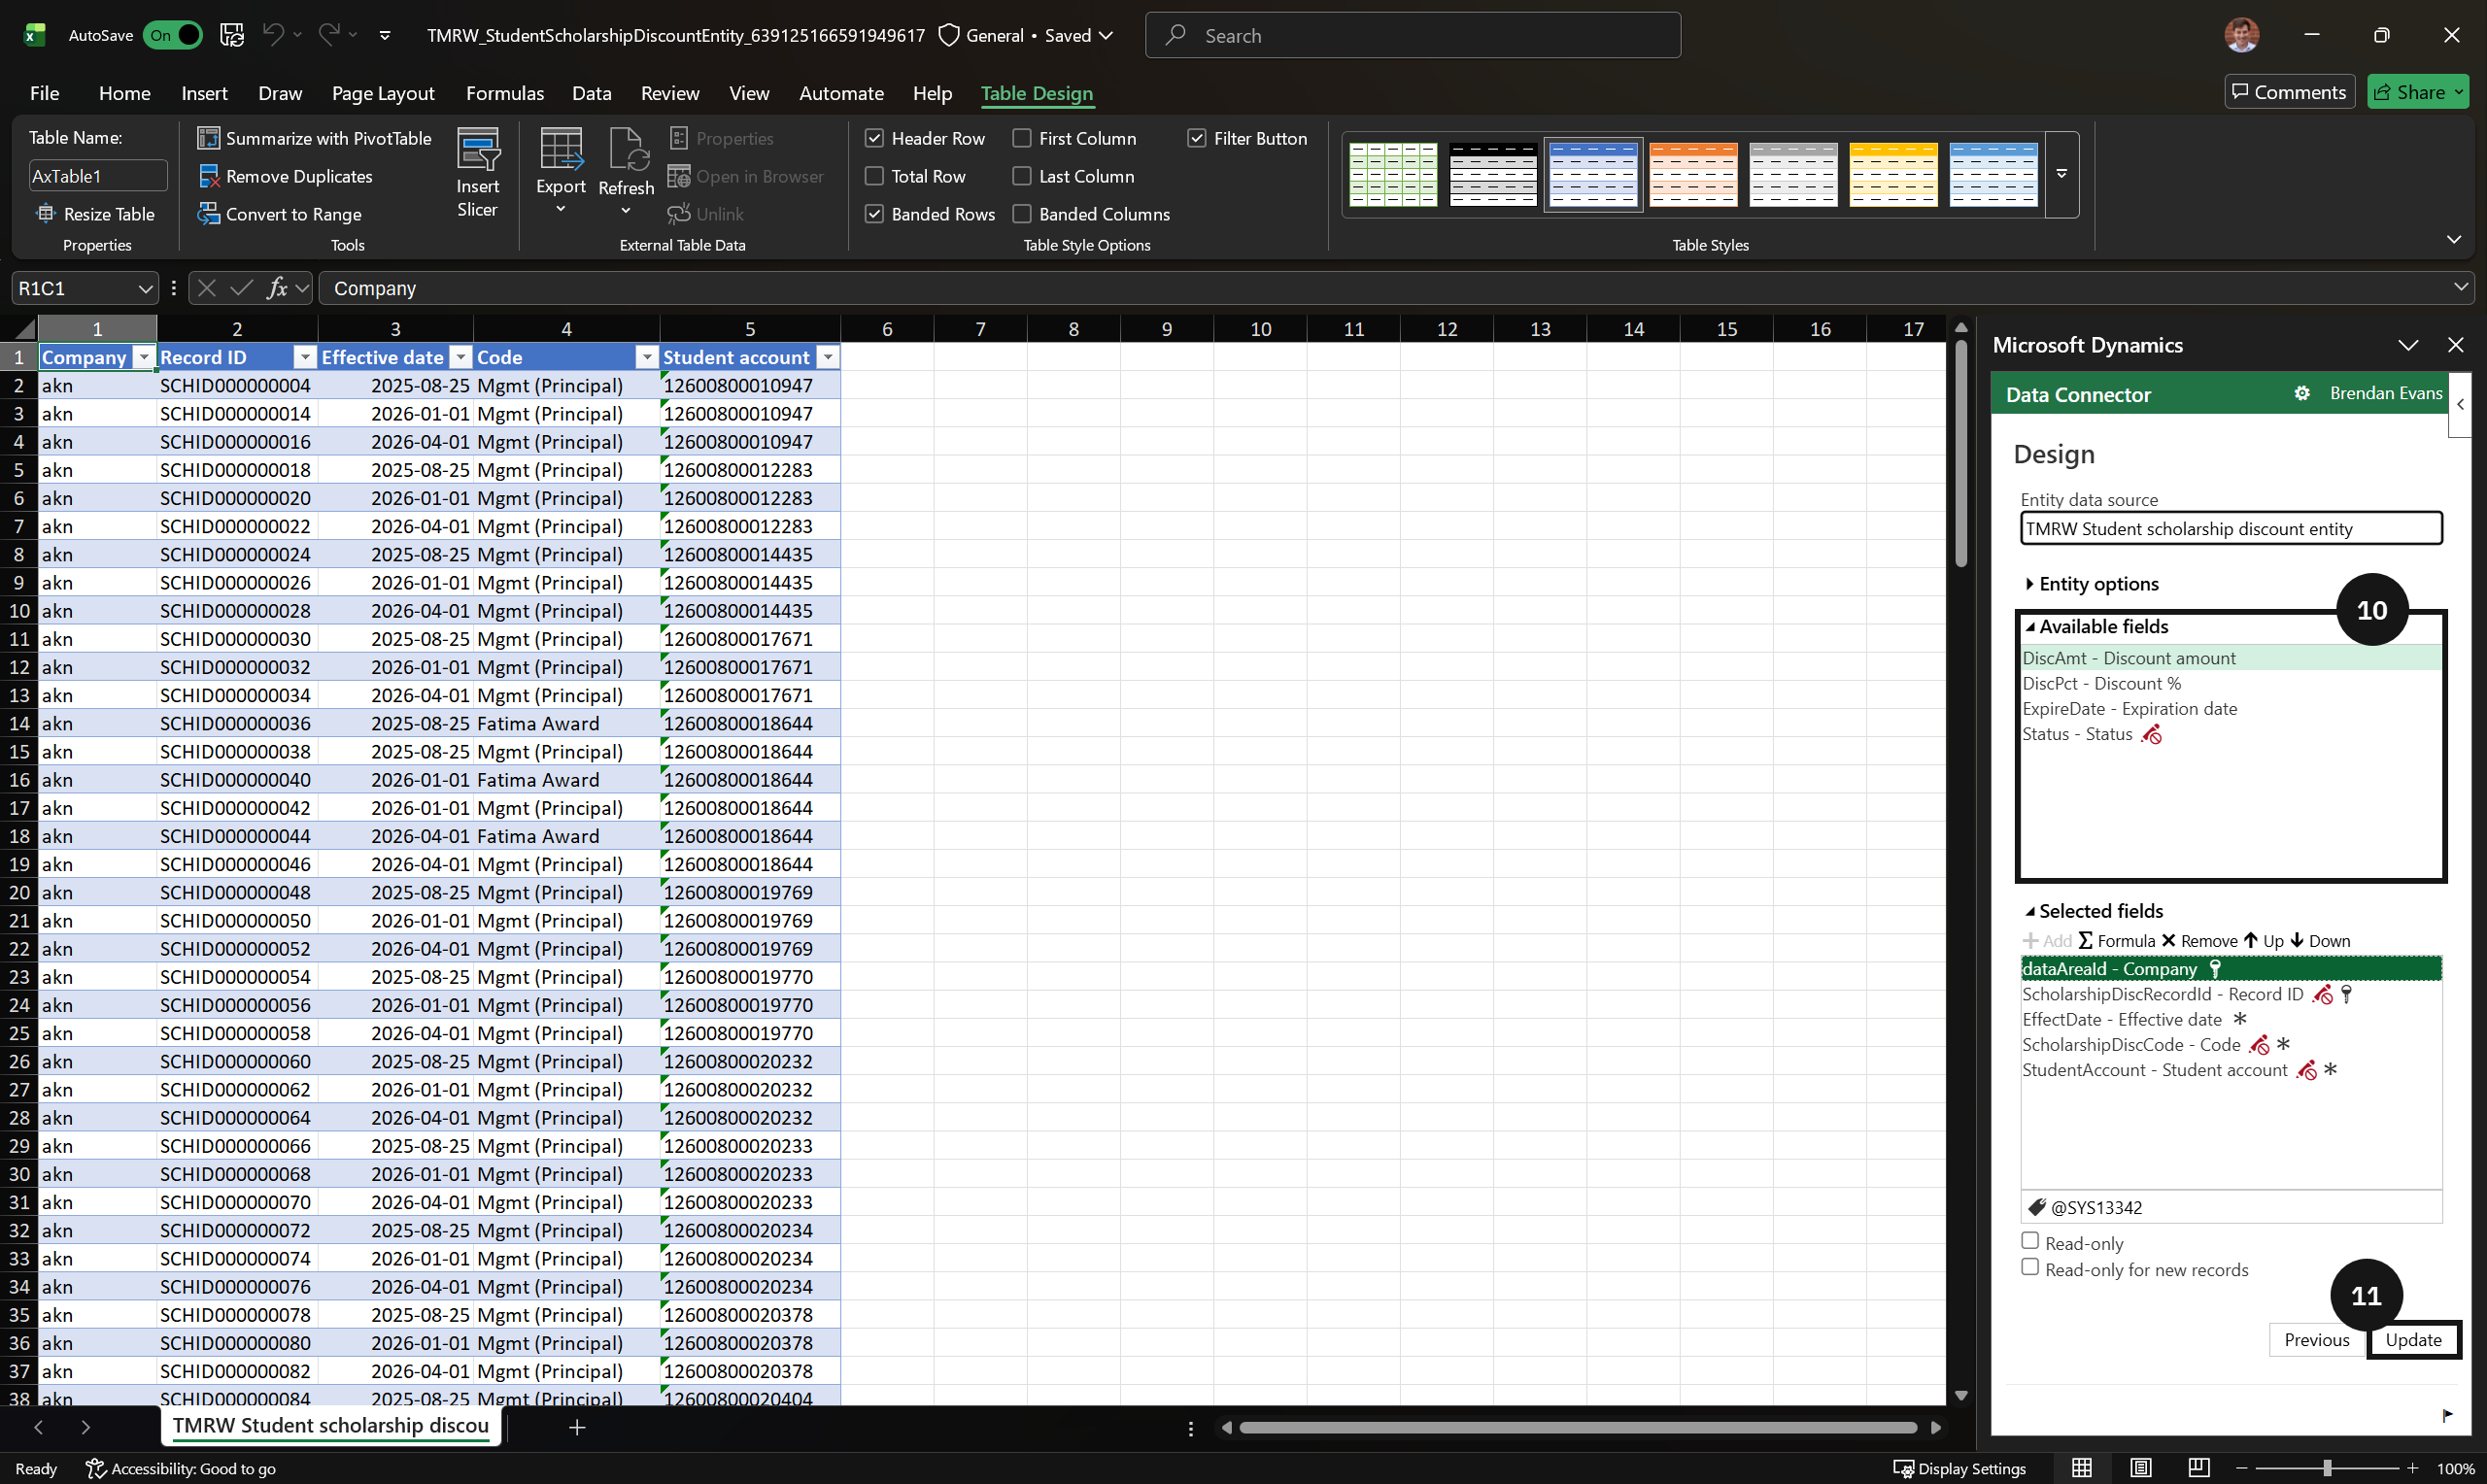
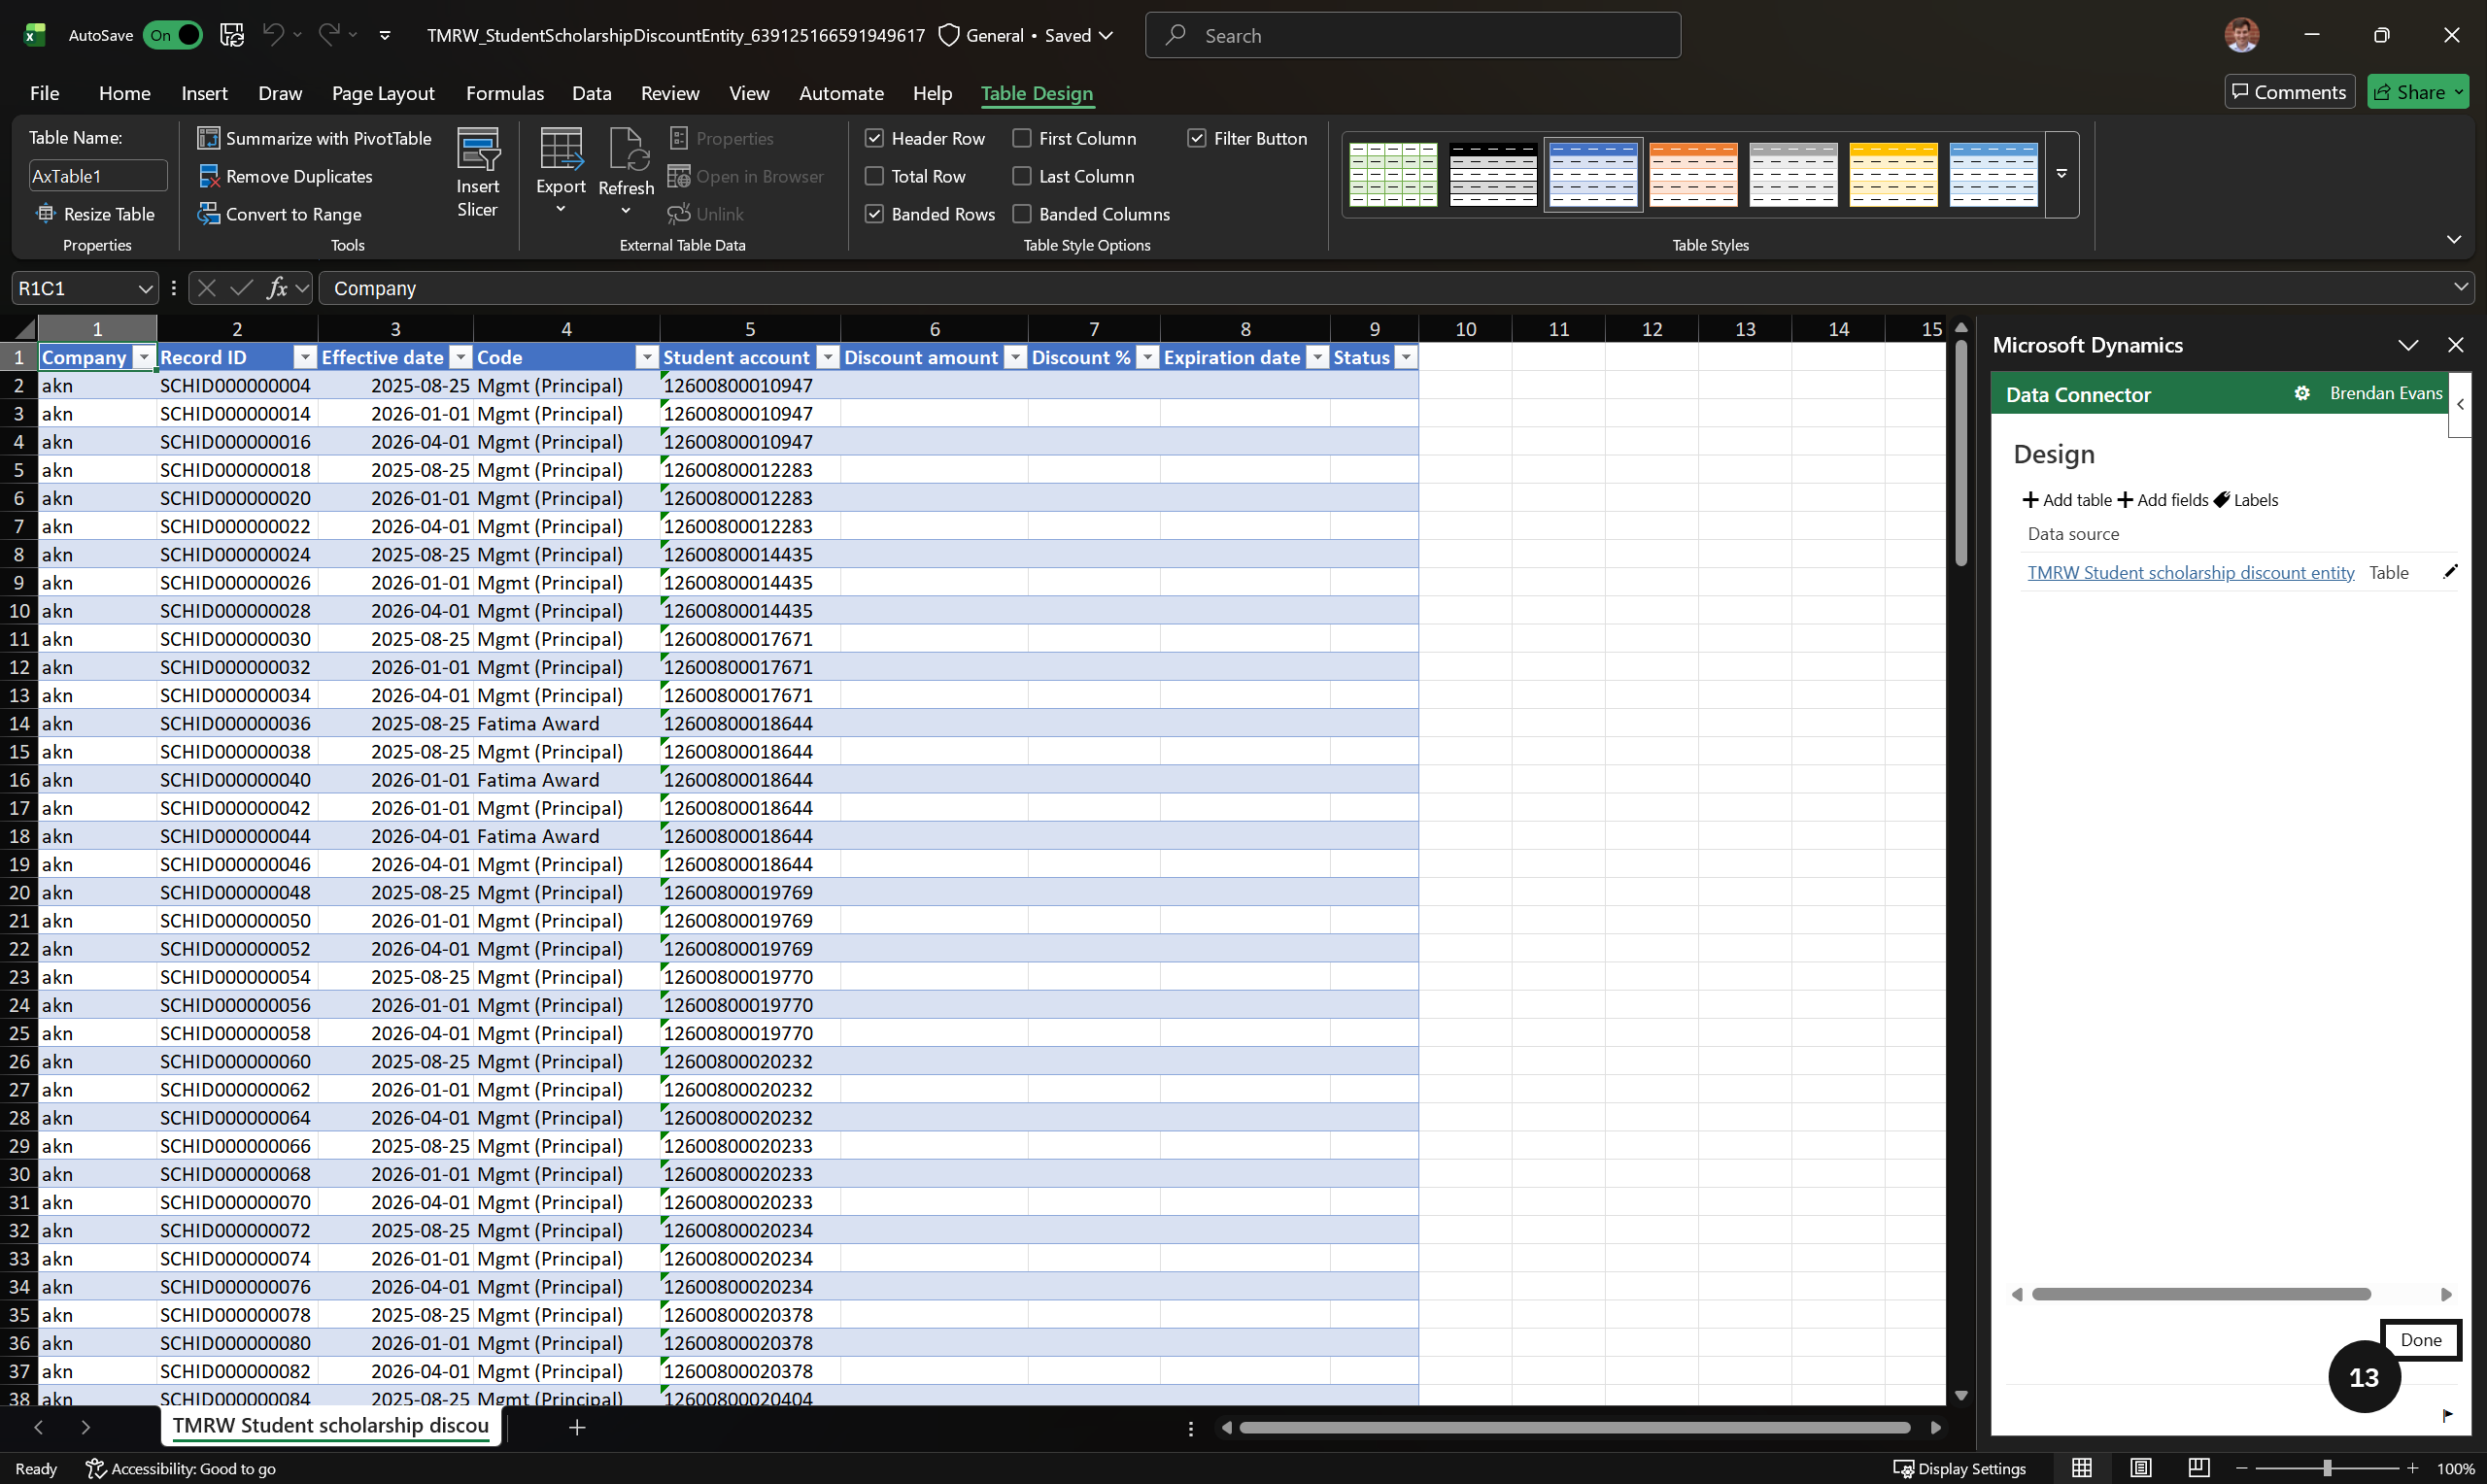
Click Design in the add-in panel (bottom-right corner) (⑧, then click the Edit button (pencil icon) next to the entity (⑨). Double-click each field in the Available fields list (⑩) to move all fields across to the selected fields. Click Update (⑪), click Yes in the confirmation prompt, then click Done (⑬).
Refresh the data
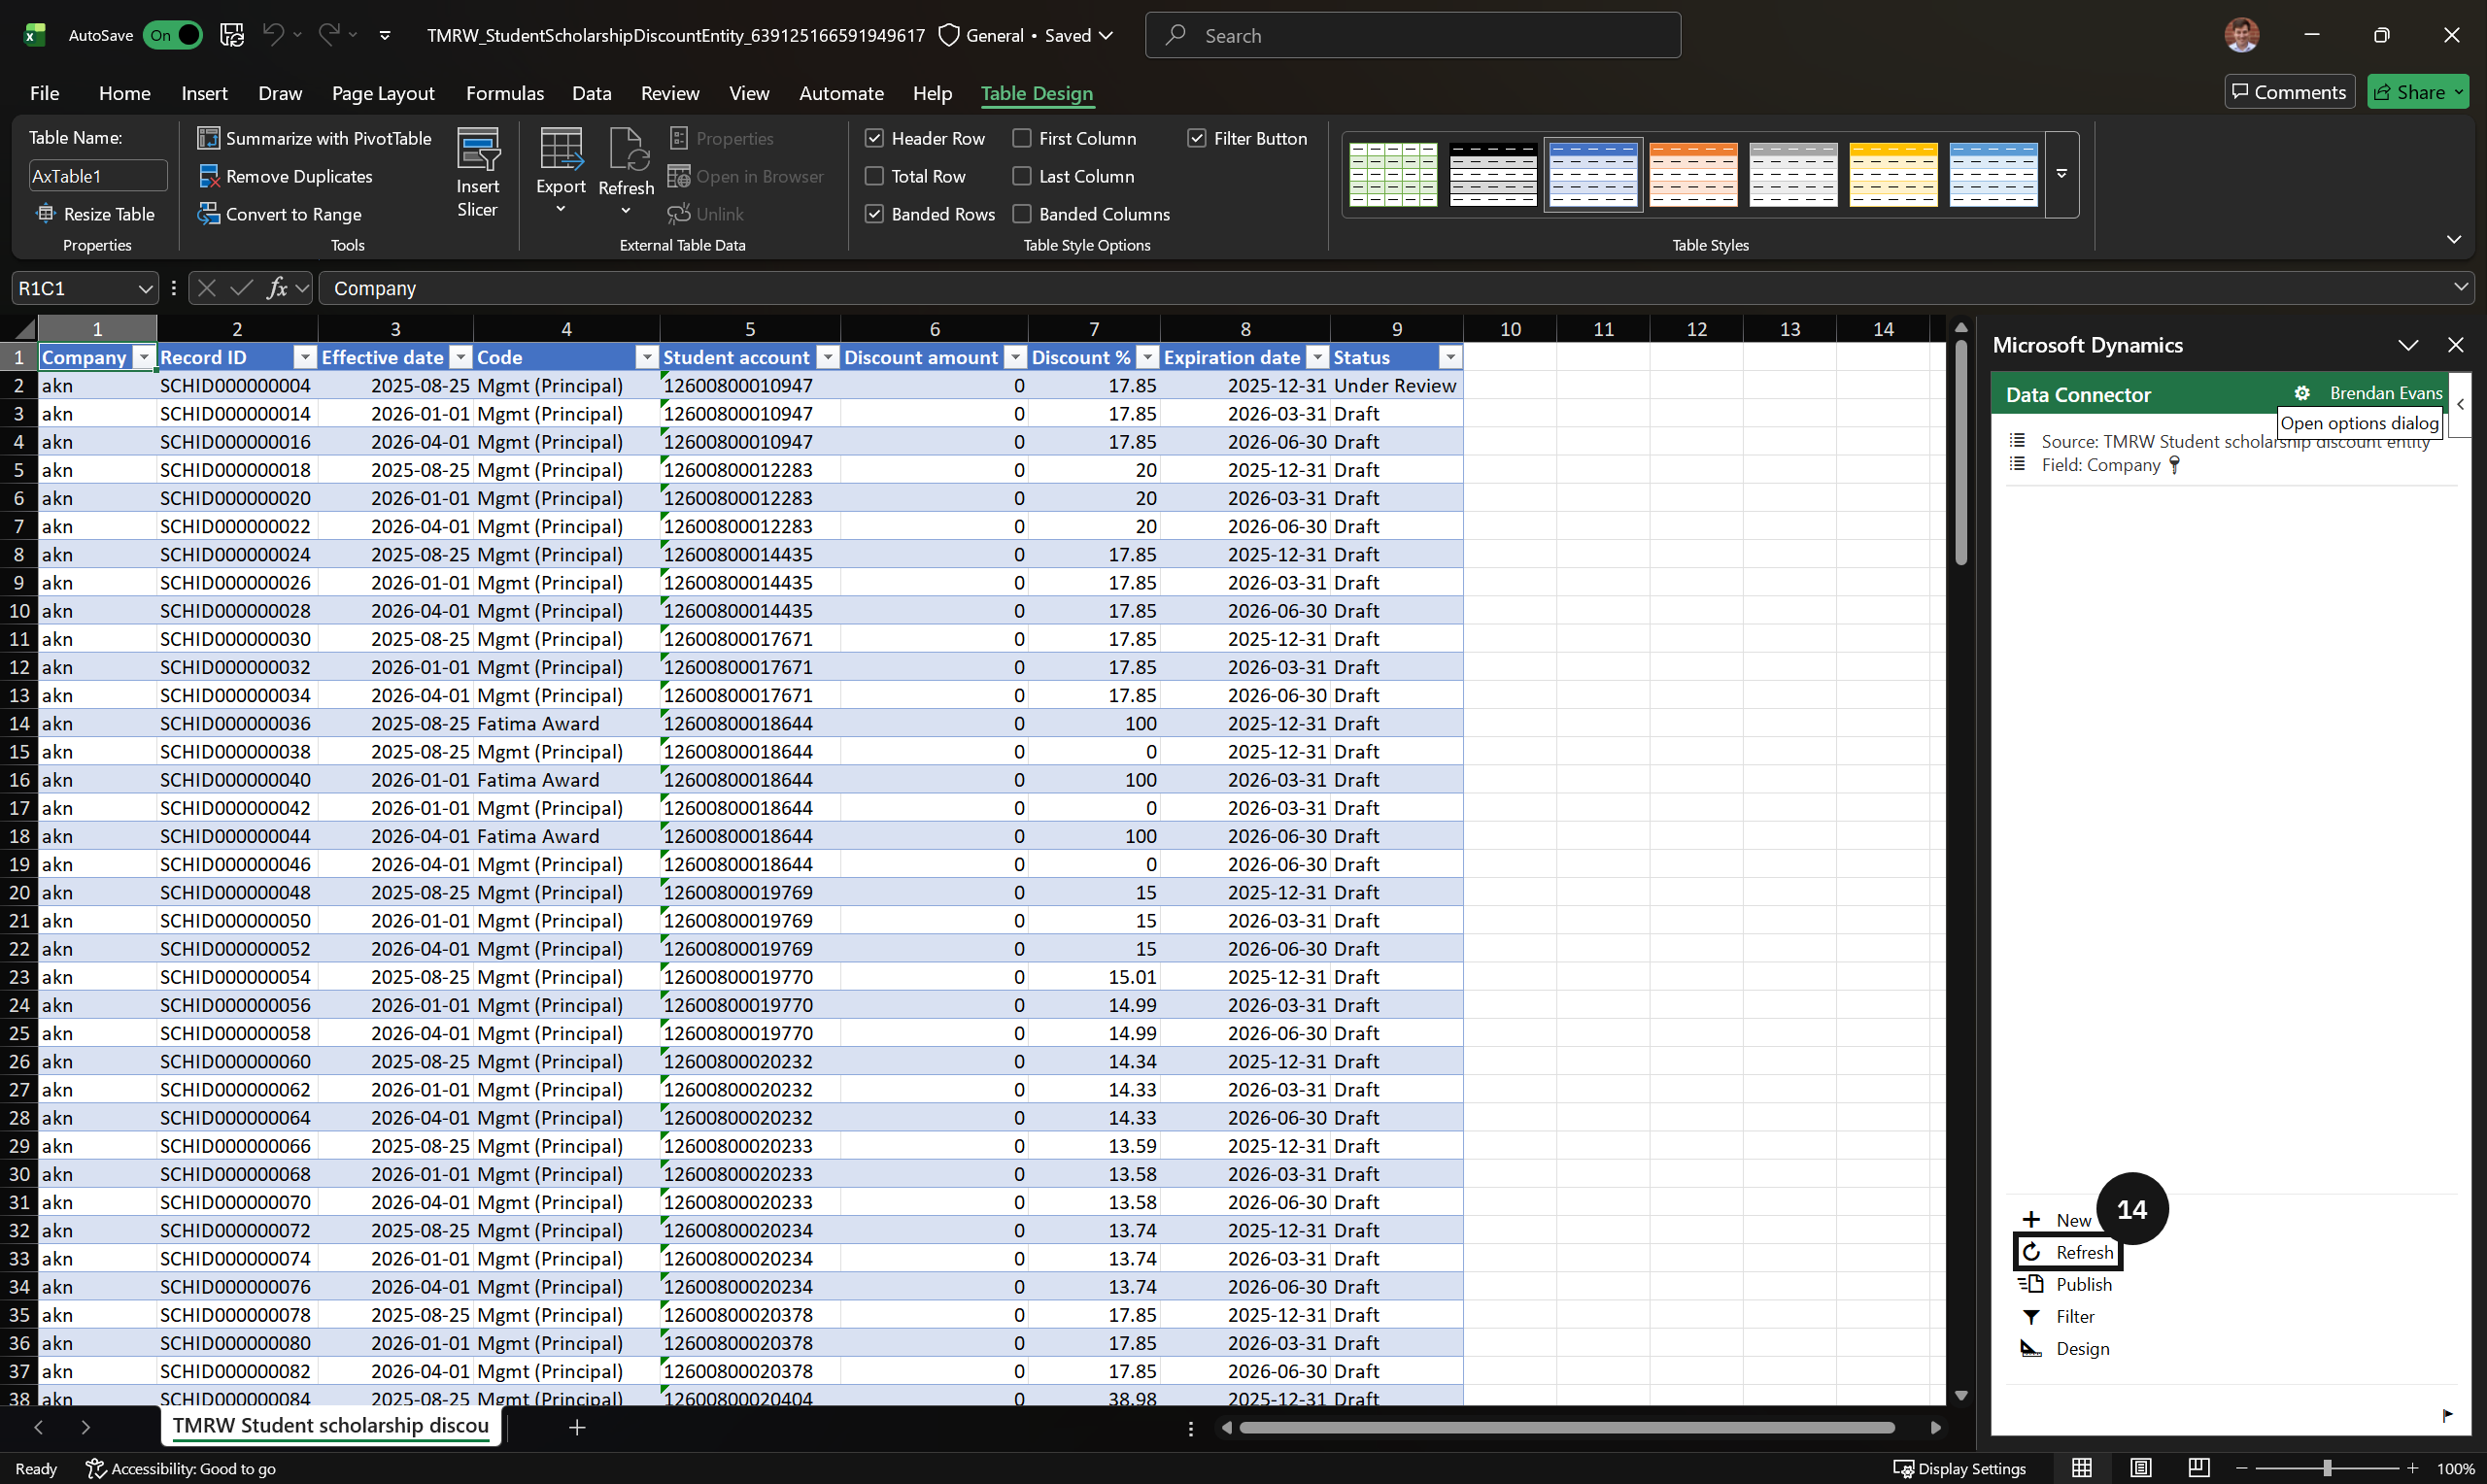
Click Refresh in the add-in panel (⑭). This pulls the latest records from the system into the spreadsheet, including any records already saved.
Enter or update records
Enter new records in the rows below the existing data, or copy existing rows and edit the details as required.
Note: Do not modify or delete existing rows unless a change to those specific records is required. Editing an existing row overwrites the data in the system on publish.
Publish the records
Click Publish in the add-in panel. The system validates each row before saving — rows that fail validation are highlighted in red. Correct any flagged data and click Publish again to resubmit.
Confirm the records
Verify that all records have been accepted and are visible in the Scholarships and discounts master.