Create a Scholarship or Discount
Quick answer
- Open Academic Management ▸ Setup ▸ Scholarships and discounts and click New.
- Fill in the Code, Name, enable Active and Approval, and assign the User group.
- Link the code to the relevant fee items and students, entering the discount percentage and dates.
- Set the Approval status to Report as ready, then Approve, and click Save.
Before a scholarship or discount takes effect on a student's fees, it must be created as a named code, linked to the relevant fee items and students, and moved through the approval workflow.
Open Scholarships and Discounts
From the FNO dashboard, open Modules ▸ Academic Management, expand Setup, and click Scholarships and discounts. Click New in the toolbar.
Complete the discount code details
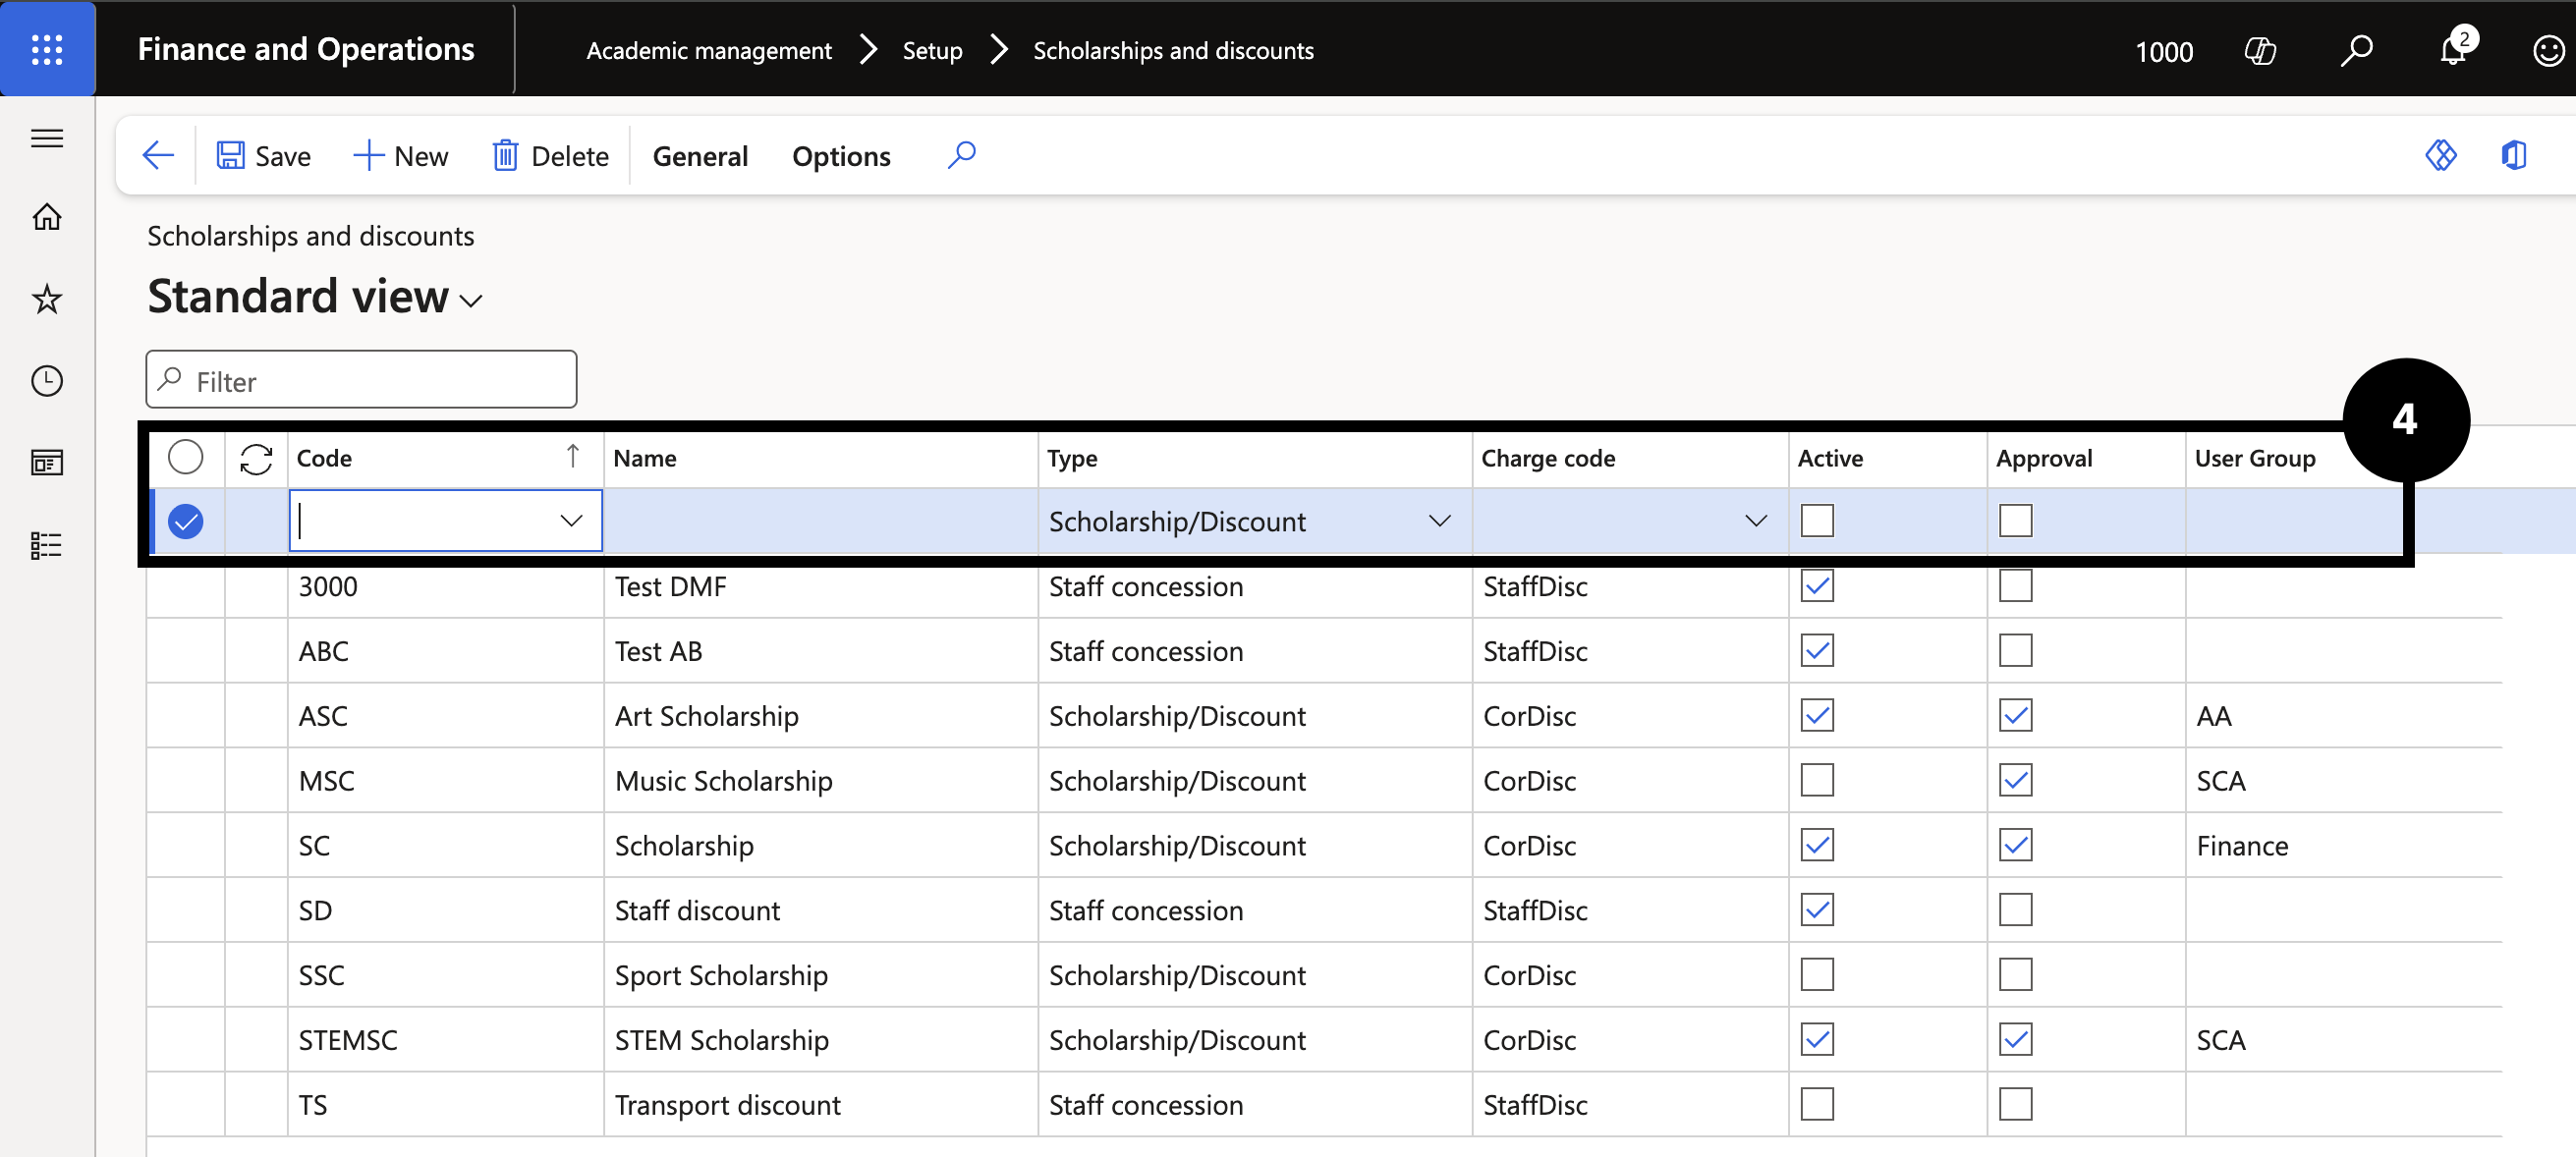
Fill in the following fields (④):
- Code — enter a unique code for the scholarship or discount.
- Name — enter the scholarship or discount name.
- Active and Approval — check both boxes.
- User group — assign the approval group. To use an existing group, select it from the dropdown.
Create a new approval user group (if needed)
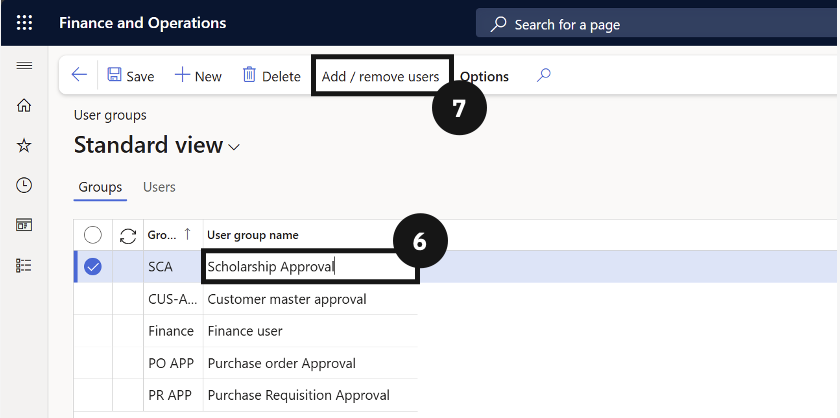
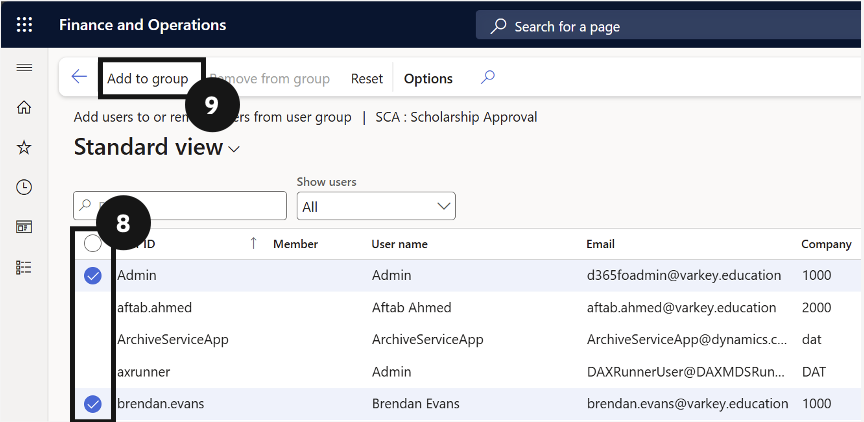
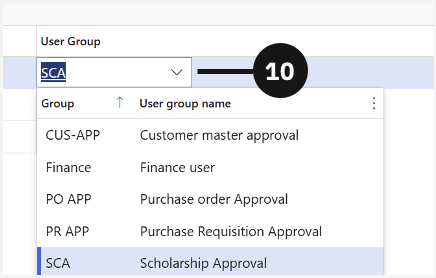
If the required approval group does not yet exist, right-click the User group dropdown arrow and select View details, then click New. Enter a Name for the group (⑥) and select the User group. Click Add/remove users (⑦), search for and select the approvers (⑧), then click Add to group (⑨). Click Back, select the new user group (⑩), and click Save.
Link fee items to the code
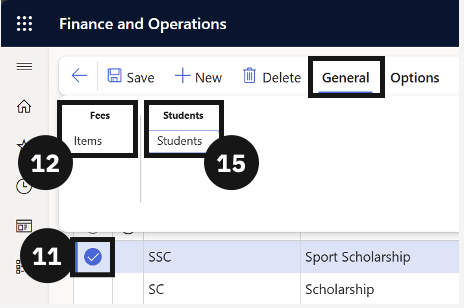
Select the scholarship or discount record you just created (⑪). Click General in the Action Pane, then choose Items under the Fees tab (⑫). Click New and select the relevant fee item — repeat for each additional item — then click Save and navigate back.
Add a student and configure the discount
Click General in the Action Pane and choose Students under the Students tab (⑮). Click New, select the student from the Student Account dropdown, and enter the discount amount under Discount % (⑰). Set the Effective date and Expiration date (⑱).

Submit and approve the discount
From the Approval dropdown, select Report as ready (⑲ ⑳). Then open the Approval dropdown again and select Approve to complete the workflow (⑲ ⑳). Click Save.