Configure the Sibling Discount Policy
Quick answer
- Open Academic Management ▸ Setup ▸ Sibling setup ▸ Sibling discount policy and click Add.
- Enter the sibling order number, a clear name, and select the student type.
- Select the line discount group and repeat for each sibling position and student type combination, then Save.
This page covers GEMS-specific configuration. General concession setup is on the Concession Management overview.
The sibling discount policy defines the discount rate applied to students based on their position in a family. It is school-specific, configured once per school, and revisited only if the school's discount rules change.
Open the Sibling Discount Policy
From the FNO dashboard, open Modules ▸ Academic Management, expand Setup, click Sibling setup, then click Sibling discount policy.
Add a policy entry
Click Add to create a new entry. Enter the sibling order number for the child position (for example, enter
3for the third child) — use the sibling order numbers configured in the Sibling Order setup. Only current students carry an active sibling order; future and past students default to 0 (⑤).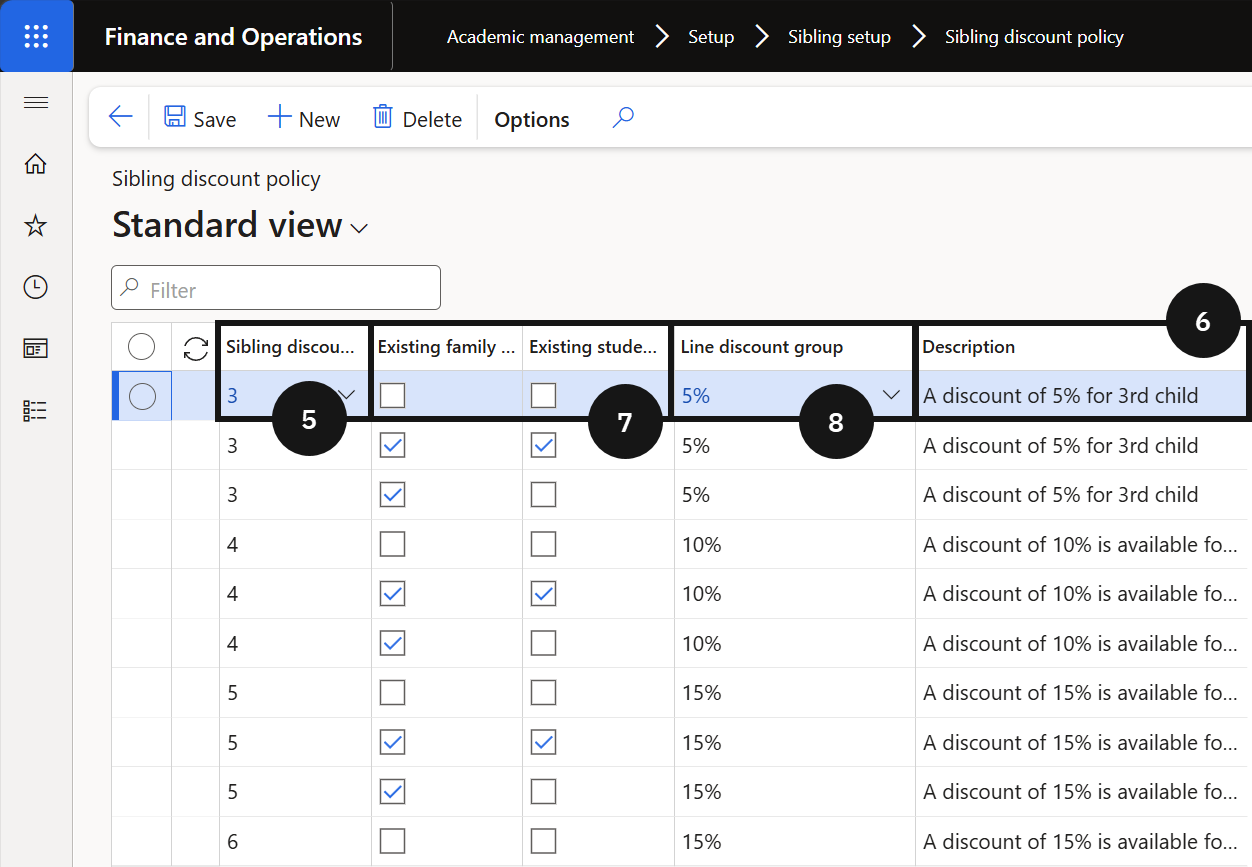
Enter a descriptive name
Enter a name for the policy entry (⑥). Write it clearly and unambiguously — for example,
Third child — new studentorThird child — existing family, existing student— because this description is read by the GEMS Parent Experience (PXP) app agent.Select the student type
Choose the student type for this entry:
- New student — students with no prior enrolment history at the school.
- Existing family, existing student — students already enrolled from a family already registered in the system.
- Existing family only — students from a known family but without an existing enrolment record.
Select the line discount group and save
Select the line discount group (⑧) to link this entry to the correct trade agreement — line discount groups are configured separately under the Sibling Order setup process. Repeat steps 2–5 for each sibling position and student type combination required by the school's policy. Click Save.