Schedule Credit Card Payments
Quick answer
- Create a customer payment journal, generate a payment proposal filtered by date range and credit card method, select invoices, click Create Payments, then use Functions ▸ Generate Credit Card Payments and Post.
- Delete any lines with zero or debit amounts before generating. If authorisation fails, unauthorised lines are deleted automatically and must be retried manually.
Scheduled credit card processing handles bulk fee payments via credit card for a defined period.
Create the journal and generate a payment proposal
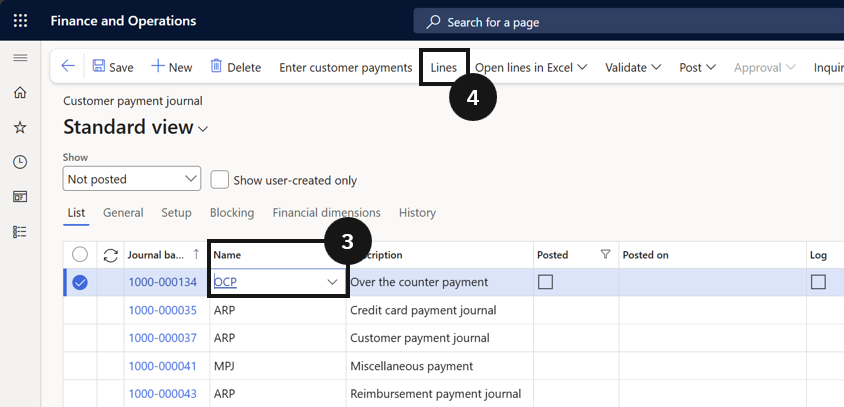
From the FNO dashboard, open Modules ▸ Accounts receivable, expand Payments, and click Customer payment journal. Click New, select the appropriate journal (③), then click Lines in the Action Pane (④).
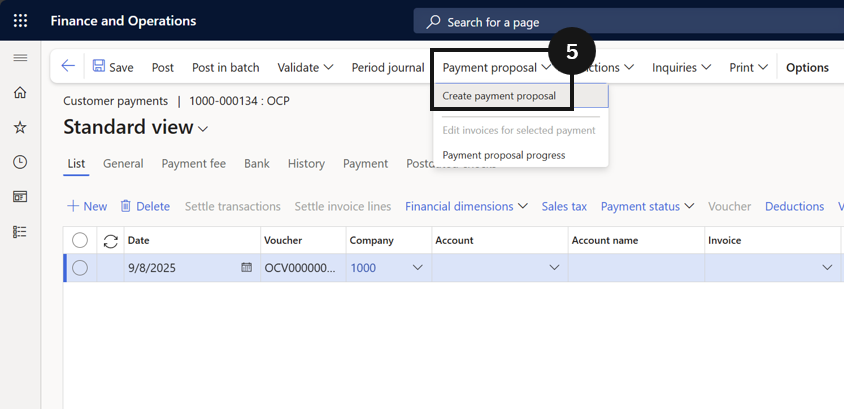
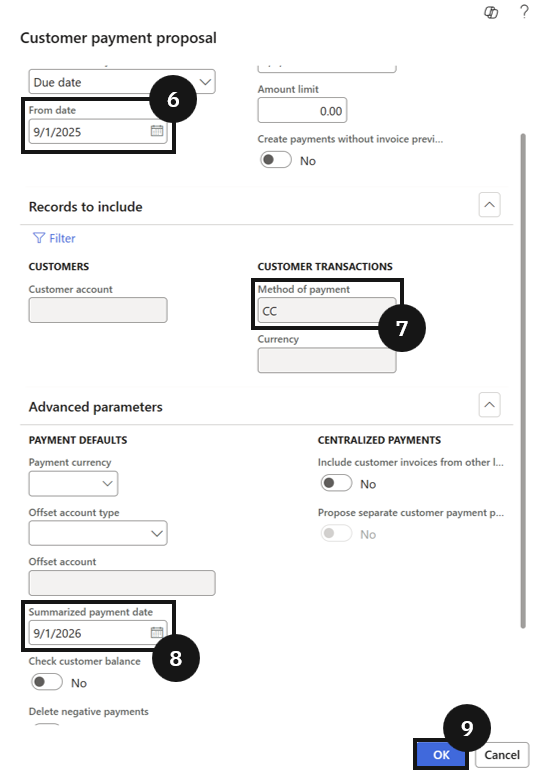
Click Payment Proposal and select Create Payment Proposal (⑤). In the dialog, set the date range for due invoices (⑥) (e.g., January 1 to January 31), set the Method of payment to the credit card (CC) method (⑦), set the Summarised payment date (⑧), then click OK (⑨). The system lists all invoices due within the selected period.
Select invoices and create payments
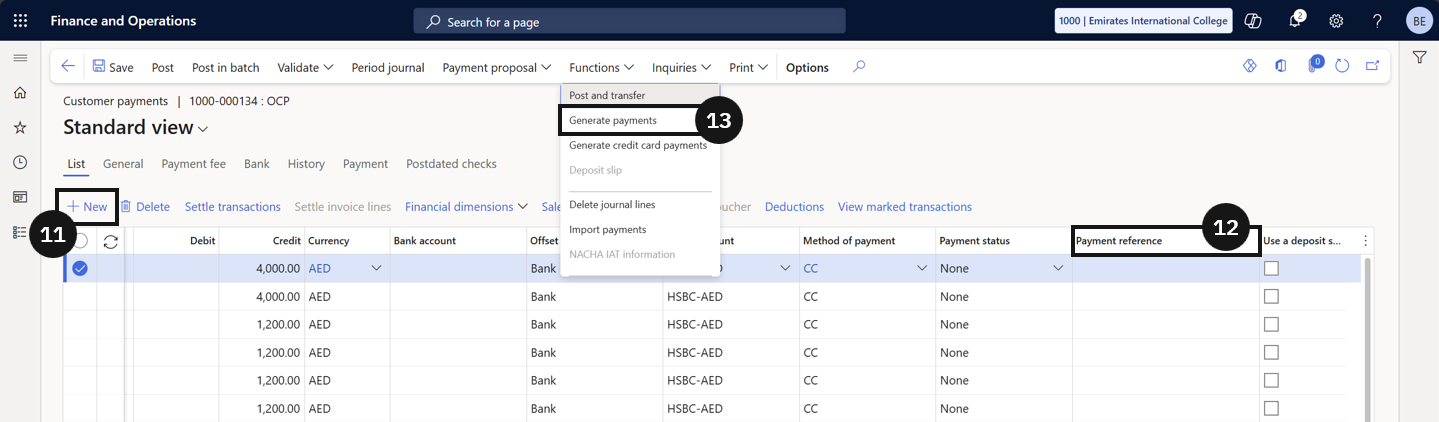
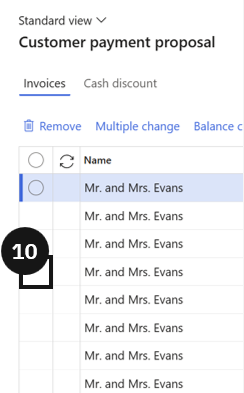
Select the invoices to be paid, or leave all unmarked to select all (⑩). Click Create Payments to transfer selected invoices to the payment journal. Delete any lines with zero or debit amounts before proceeding. Enter the Payment reference as required (⑪).
Authorise and post
Click Functions in the Action Pane, then select Generate Credit Card Payments (⑬). The system requests authorisation from the service provider. If successful, the status changes to Approved. If authorisation fails, a failure message appears, unauthorised lines are deleted, and those transactions must be manually retried or reviewed.
Once authorisation is received, click Post.