Process a Post-Dated Cheque
Quick answer
- Open Accounts receivable ▸ Payments ▸ Cashier receipt, create a new receipt, select the cheque method of payment, click Check details, enable Postdated check, enter the maturity date, cheque number, and issuing bank, then Post.
- The Check details button only becomes active when the Method of payment is set to Cheque.
When a fee payer provides a cheque dated for future settlement, record it as a post-dated cheque so the maturity date and bank details are captured with the receipt.
Create the cashier receipt
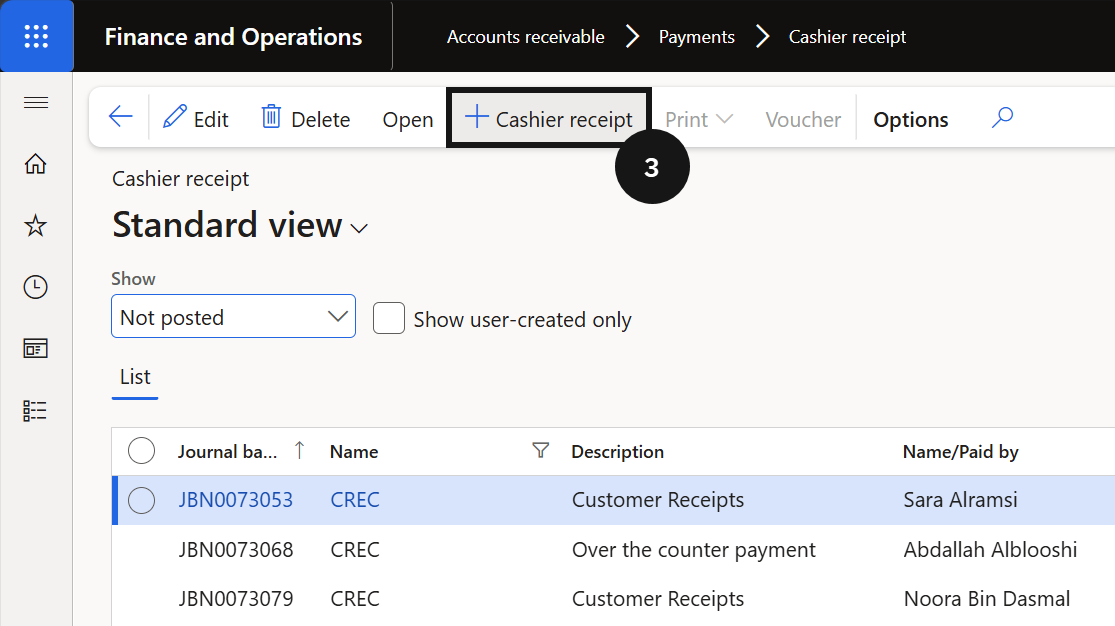
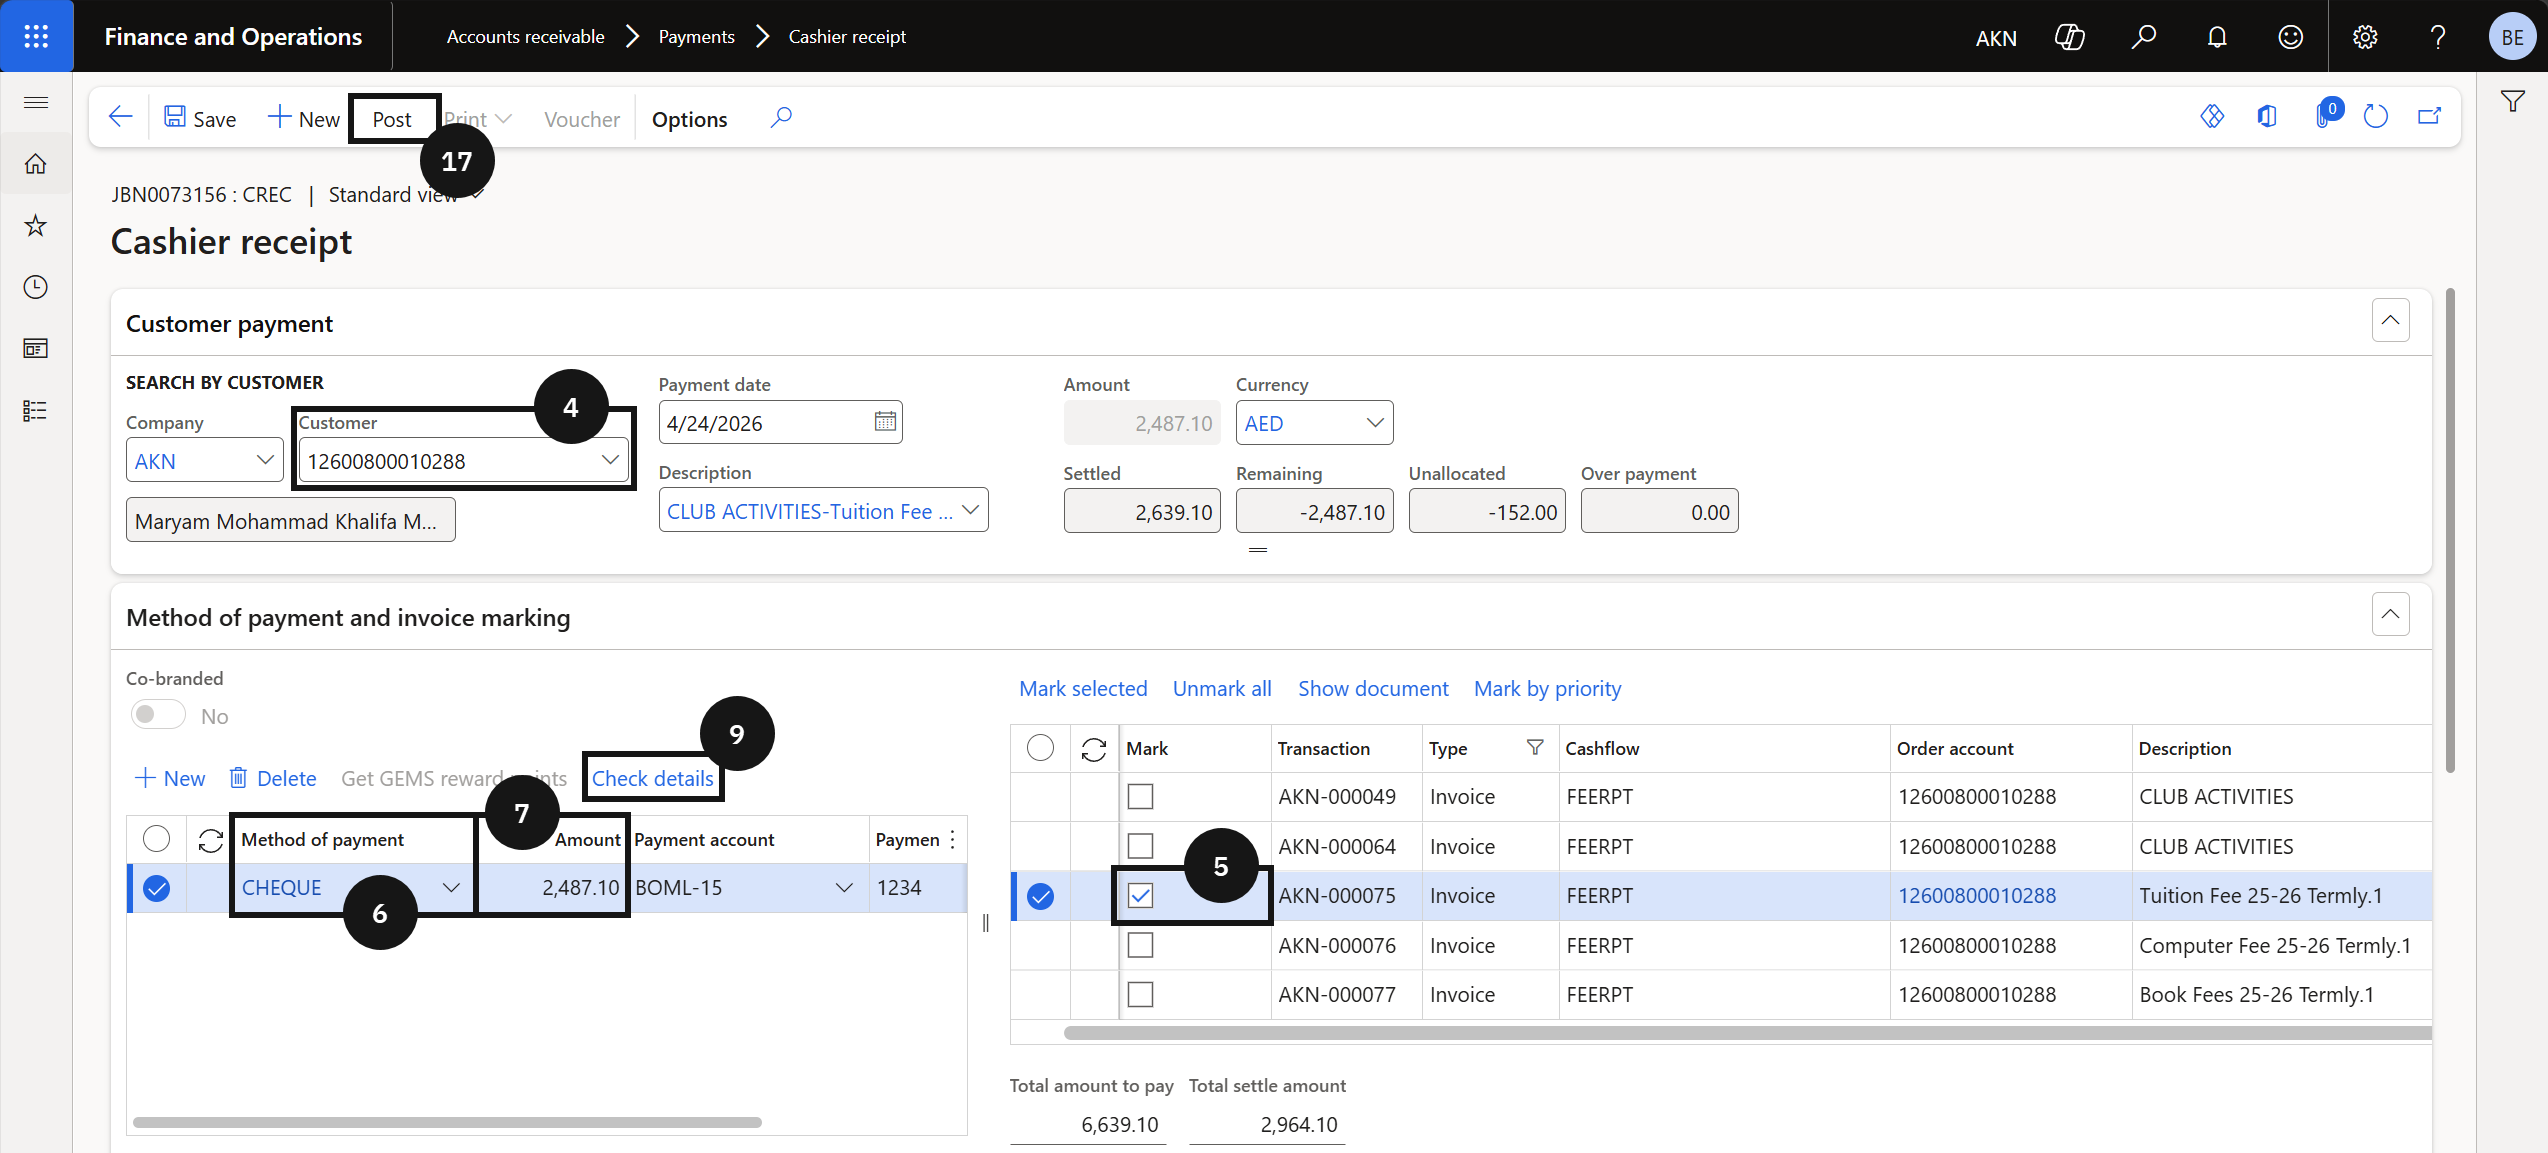
From the FNO dashboard, open Modules ▸ Accounts receivable, expand Payments, and click Cashier receipt. Click + Cashier receipt (③) and complete the following:
- Customer (④) — select the student account.
- Mark the payment (⑤) to be applied on the right-hand side.
- Method of payment (⑥) — select Cheque.
- Amount (⑦) — enter the amount.
- Payment reference — enter a reference if required.
Enter cheque details
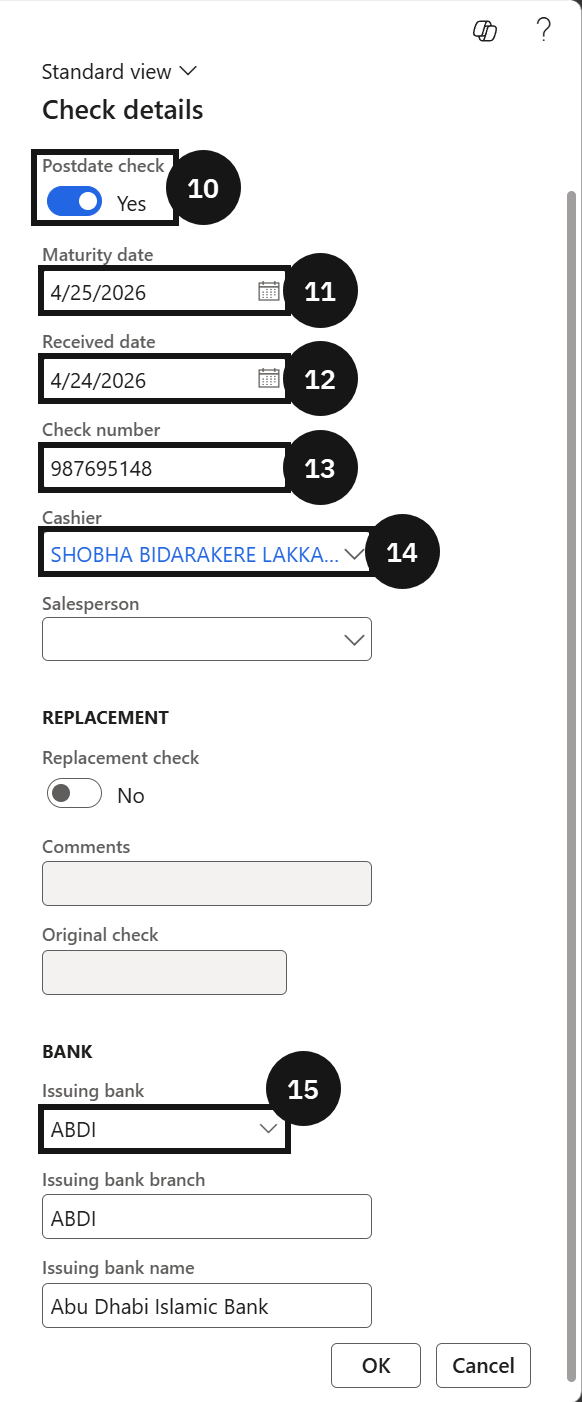
Click Check details (⑨)(this button only becomes active when the Method of payment is set to Cheque). Enable the Postdate check toggle (⑩) and complete the following:
- Maturity date (⑪) — enter the cheque maturity date.
- Received date (⑫) — enter the date the cheque was received.
- Check number (⑬) — enter the cheque number.
- Cashier (⑭) — enter the name of the cashier who collected the cheque.
- Issuing bank (⑮) — select the customer's bank.
Click OK.
Post and deliver the receipt
Click Post on the Action Pane (⑯). Enable the Print receipt toggle and click OK to post the journal.