Create a New Payment Plan
Quick answer
- Open Accounts receivable ▸ Payments setup ▸ Payment schedules, click New, enter a code and description, configure the allocation, payments per, change frequency, and number of payments, then save.
- Payment schedules allow the school to offer fee payers the option to pay invoices in instalments.
Payment schedules allow the school to offer fee payers the option to pay invoices in instalments rather than a single lump sum. The payment plan setup defines how offered plans display on the customer statement.
Open Payment schedules and create a new entry
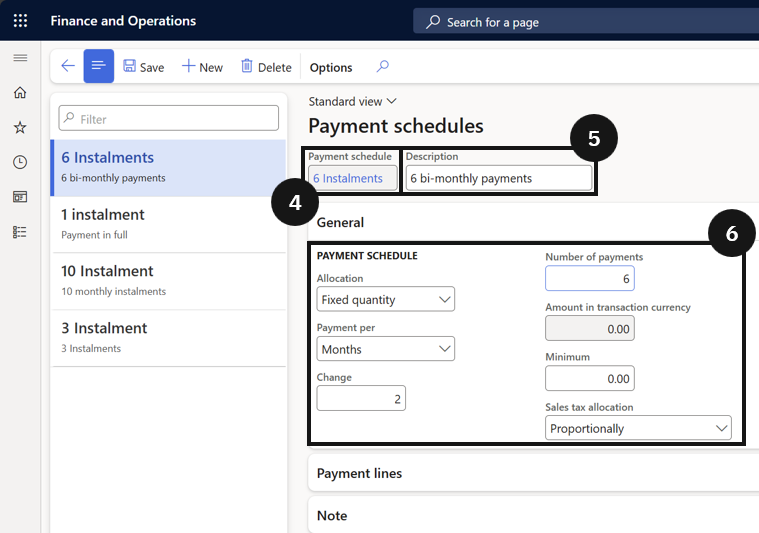
From the FNO dashboard, open Modules ▸ Accounts receivable, expand Payments setup, and click Payment schedules. Click New and complete the following:
- Payment schedule (④) - enter the payment schedule
- Description (⑤) — enter a description for the payment schedule.
- Allocation (⑥) — select the payment allocation method.
- Payment per (⑥)— assign the timeline.
- Change (⑥) — enter the frequency.
- Number of payments (⑥) — enter the number of instalments.
Save
Click Save.